Deploy a Dedicated Node
OnFinality makes it really easy to create new nodes on over 100 supported networks. Our Managed node service is fully hands off - let our expert staff manage the setup, maintenance, monitoring and upgrades of your node.
In this guide, we will be running a Managed Ethereum Full Node. The process is the same with all Managed Nodes.
We recommend the Managed service for most users.
You may instead consider Self Service if you:
- Require the node urgently (within minutes using Lightning Restore)
- Have the capability to monitor and maintain your own node
- Have short term use cases, where paying by minute is preferable to monthly, or
- Automate node deployment using the OnFinality CLI
Getting Started
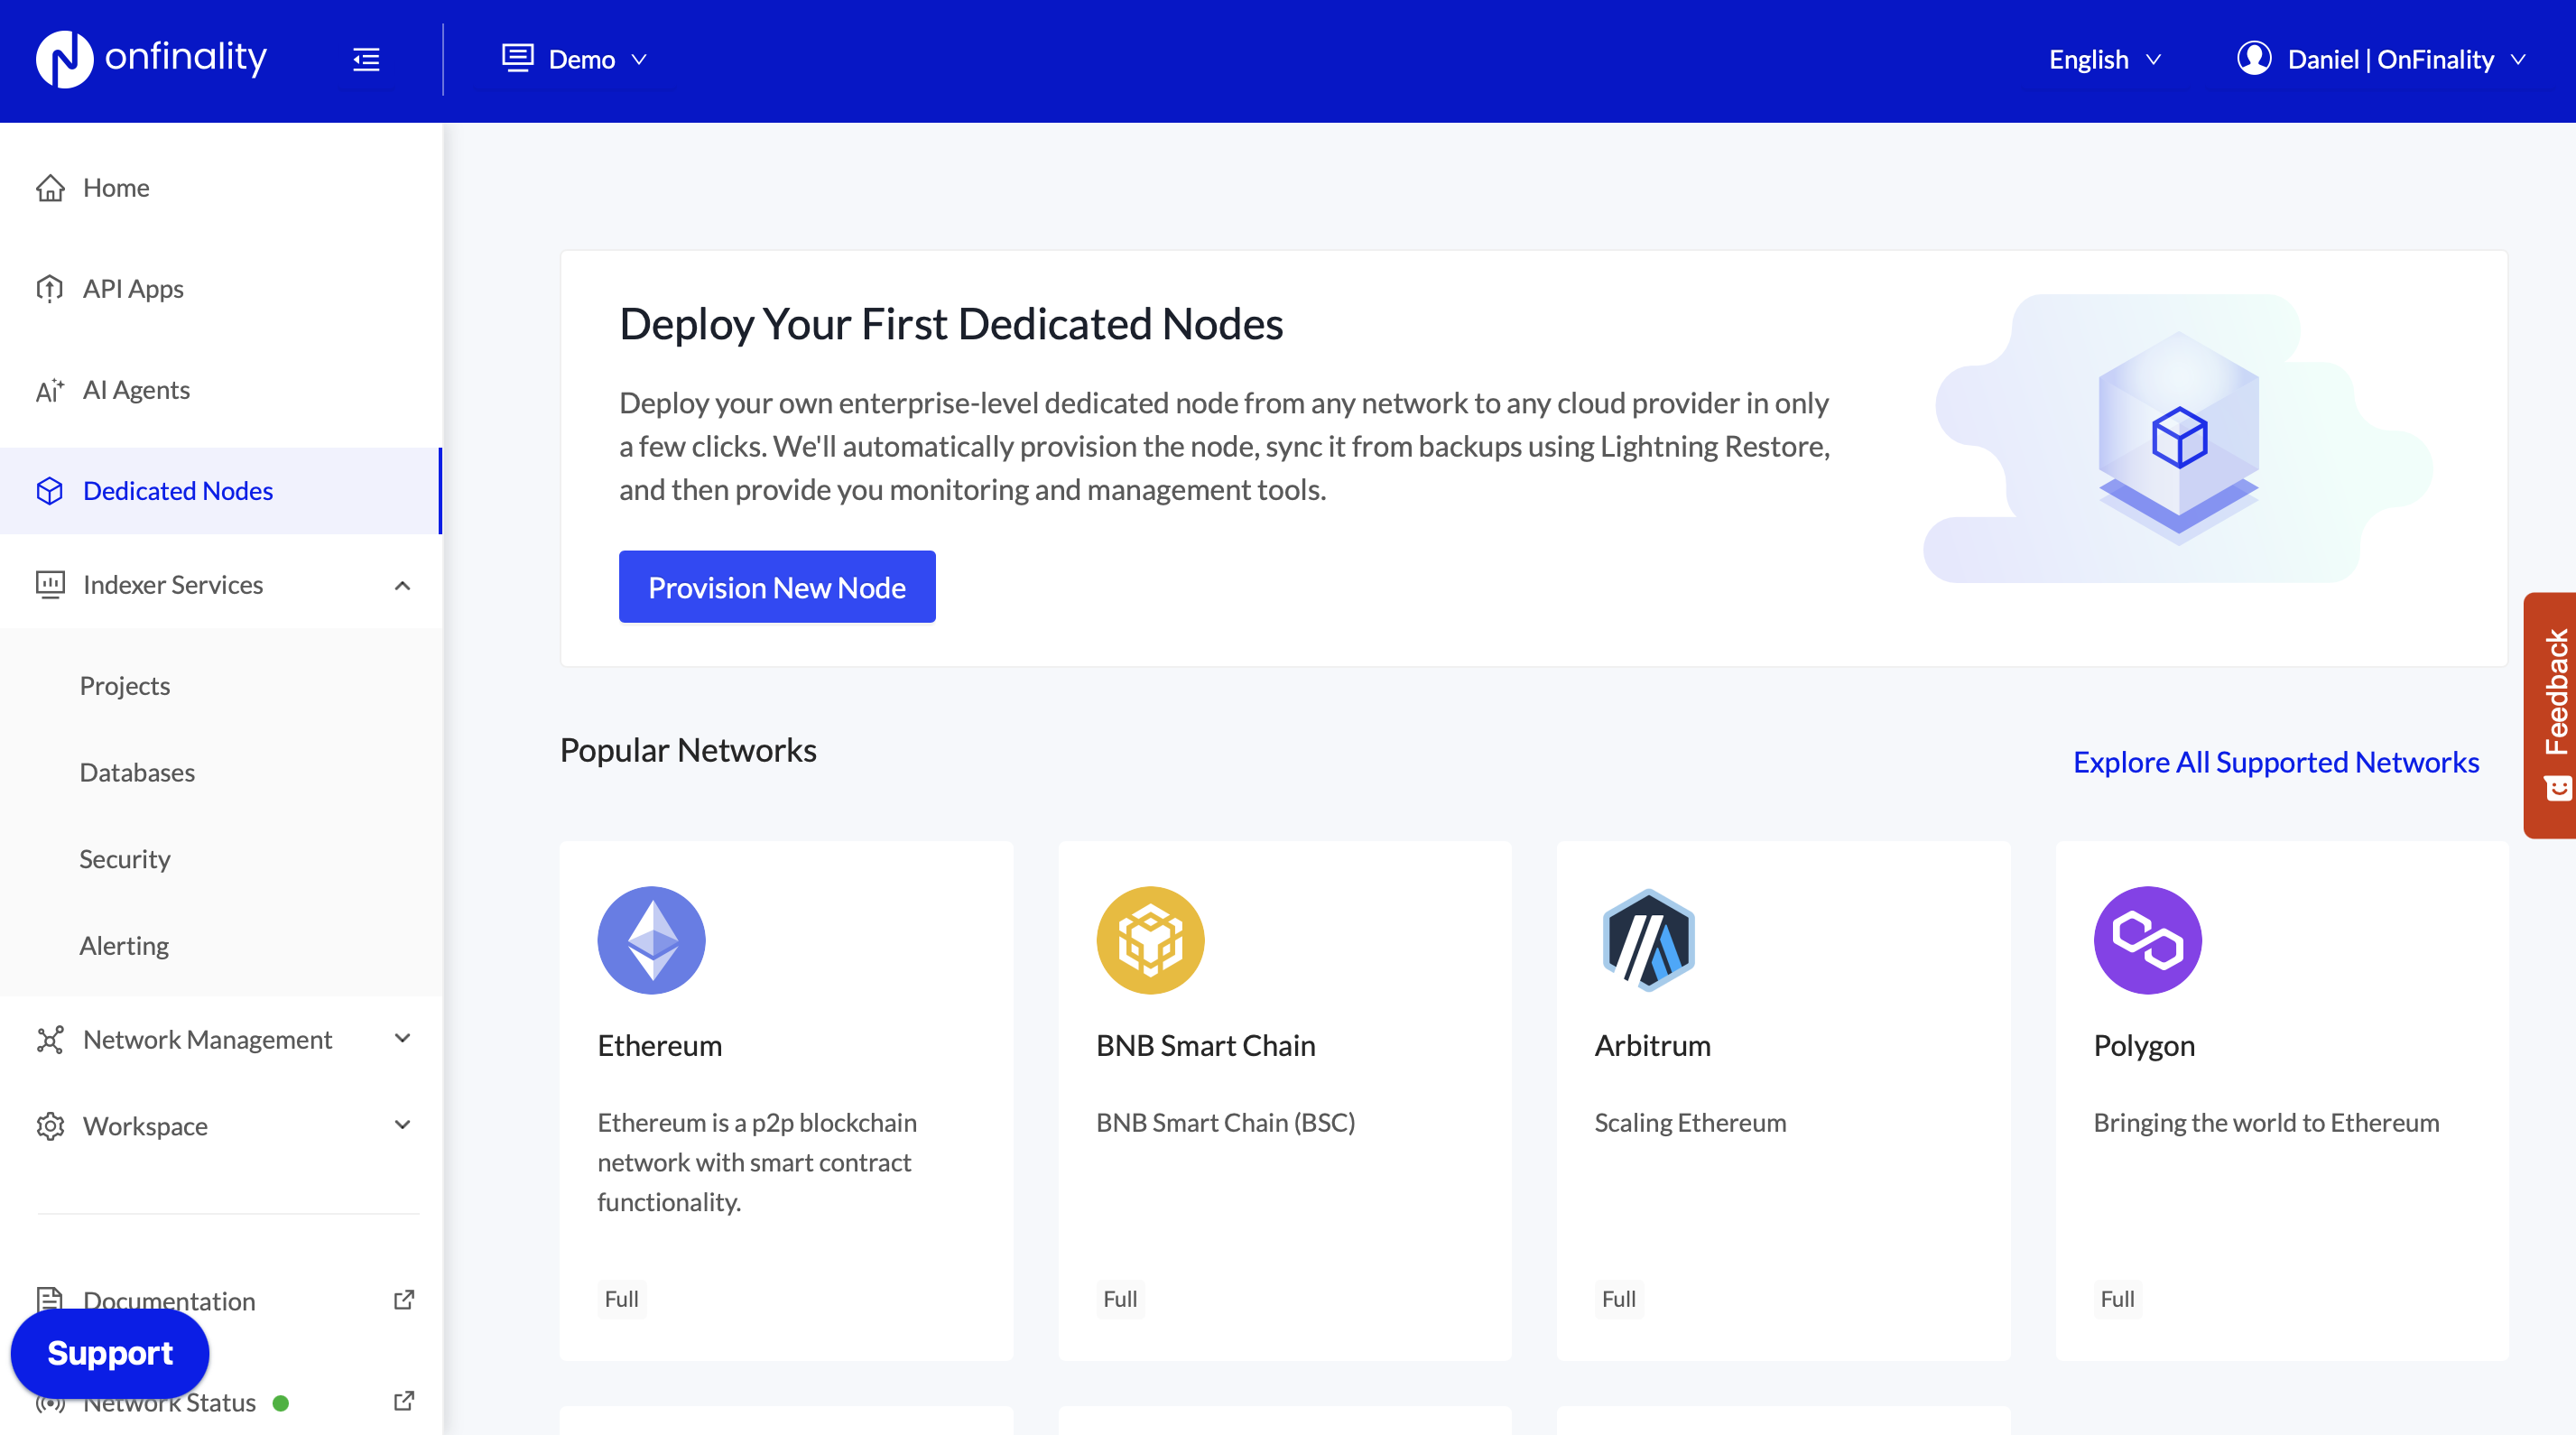
Login to your OnFinality account and go to the Dedicated Nodes page. Here click on Provision New Node in the centre of your screen.
Select a Network
The first page will allow you to select what network you want to create a new node in. This list will show both public networks that OnFinality supports, and also any private or custom network that you've already added. Today we're going to create a Ethereum node, so we'll click on Ethereum.
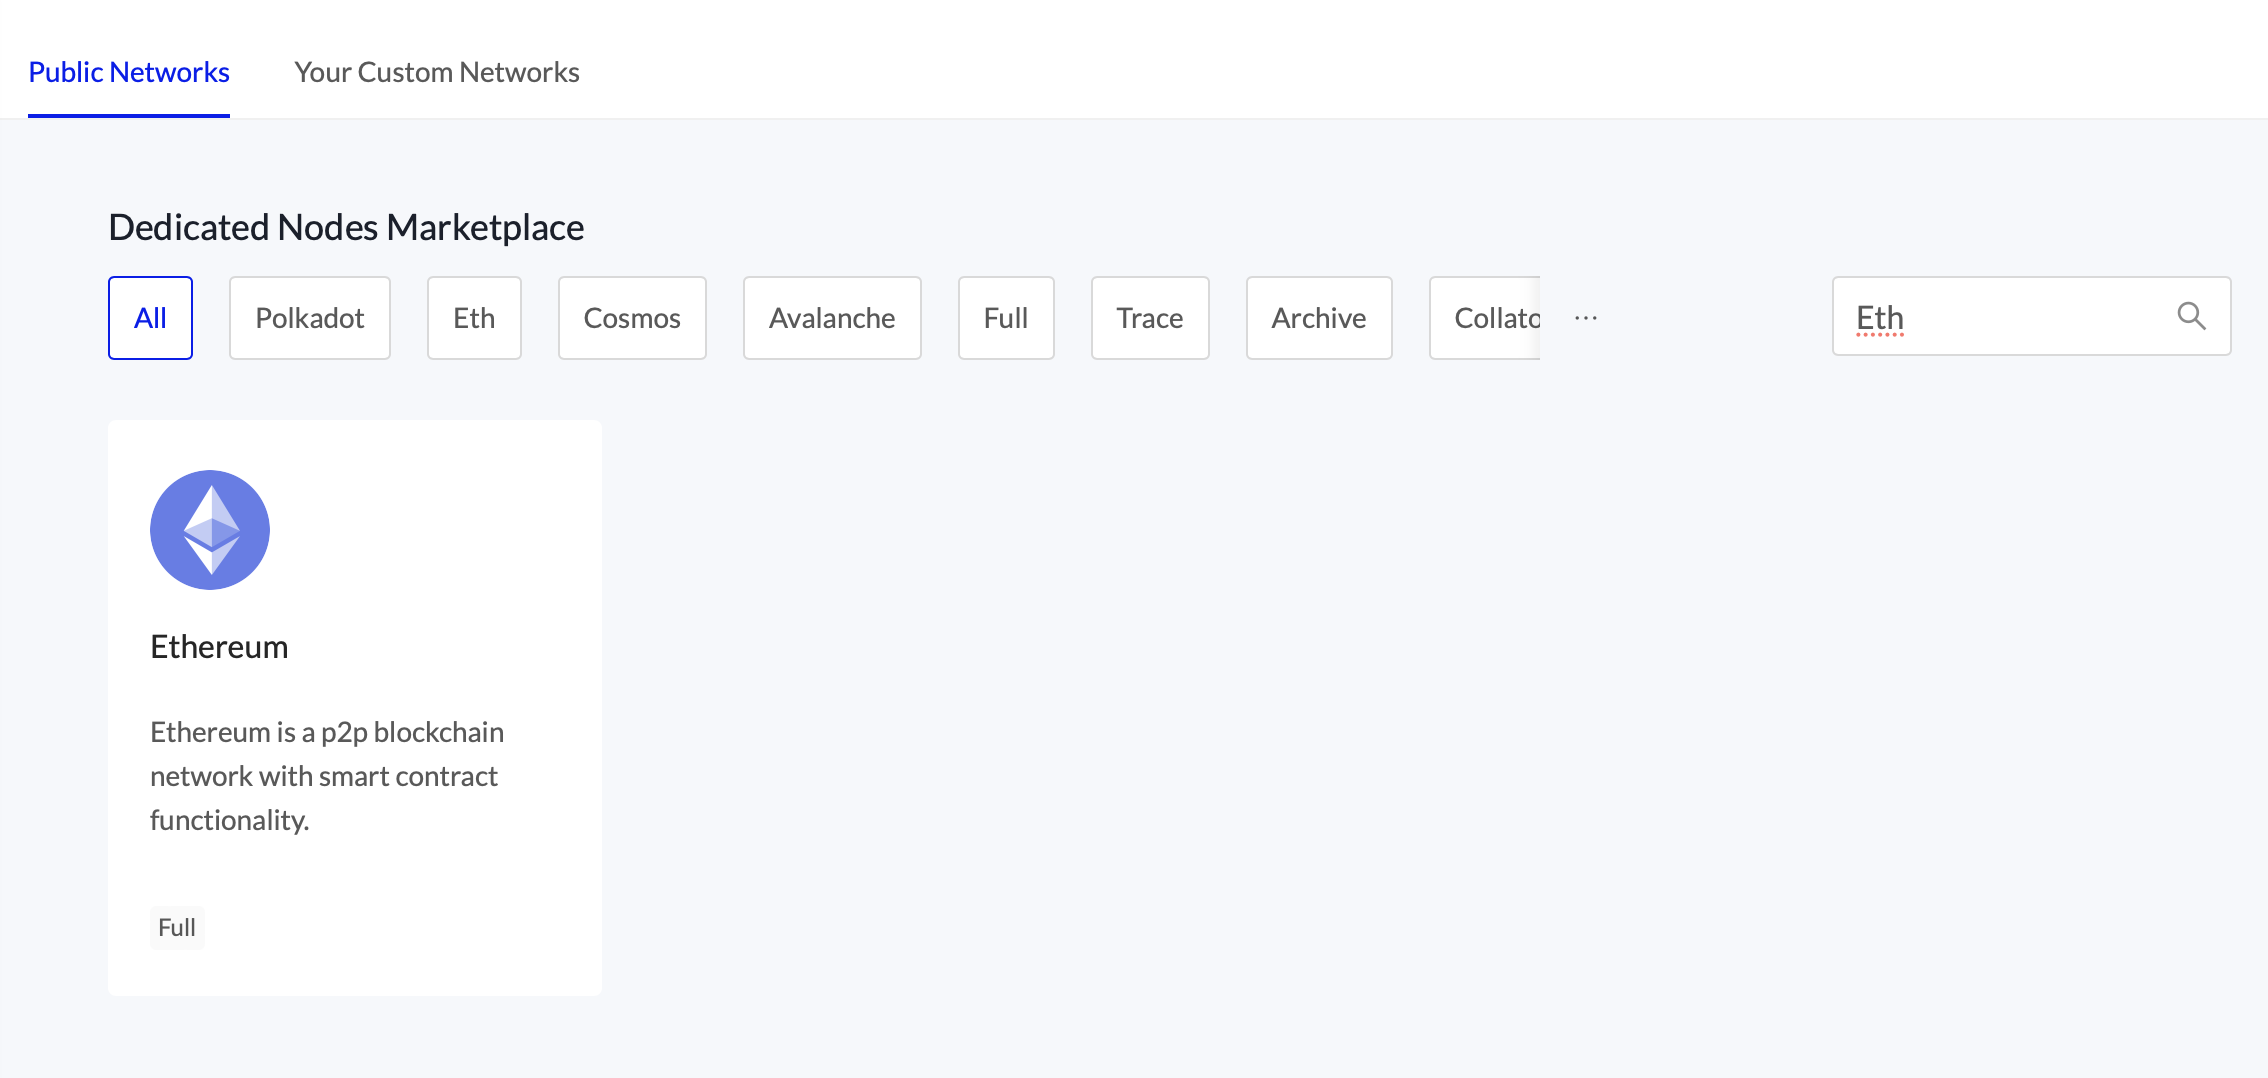
Use the search bar to quickly find a network
Configure your New Node
Provide your node with a Name and select the Node Type.
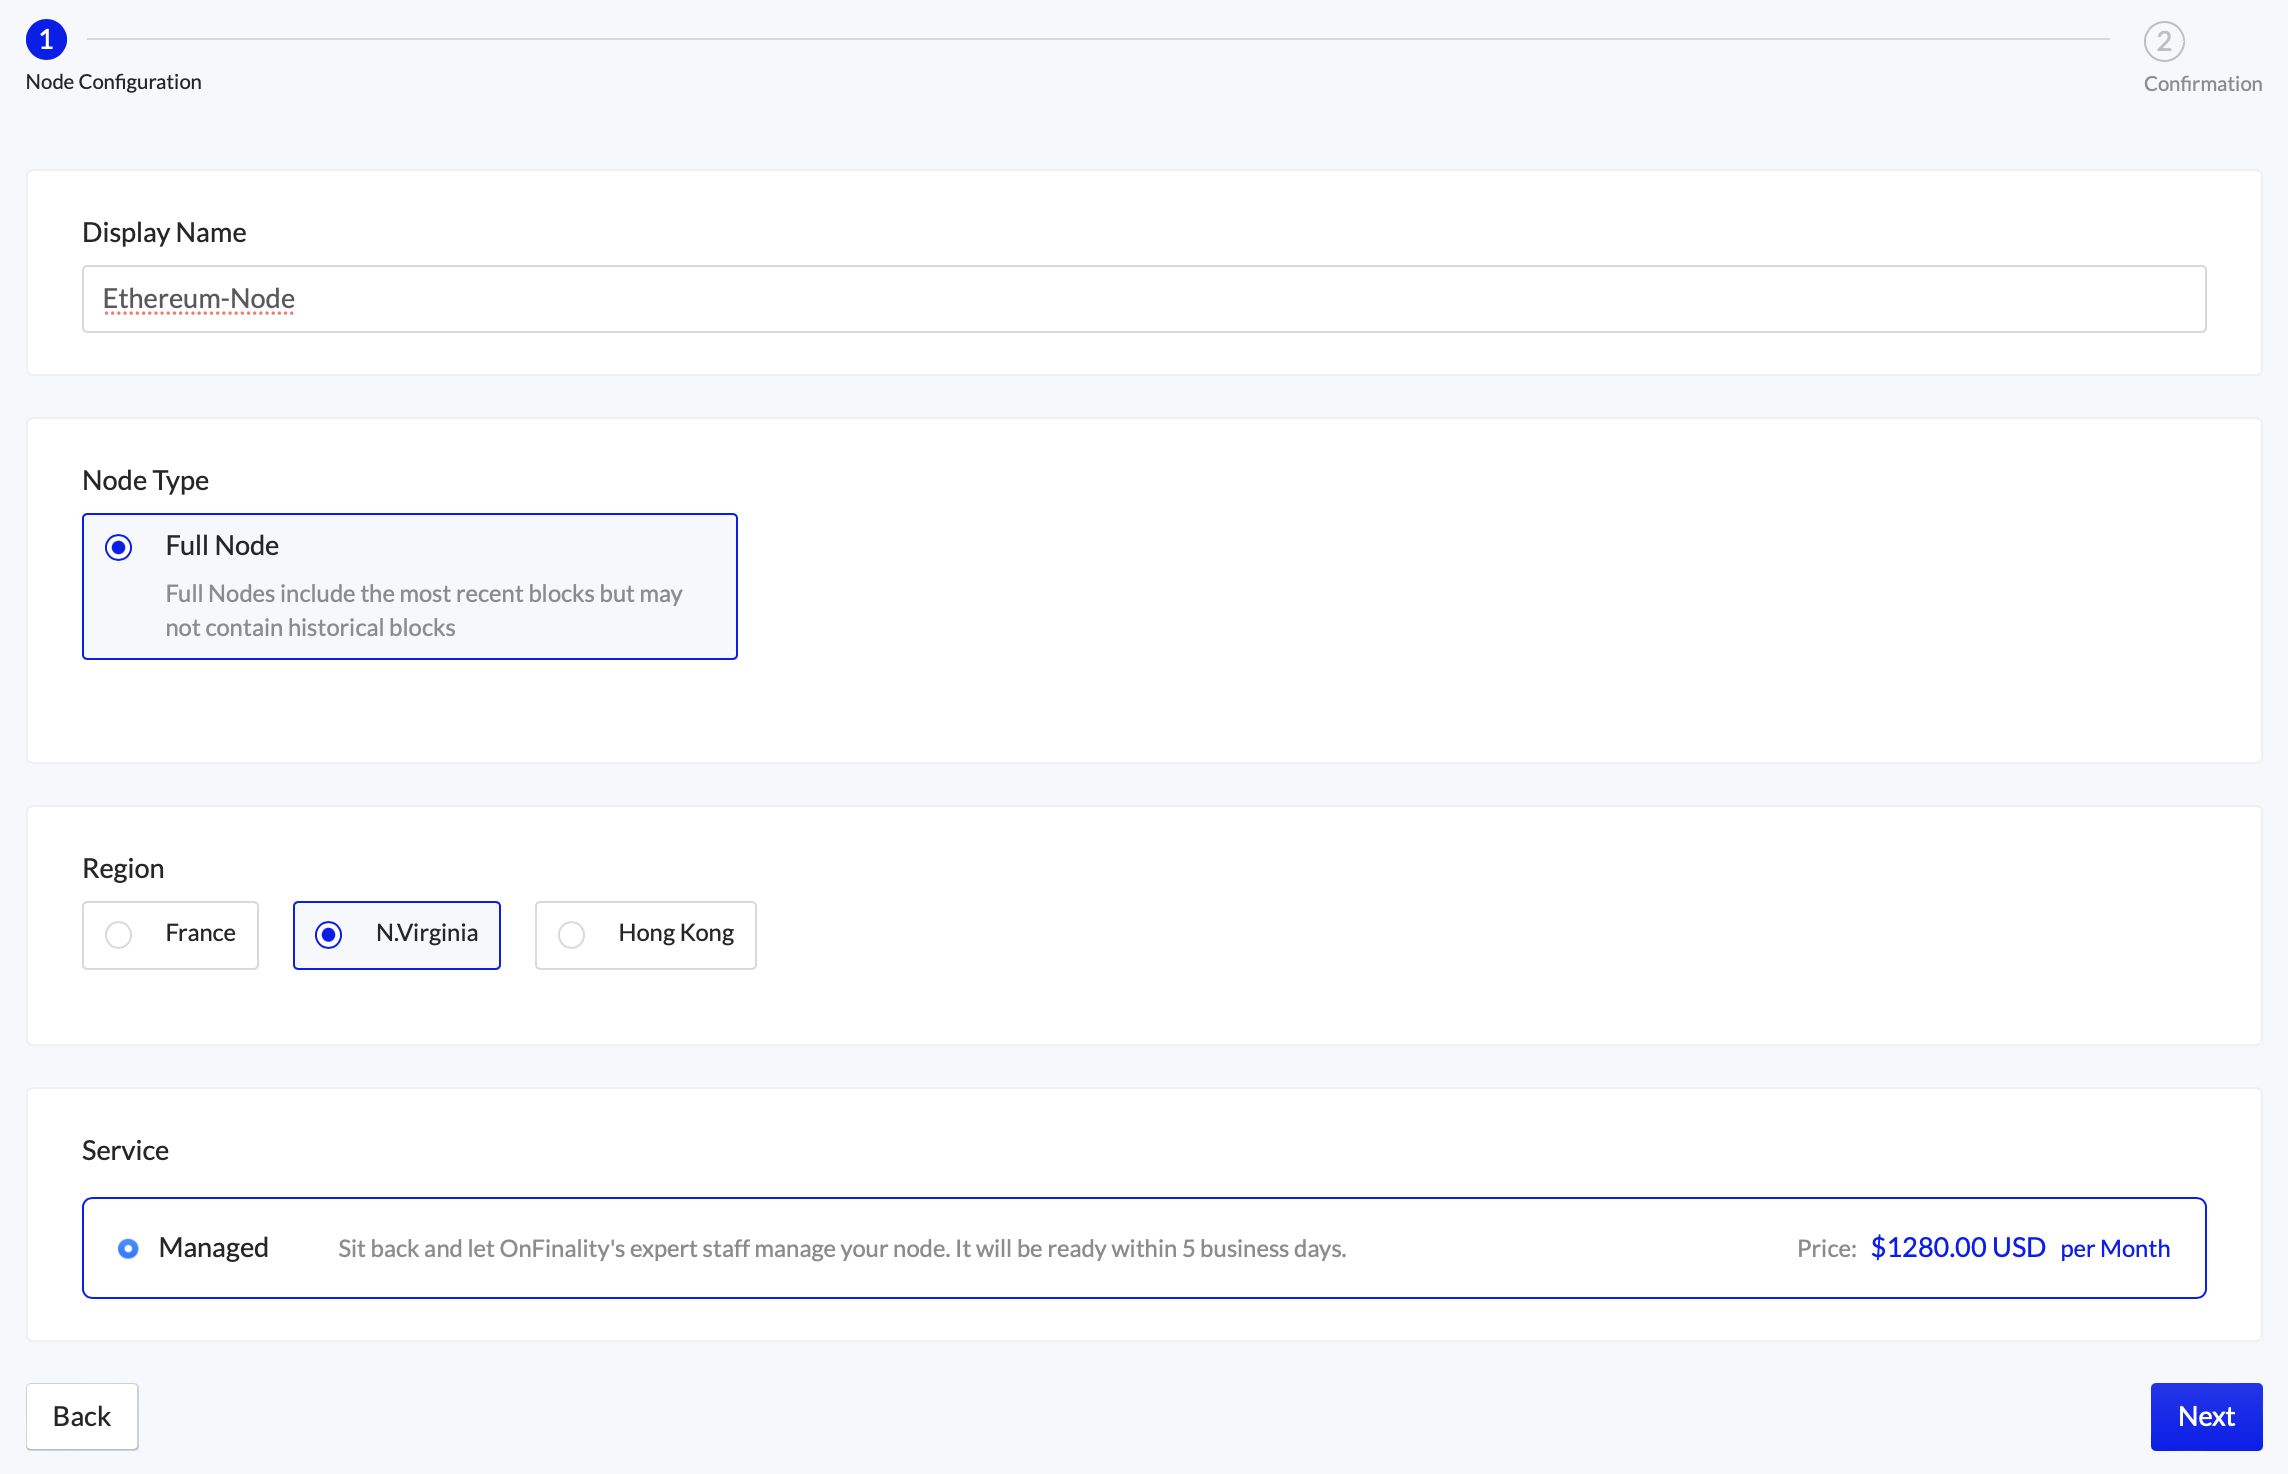
Select Managed Service and the Region. The monthly price will be displayed.
Look out for the Lightning Restore icon for a quicker ready time
Press Next.
Review your New Node
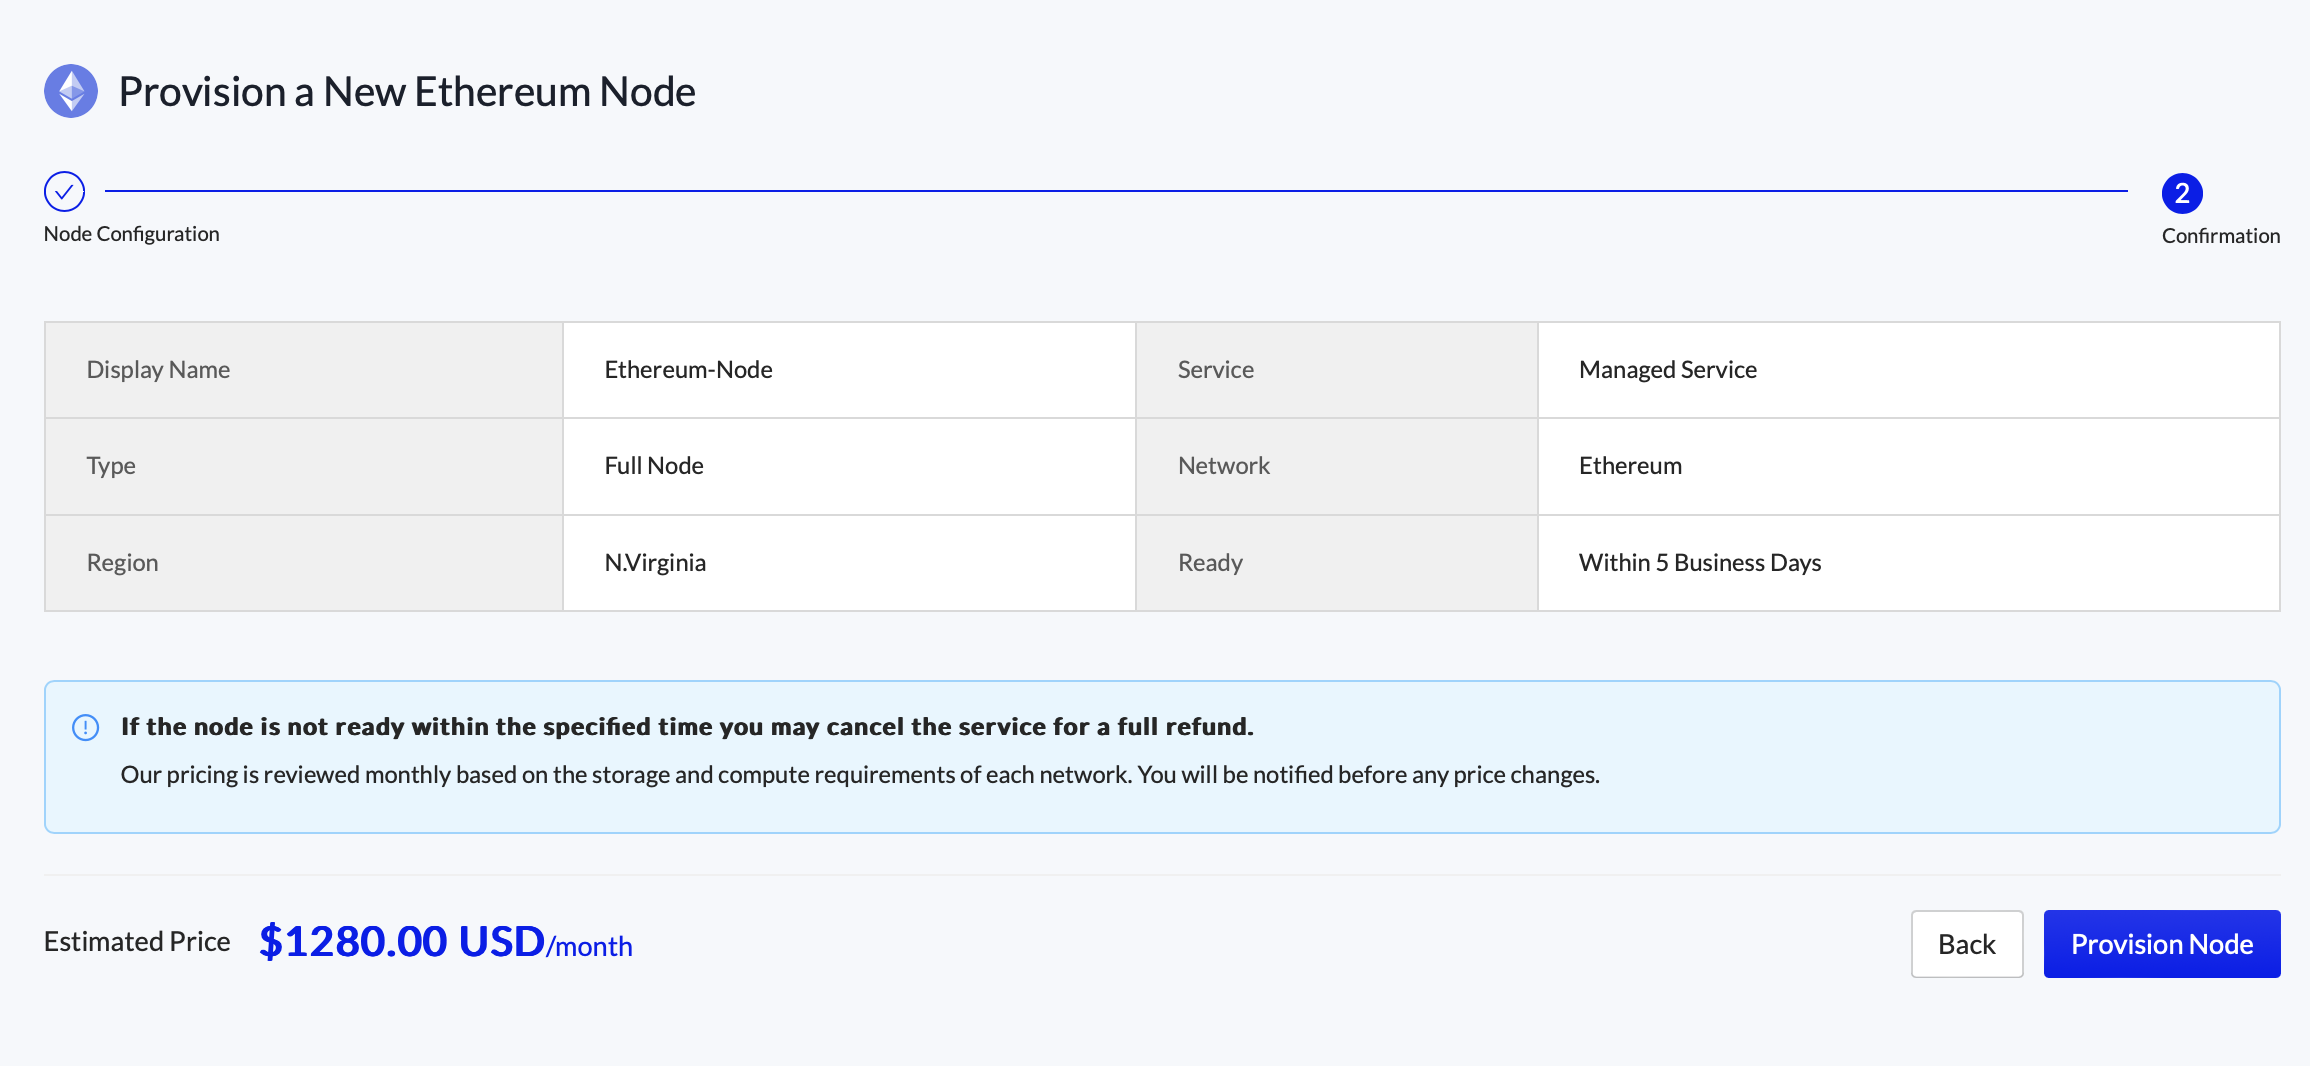
The last step shows you all the settings about your new node, you can go back to change any details or click Provision Node to provision your new node on your selected cloud.
Select Billing Method
Select your billing method for this node using the checkbox provided and then click Create Node.
Your card will be immediately charge for the first month, but the billing period will not begin until the node is ready.
If the node is not completed within the Ready time frame, you can cancel the service for a complete refund.
If you haven't already added billing details to your account and you're not on a Partner plan you'll need to add a credit card. Click Add New Credit Card and enter your details on the secure popup.
If your account already has a Default Credit Card configured this step will be skipped and the charges will be included in your regular monthly bill against that card.
Congratulations, now go and build your dApp!
Back on your Nodes list, you'll see your new node appear. When it is ready the status will be changed to Ready and you will receive an email notification.
Next Step: Connect to your Dedicated Node