Blockchain Transactions dApp
In this tutorial, we will be building a decentralised application (dApp) which can submit and view transactions on the Base Sepolia testnet.
Tutorial Spotlight
Outcomes
Build a fully functional Blockchain dApp
Learn why Data Indexers are used in Blockchain dApps
Deploy your own Data Indexer
Query your Data Indexer to display blockchain transactions in your app
Learn how to interact with a Wallet from your dApp to:
Log in as a user’s wallet
Sign and send transactions
Learn to use a Blockchain Explorer
Screenshots
Sending a Base Sepolia testnet transfer

Displaying recent Base Sepolia transactions
Cost
Free! using OnFinality’s Developer API & Indexing Plans
Components & Introduction
Our dApp will be built up of the following components:
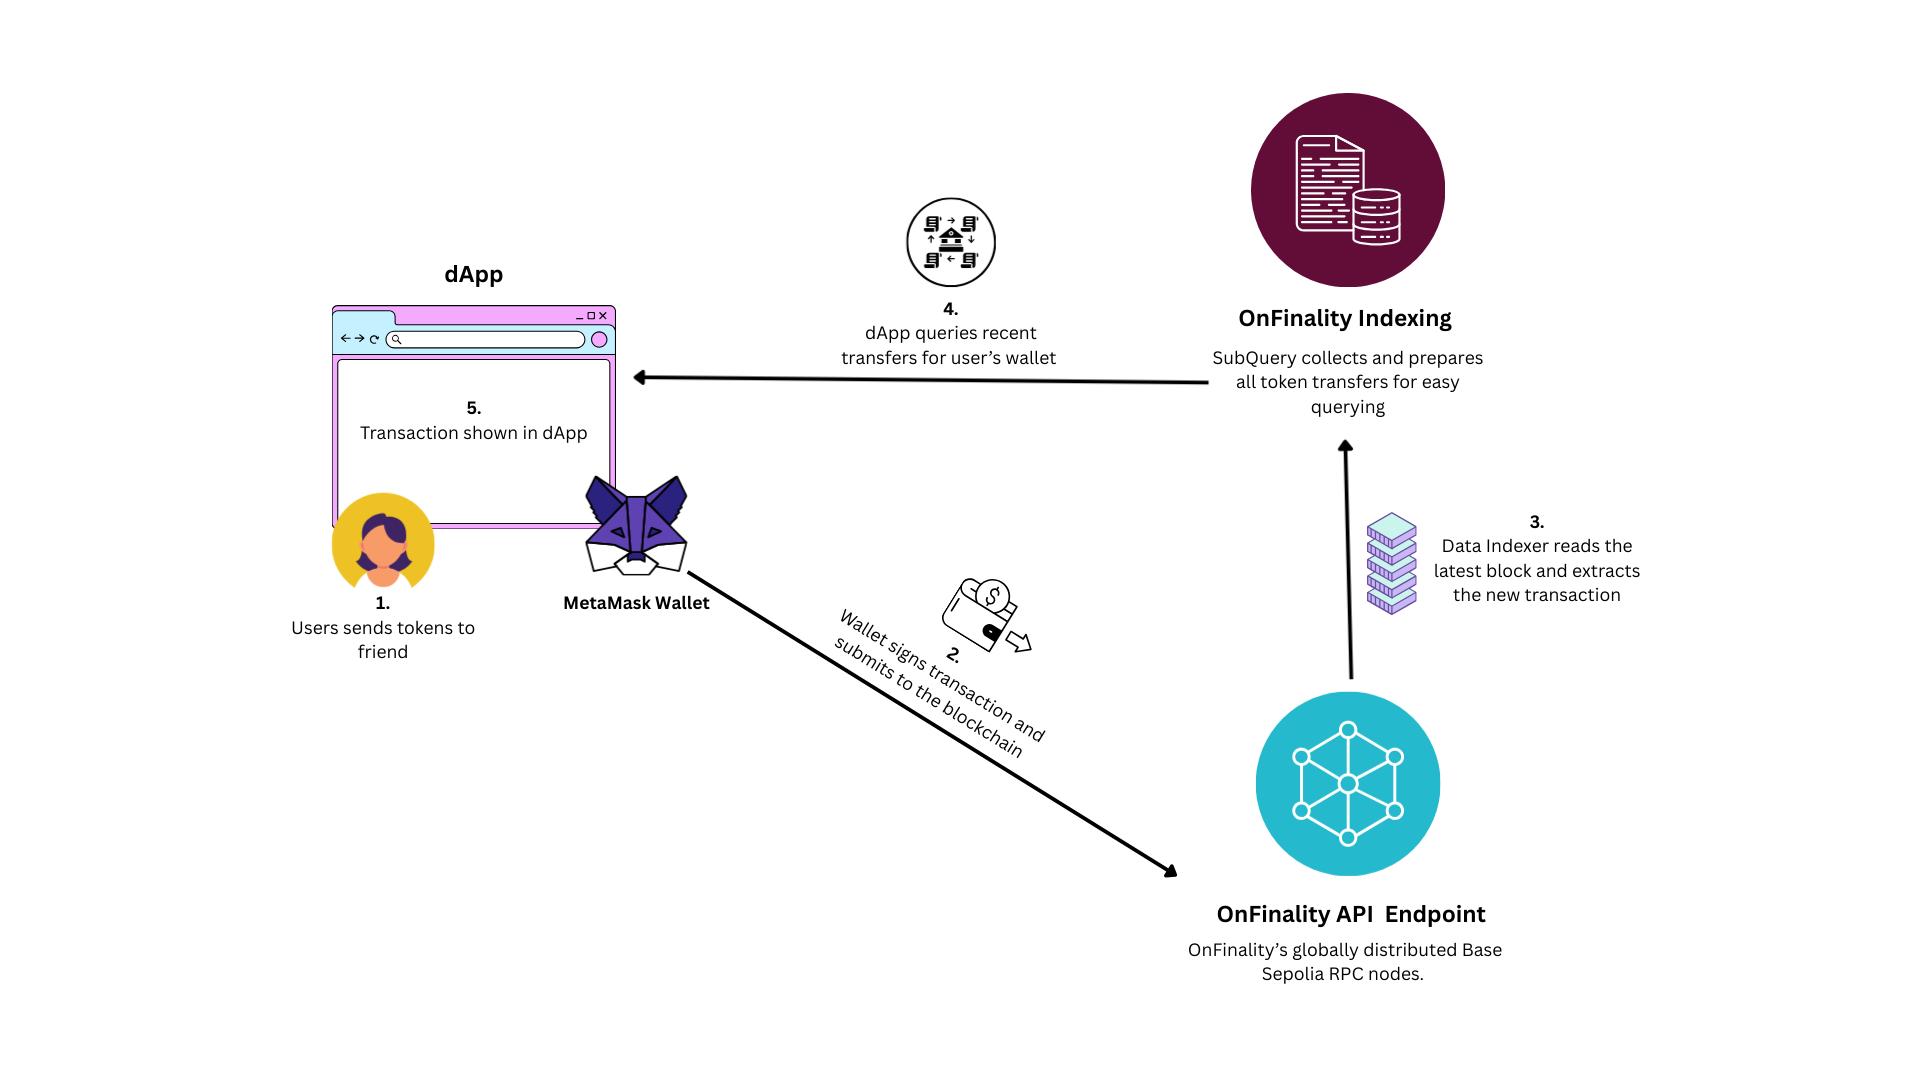
dApp
A next.js web application where users can:
View all transactions on the Base Sepolia testnet
Show users' Base Sepolia balance
See all transactions for their wallet
Send Base Sepolia Eth Testnet tokens
Blockchain Wallet (using Wagmi)
MetaMask Wallet authenticates the user’s blockchain address and securely signs transactions before submitting to the blockchain.
We will connect MetaMask to our dApp using Wagmi, the modular wallet connector which supports multiple wallets & javascript frameworks.
Your dApp will never have access to user’s blockchain keys or sensitive information - this is all handled by the wallet.
Data Indexer
A SubQuery project which indexes all transactions on the Base Sepolia testnet into a database which our application can easily query.
It would be too slow to get this information directly from the blockchain because we don’t know which blocks the user has transactions in.
OnFinality API Endpoint
OnFinality runs a globally distributed cluster of shared Base Sepolia RPC nodes. This is more cost effective and provides faster global latency compared to running a dedicated Base Seplia node just for dApp.
This will be used to:
Feed blocks to the SubQuery Indexer
Get wallet balances
Propagate transactions on the Base Sepolia blockchain
Useful Resources
Next.JS | Getting Started: Installation
https://wagmi.sh/react/getting-started
Prerequisites
An account with OnFinality: https://app.onfinality.io/signup
A code editor (IDE) - we used Cursor
MetaMask browser extension
Steps
Let’s jump into it!