Set up an Avail Goldberg Testnet Validator on OnFinality
How To Set Up A Validator For the Avail Goldberg Testnet On OnFinality
Introduction
In this How-To Guide, you will learn how to set up your own Validator for the Avail Goldberg Testnet. This guide should be used alongside Avail's official guide which is kept up to date and more detailed.
Avail
Avail is the essential base layer for modern blockchains.
With Avail, it’s never been easier to spin up your own blockchains.
Avail Goldberg Testnet
The Avail Goldberg Testnet is the latest, incentivised, test network of the Avail Project.
Why Run A Validator For Avail Goldberg Testnet
Avail is now ushering in the Clash of Nodes campaign using the Goldberg testnet. This campaign is a call to action for node operators to participate in an incentivized, real-time testnet environment. It's a critical testbed for Avail's infrastructure, designed to rigorously evaluate its capacity as a foundational layer for the next wave of rollup-centric blockchain ecosystems.
Like all nominated Proof-of-Stake (nPoS) networks, Validators play a crucial role in securing and ensuring the success of the Avail network. By running an Avail Goldberg Testnet validator, you can enter their Clash of Nodes campaign
The Avail Clash of Nodes campaign has a limited set of validators, view their documentation for information on how to take part
Useful Links
Avail's official validator guide
Disclaimer
Running a Collator or Validator comes with a high risk and requires a high level of technical knowledge and skill. As per our Terms of Service, OnFinality is neither responsible for any rewards nor losses, such as from slashing, incurred when running a Validator or Collator node on OnFinality. Users should read and fully understand the relevant documentation for the Network before setting up the node, and get in touch directly with the Network if they have any questions or concerns.
HOW TO SET UP A VALIDATOR
1. Log In To OnFinality
Create an account and log in to OnFinality, then add a payment method.
2. Create Dedicated Node
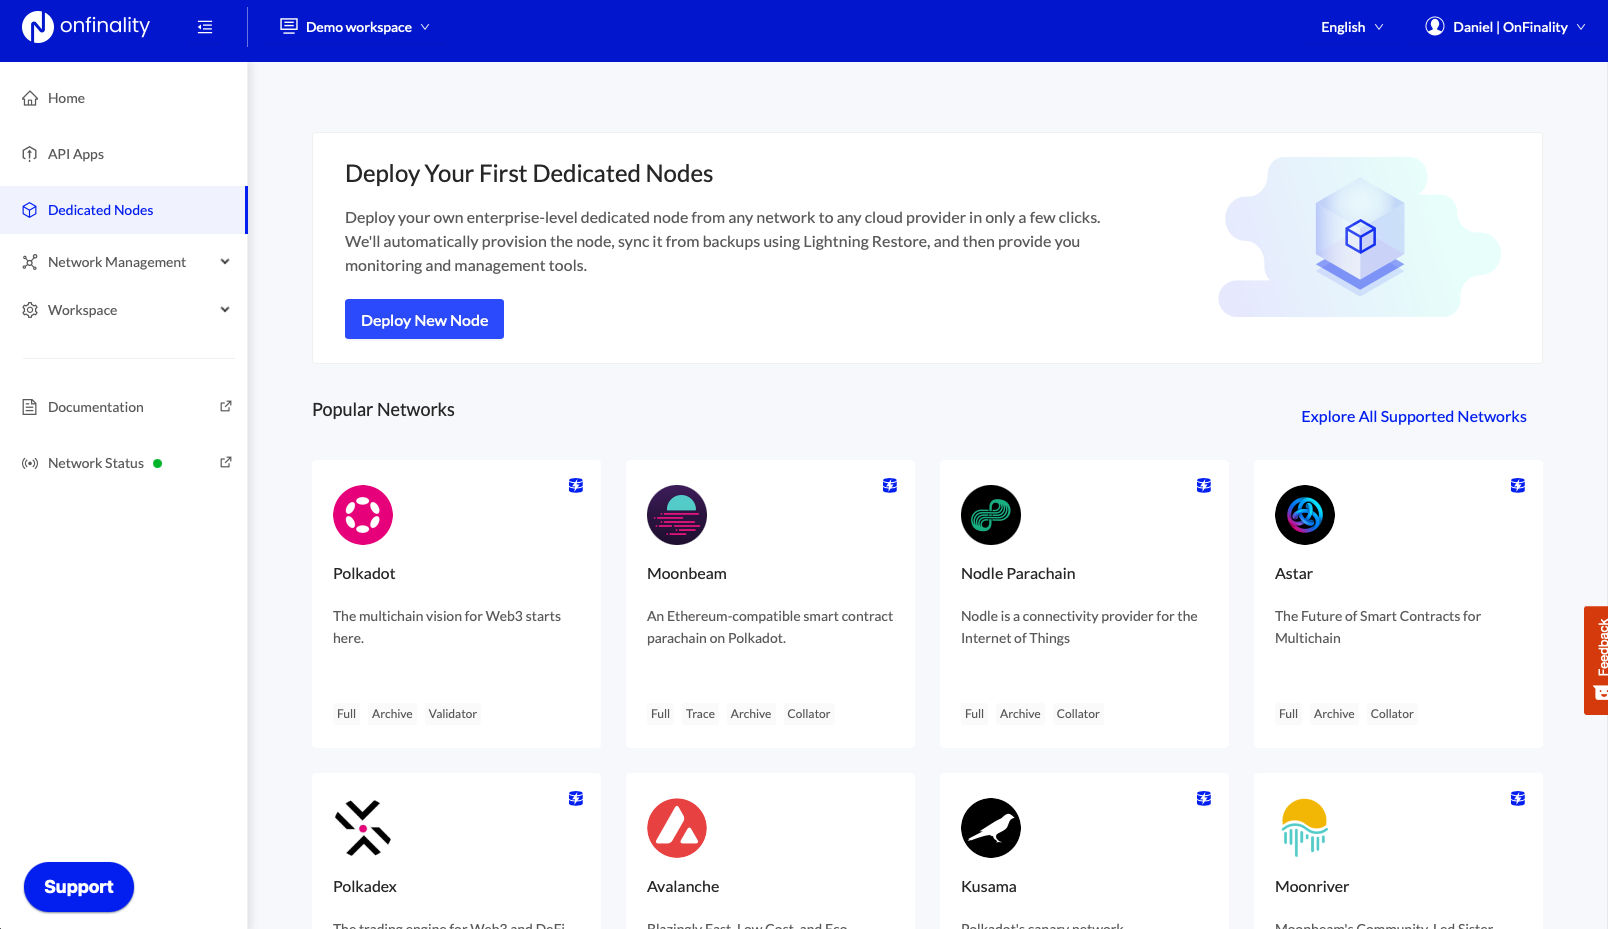
Select the Dedicated Nodes menu and press “Deploy New Node”
2.1 Select Network
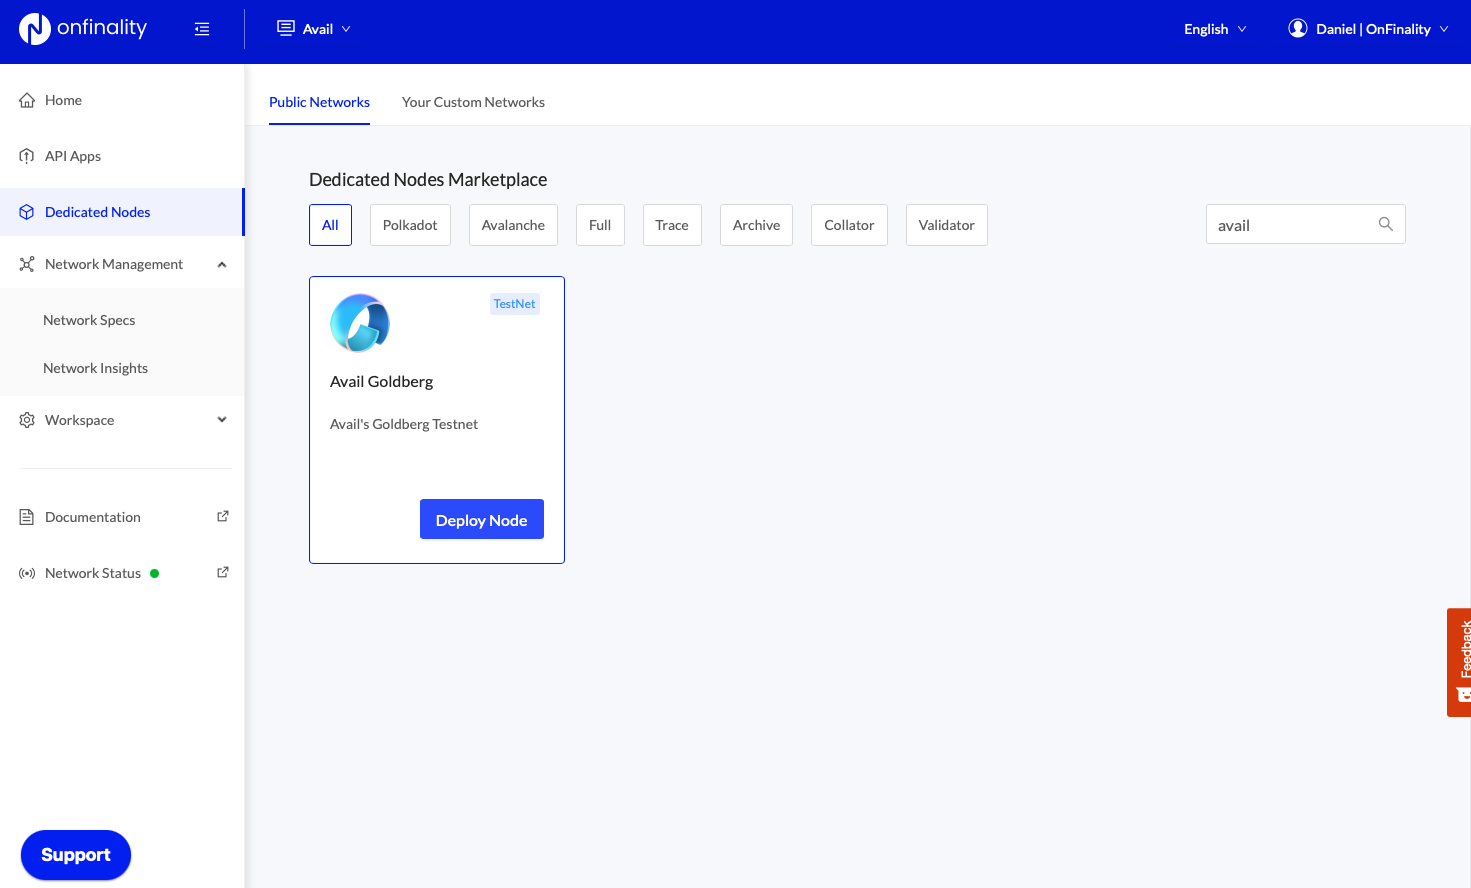
Search for Avail Goldberg and then click “Deploy Node”
2.2 Configure Node
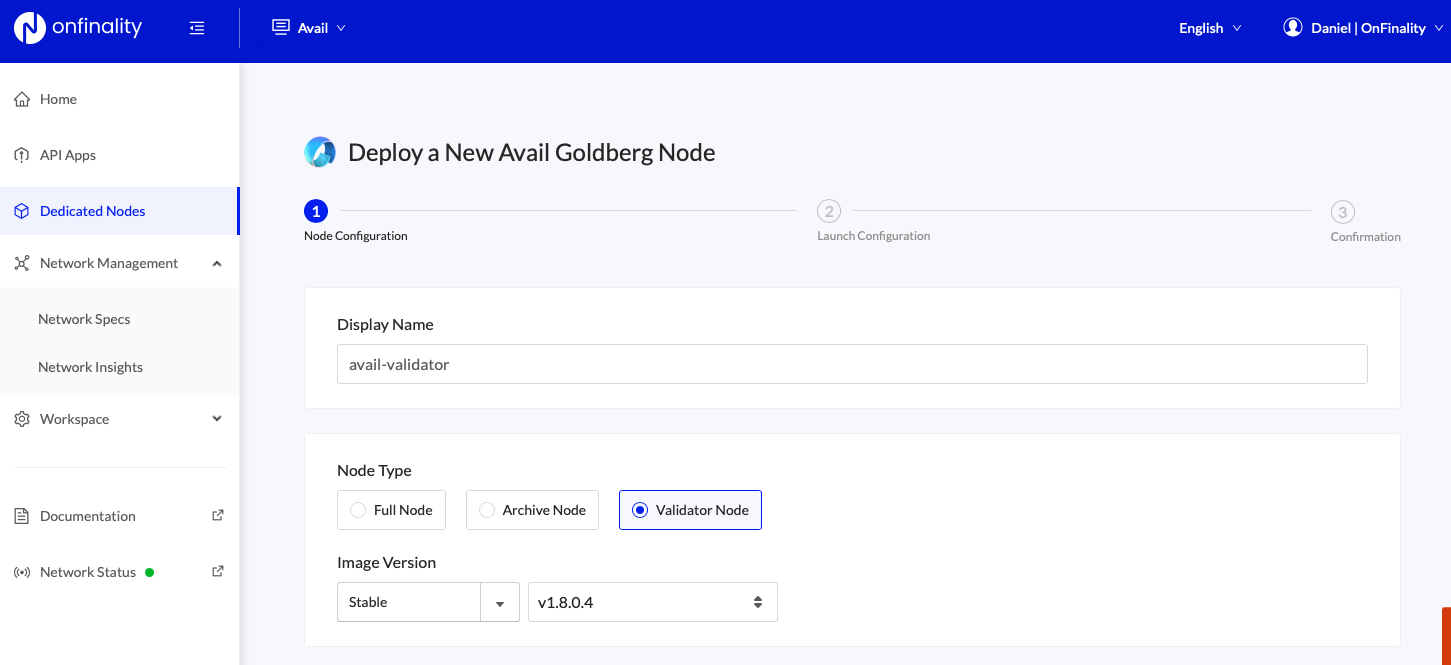
Enter an easily identifiable Display Name and choose the Validator Node Type. Select the recommended Image Version.
Scroll down to set the Cloud Provider and Region where you will run the node. Networks may have a preference of where you should run your validator or collator, so check with their official documentation.
Look out for the Lightning Restore indicator to get the node running as fast as possible.

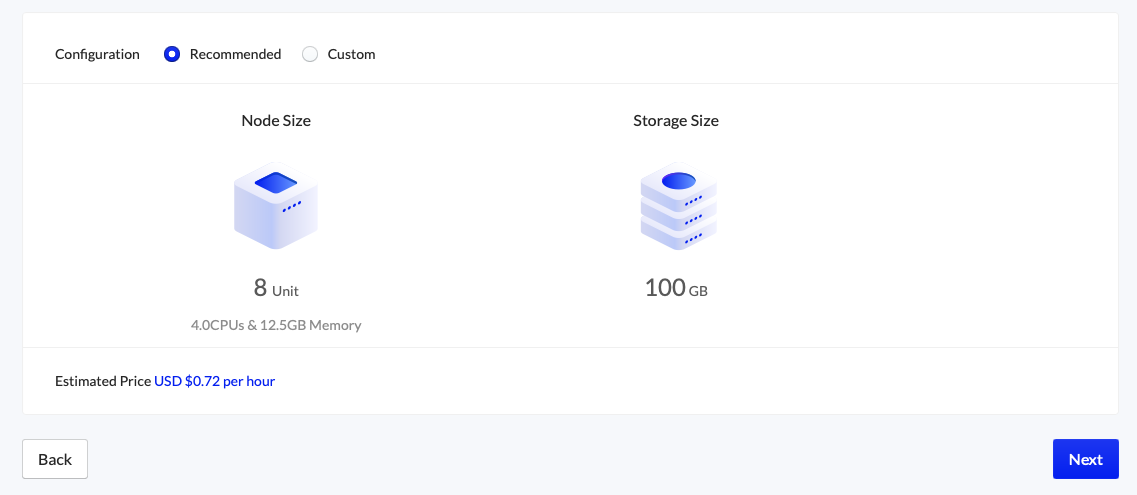
Use at least the recommended configuration suggested by the network, then press “Next”
2.3 Configure Launch Arguments
Next, review the node’s Launch Configuration. The recommended settings are usually sufficient, but we recommend comparing with official documentation to be certain.
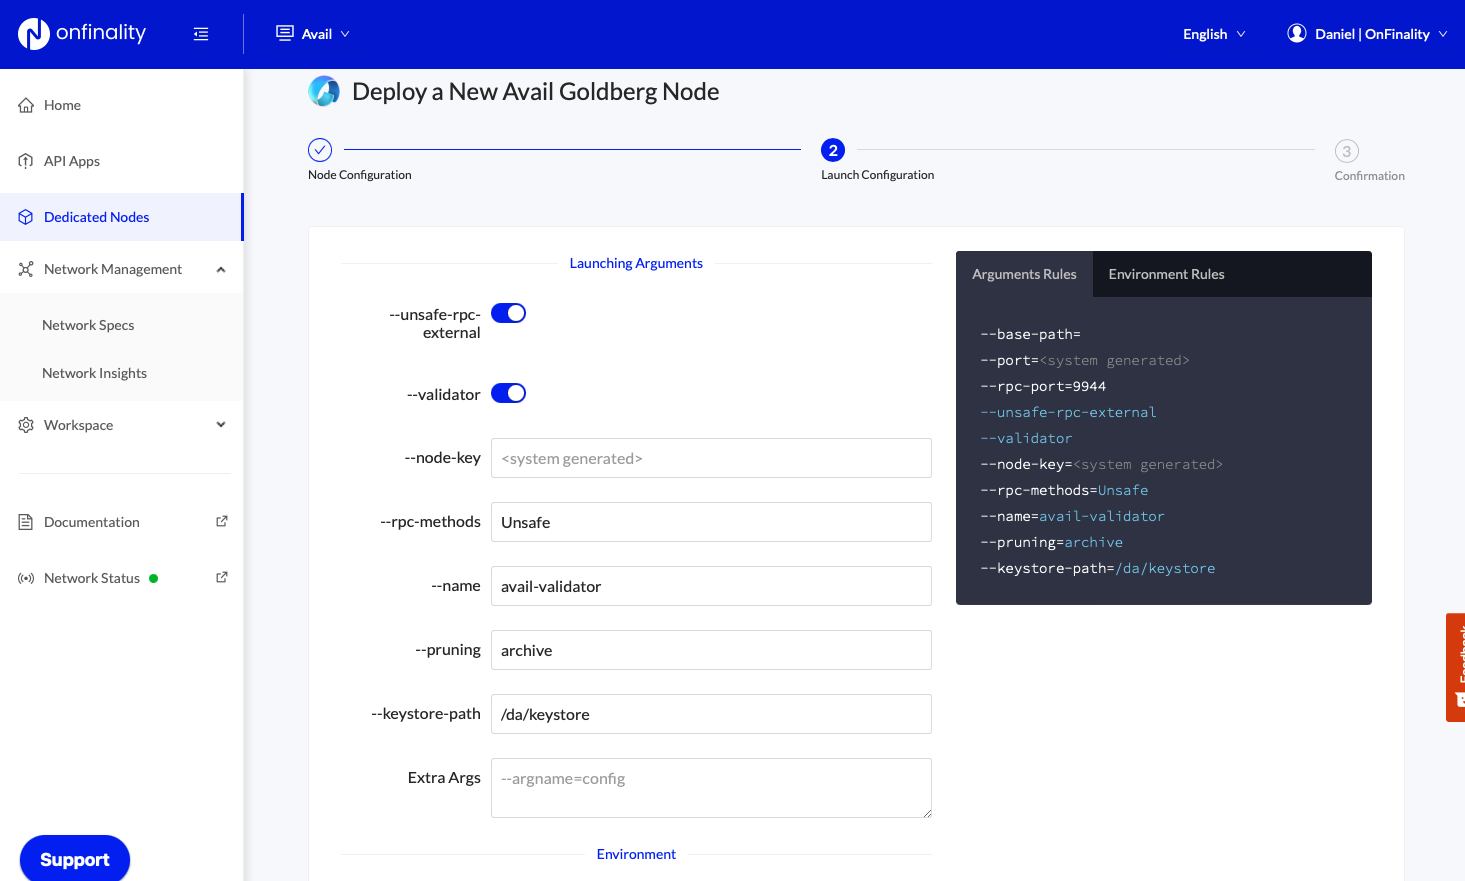
Press “Next”
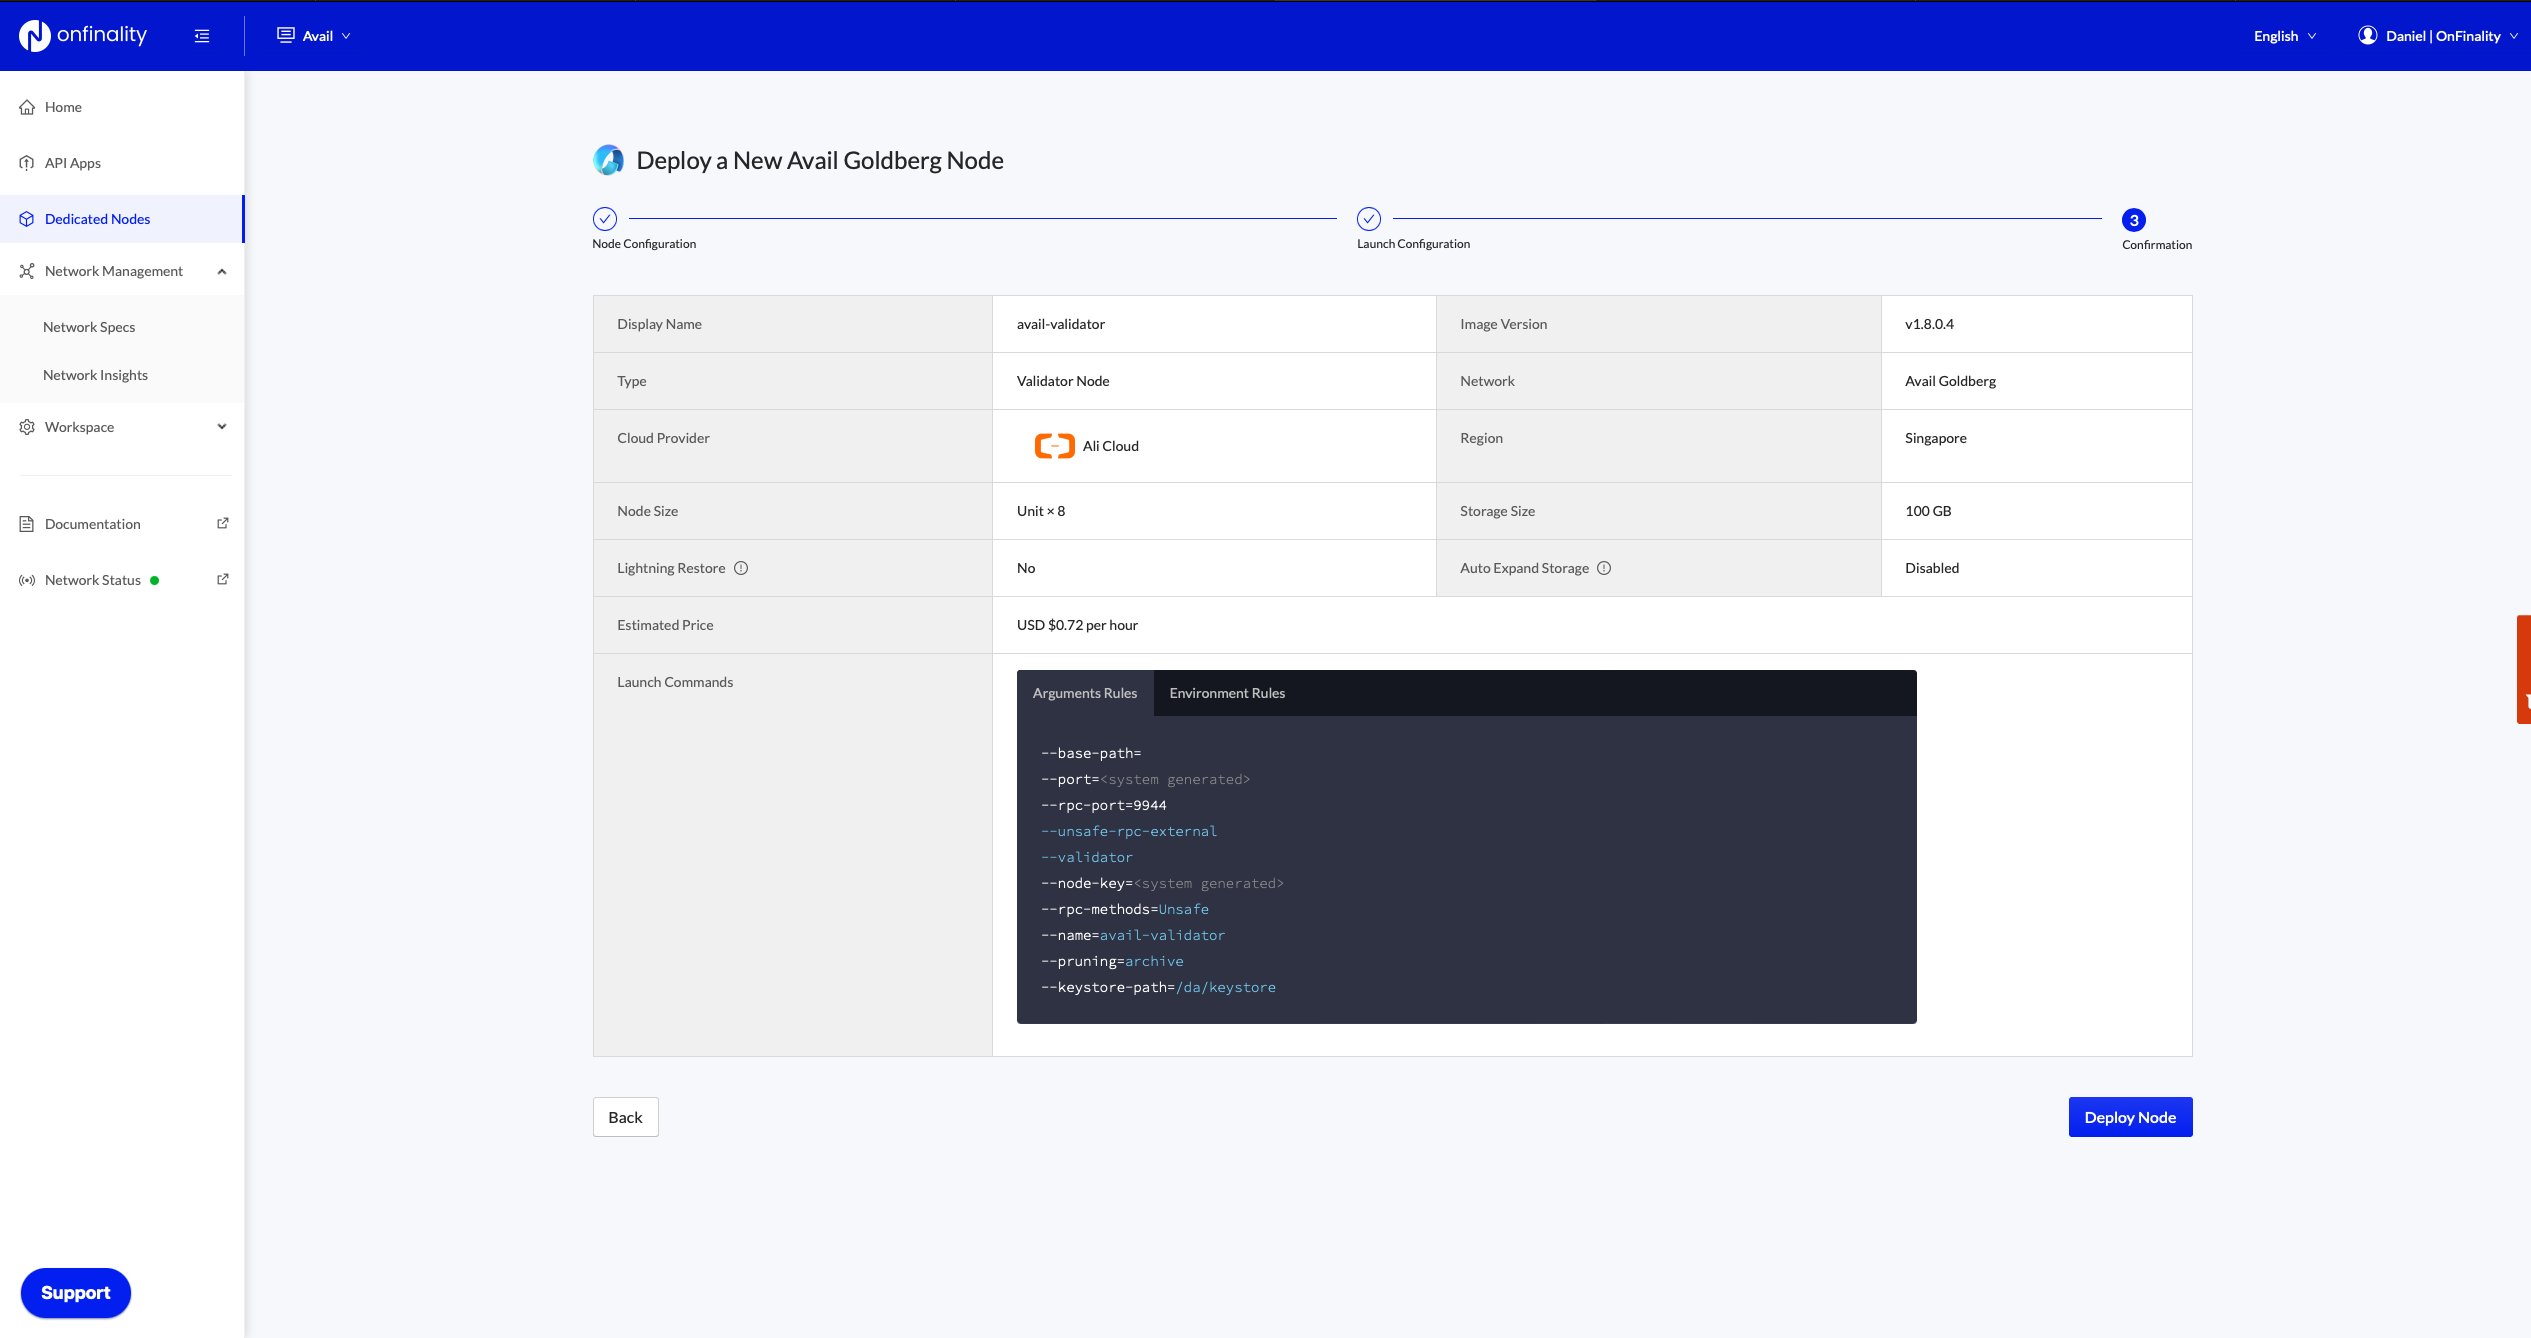
2.4 Review Node
Finally, review the node’s settings and press “Deploy Node”
3. Sync Your Dedicated Node
Once your node is successfully deployed, you can find it in the “Dedicated Nodes” section on our portal.
Click on your node and confirm the following:
Node has peers, and blocks are syncing appropriately
No configuration errors in the console log. You can find your console by clicking on “Console logs” on the top right hand.
CPU, Memory, and Storage are within reasonable range of use.
You can cross-reference the respective network blocks on the PolkadotJS App.
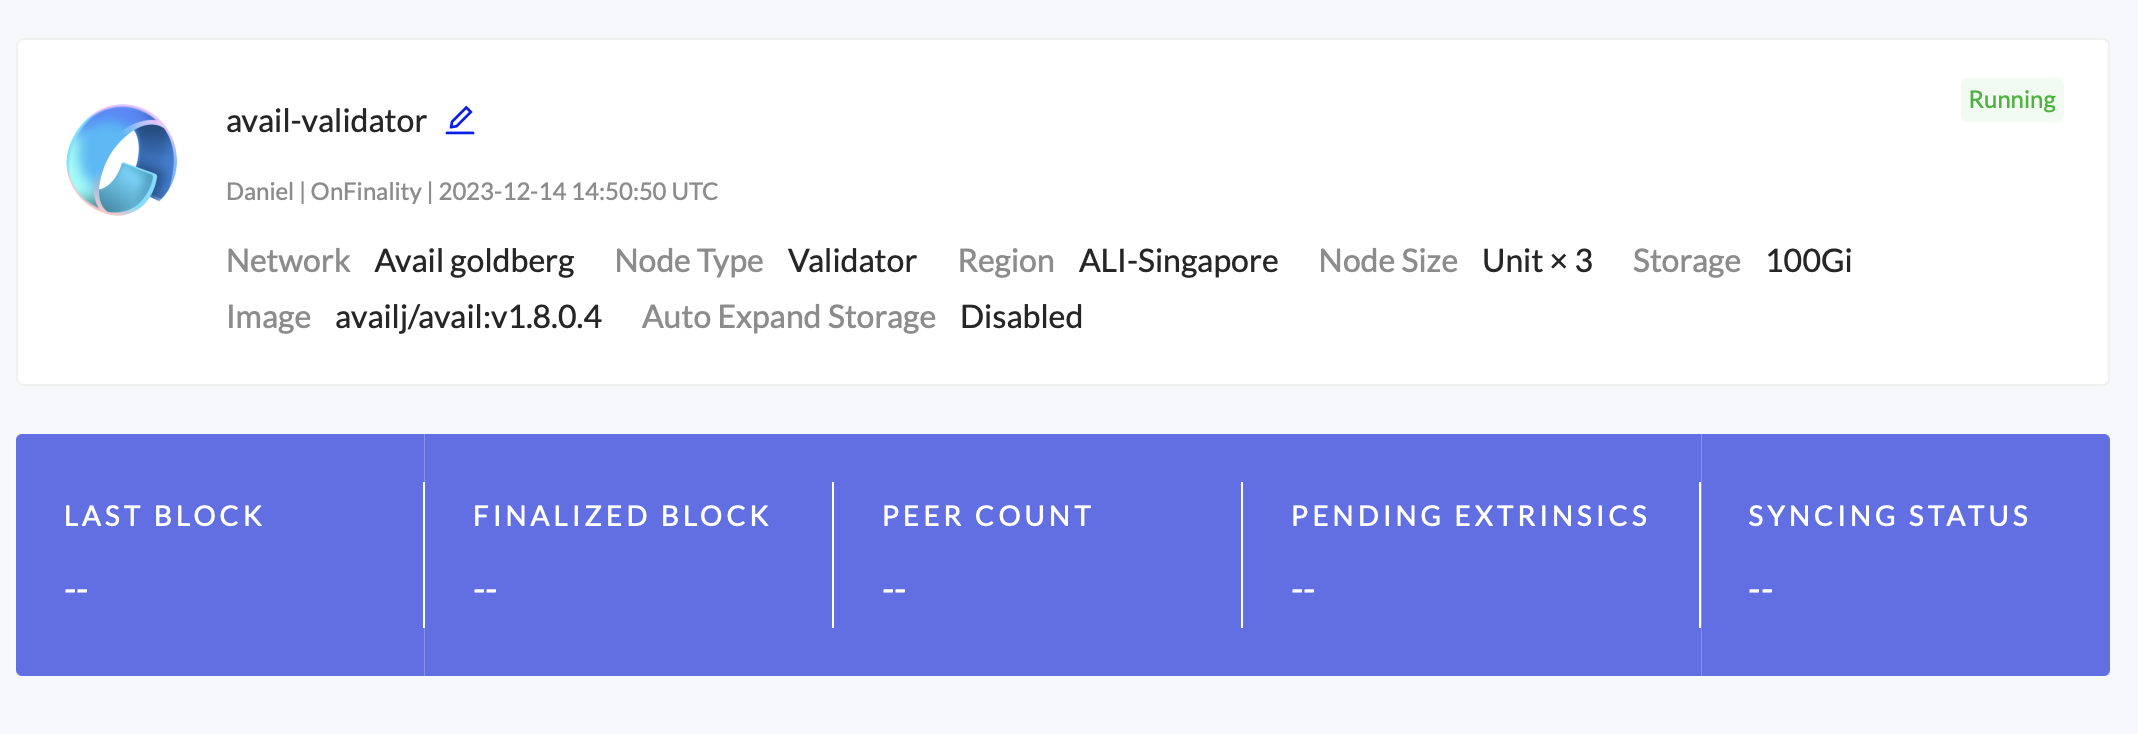
Once the Syncing Status says Synced you can continue to the next steps.
If you’re using Lightning Restore this won’t take more than 5 minutes.
4. Set Up Accounts And Stake
Before you can become an active validator, you need to bond your funds to your node. This involves creating two separate Avail accounts: a stash account for holding your funds and a controller account for managing staking actions.
Stash account
This account holds funds bonded for staking, but delegates some functions to the Controller account. It can be kept in a cold wallet, meaning it can stay offline all the time.
Controller account
This account acts on behalf of the Stash account, signalling decisions and necessary execution for staking. It only needs enough funds to pay transaction fees.
Create Avail Accounts
Navigate to the Goldberg network explorer at goldberg.avail.tools.
Create a
stashand acontrolleraccount. Thestashaccount should ideally be a cold wallet, while thecontrollercan be a hot wallet.The controller key is responsible for managing staking activities and executing transactions, including the payment of transaction fees.
The stash key primarily safeguards your funds and should ideally be stored in a cold wallet or kept offline. It is not recommended to use the stash key for routine account activities like submitting extrinsics.
Ensure both accounts have sufficient funds to cover transaction fees.
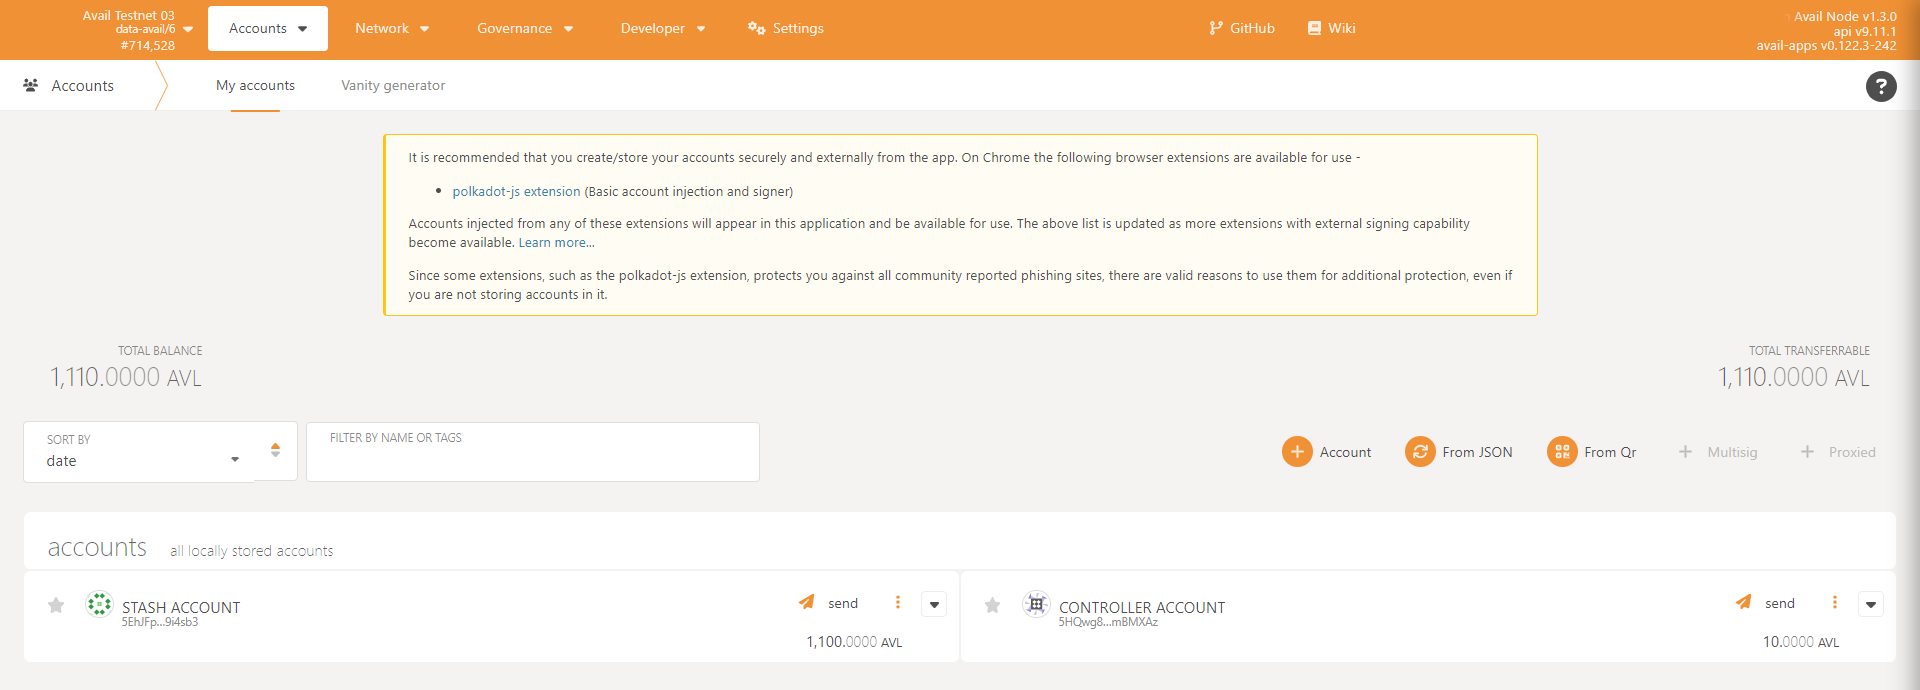
Funding Accounts
Keep the majority of your funds in the stash account and only a minimal amount in the controlleraccount to cover transaction fees.
For validators participating in the Avail Goldberg testnet, contact the Avail team to have funds transferred.
5. Bond your Funds
Don't bond all your AVL tokens as you'll need some for transaction fees. You can always bond more tokens later. Note: Withdrawing any bonded amount is subject to the duration of the unbonding period.
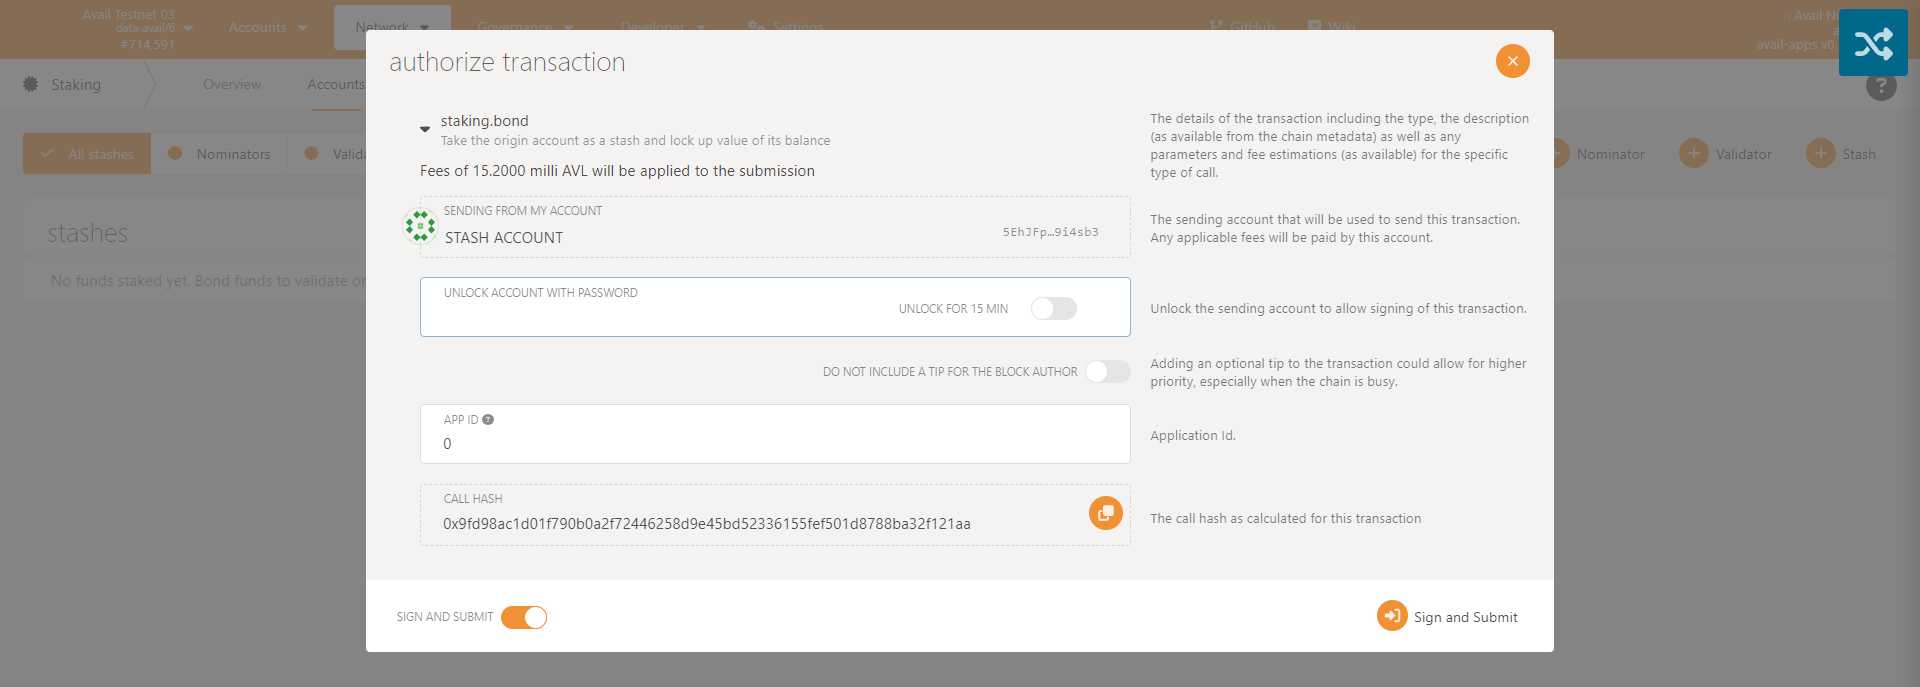
Navigate to the Network > Staking > Accounts tab in the Explorer.
Click on Stash to initiate the bonding process.
Fill in the bonding preferences.

Stash Account: This is your designated Stash account.
Controller Account: Choose your Controller account, which only requires a minimal amount of AVL to initiate and cease validation.
Value Bonded: Specify the quantity of AVL tokens you wish to bond from your Stash account. You can stake any amount that exceeds the minimum requirement.
Payment Destination: This is the account where your validation rewards will be sent. For more details, visit this link.
After filling in the required fields, click
Bond. You will be prompted to enter your wallet password. Input your password and then click Sign and Submit.
6. Generate Session Keys
Session keys are what links the validator or collator to your account.
First, locate your Dedicated Node’s RPC endpoints under API Endpoints. Access is secured by an API Key at the end of the URL, so keep it safe and private.
Option 1 — Polkadot-JS:
Copy your RPC — Websocket endpoint into the Polkadot-JS Custom Endpoint and press save to connect to the node
Navigate to Developer > RPC Calls and submit an author rotateKeys call.
Record the result.
Option 2 — CLI:
Generate the session keys on your Dedicated Node via the author_rotateKeys RPC Request, using your Dedicated Node’s RPC — Http url.
Example request
curl **Node's RPC Http endpoint here** -H \ "Content-Type:application/json;charset=utf-8" -d \
  '{
    "jsonrpc":"2.0",
    "id":1,
    "method":"author_rotateKeys",
    "params": []
  }'
You will get a response like this
{
  "jsonrpc": "2.0",
  "result":"0xc05a9d093e4db4c1bde31977716e7a0a39d6f3d1f1bf749e7fec8371147de730af6860aeef81a11130c9fcd317b96e736f6c36141c28f382a18f9faf6e7df797eaa951ead00d12db10937003f0956e3d3444d1774d452ed045dbc1b84d1bf1471abf5d77bf5033845f01be1188a852c6f0ba703042b4d06d14314841c1096c50",
  "id":1
}
The content after "result" is the session keys of your validator node
7. Set Session Keys
You must inform the network of your Session keys by signing and submitting the setKeys extrinsic. This action associates your validator with your Controller account.
Navigate back to the Staking tab.
Click on
Set Session Keyand enter the hex-encoded result.Click
Set Session Keyand enter your the session keys from Step 6

After submitting the extrinsic, you'll observe that Set Session Key changes to Validate. Make sure your node is fully synchronized before proceeding further.
8. Register Your Validator
Click
Validateon the Staking tab.

Set your validator commission percentage.
Enter your password and click
Validate.

Congratulations
If you have followed all of these steps, and been selected to be a part of the validator set, you are now running an Avail Goldberg Testnet validator!
More Resources:
Developer documentation:https://documentation.onfinality.io/support/
About OnFinality
OnFinality is a blockchain infrastructure platform that saves web3 builders time and makes their lives easier. OnFinality delivers scalable API endpoints for the biggest blockchain networks and empowers developers to automatically test, deploy, scale and monitor their own blockchain nodes in minutes. To date, OnFinality has served over 277 billion RPC requests across 60 networks including Polkadot, Kusama, Moonbeam, Astar, Avalanche and Cosmos, and is continuously expanding these mission-critical services so developers can build the decentralised future, faster!
