AI Agent AVA - Setup Guide
AI Agent AVA provides intelligent support for blockchain communities networks and communities. It is designed for Web3 builders, protocols, wallets, infra teams, and DAOs that want to scale support, reduce manual workload, and deliver accurate responses to their users in real time.
AVA works best with the improved language models in our Growth and Advanced AI Plans. Contact us support@onfinality.io for a no obligation trial.
Setting up your AI Agent
In this guide we’ll help you to set up an example AI Agent, providing responses to Discord based on the project’s:
Website
Documentation
Subgraph project for live blockchain investigation
We are showcasing only some of AVA’s functionality - for more visit:
1. Create your AI Agent
Sign in to your OnFinality account and navigate to the AI Agent menu
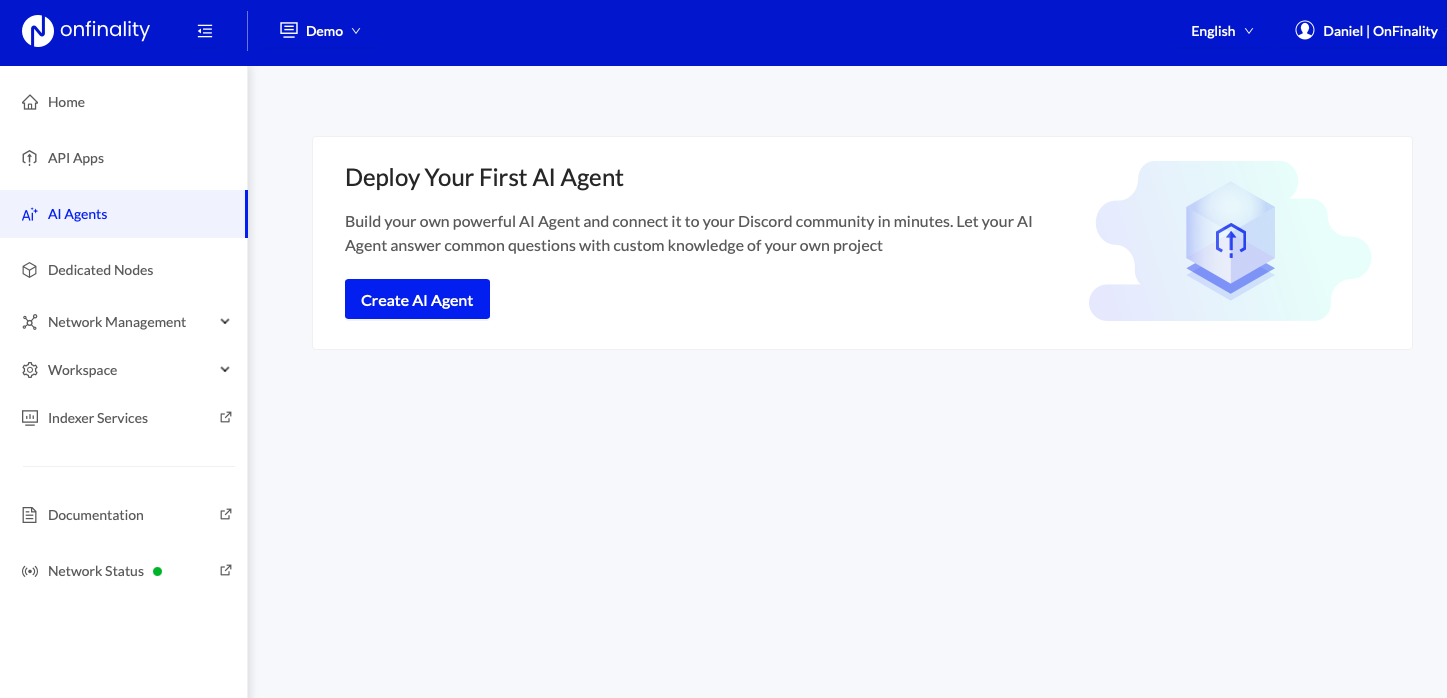
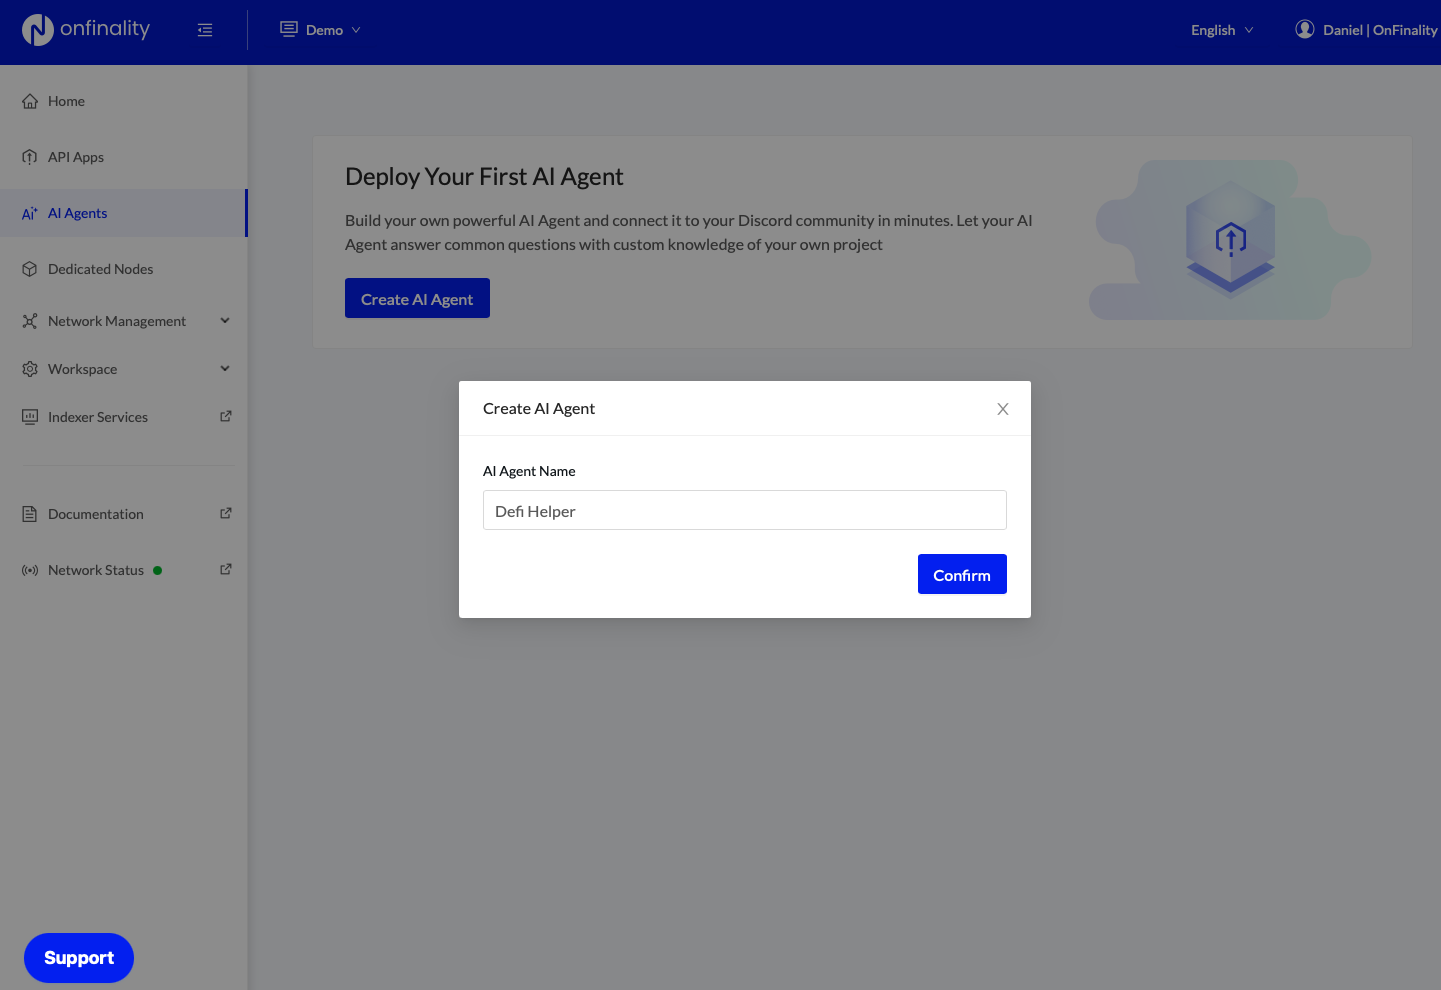
Press Create AI Agent
Provide an internal AI Agent Name. This is not customer facing and used only for differentiating your AI Agent inside OnFinality’s platform.
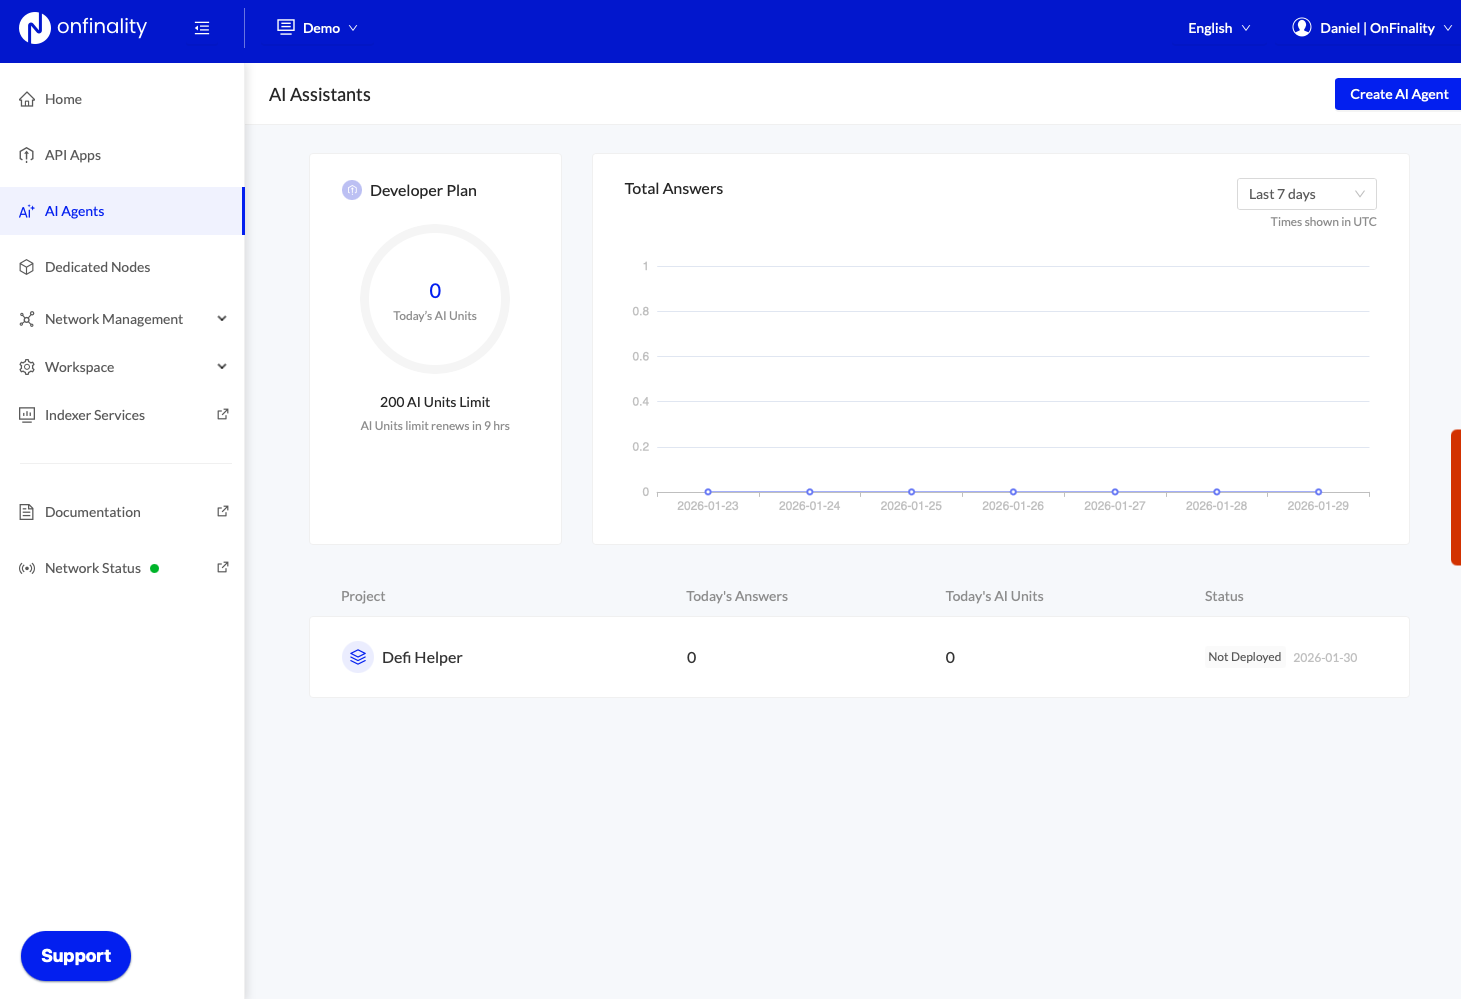
You can now see your AI Agent and can start the configuration.
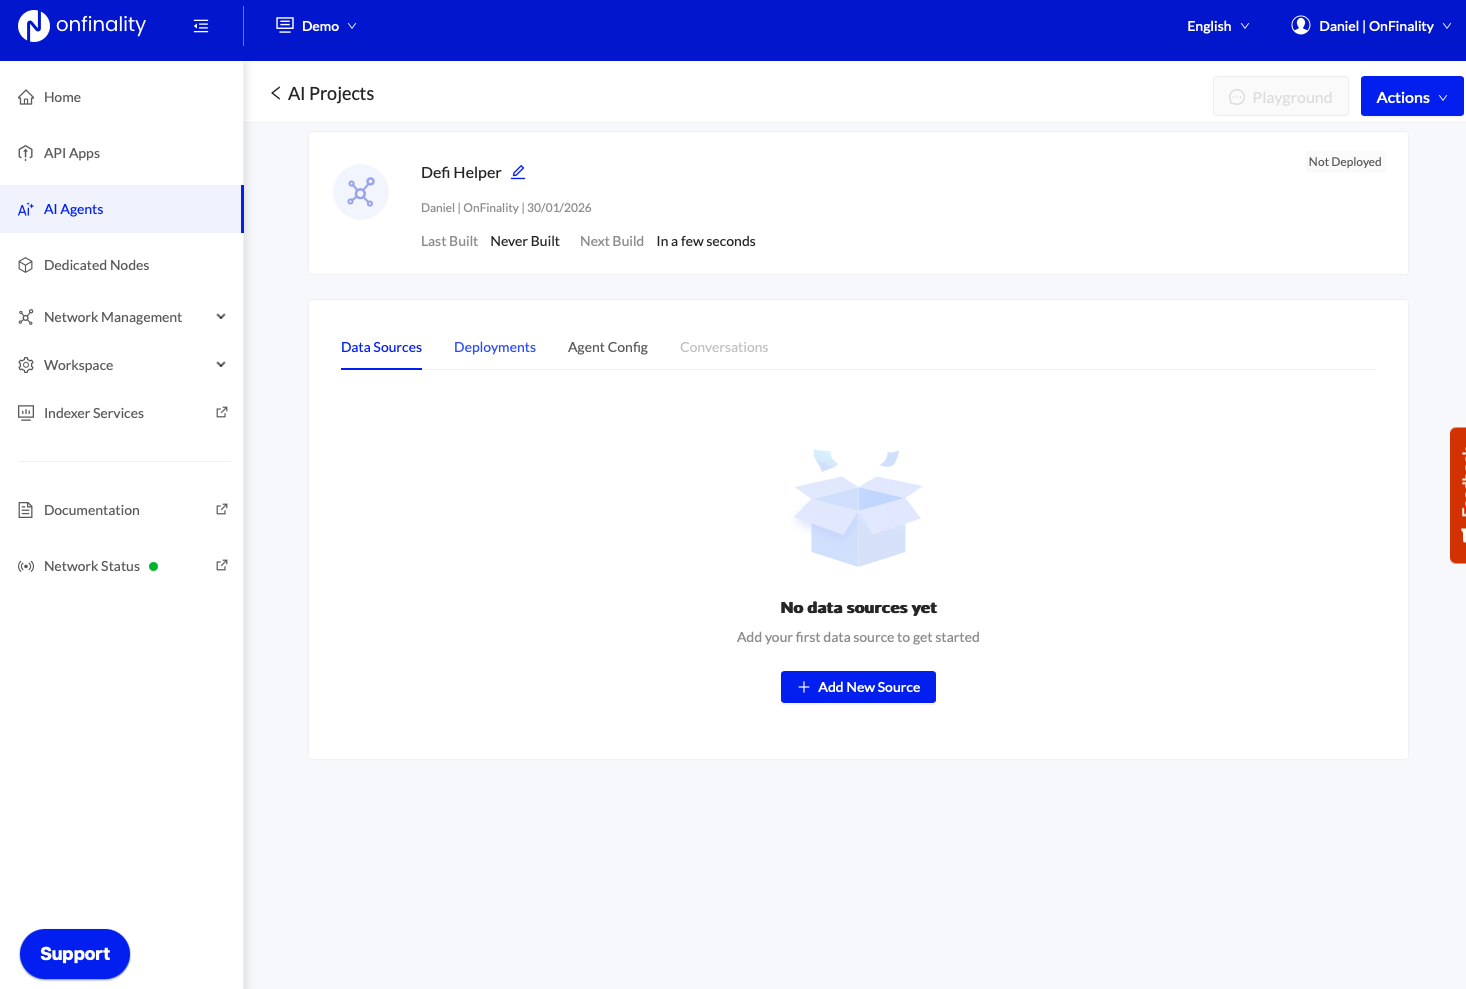
2. Configure your Data Sources
Before interacting with AVA you’ll need to set up Data Sources. Data Sources define what AVA knows and where that knowledge comes from. There are two primary types of Data Sources:
Static Data Sources
Provided context such as documentation, websites, and text.
Dynamic Data Sources
Real time data sources such as live blockchain data or external MCPs.
See the complete Data Source documentation here.
2.1 Project Knowledge (Static Data Source)
First, we’ll provide AVA with background knowledge of our project by connecting to our website & documentation.
Open your AI Agent and press Add New Source on the Data Sources tab
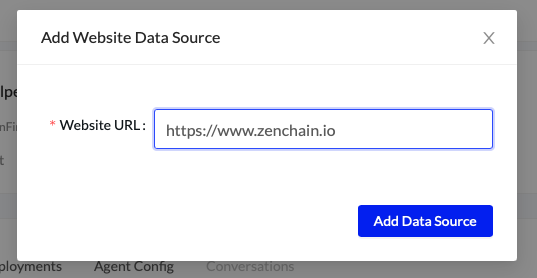
Select Website from the Data Source marketplace
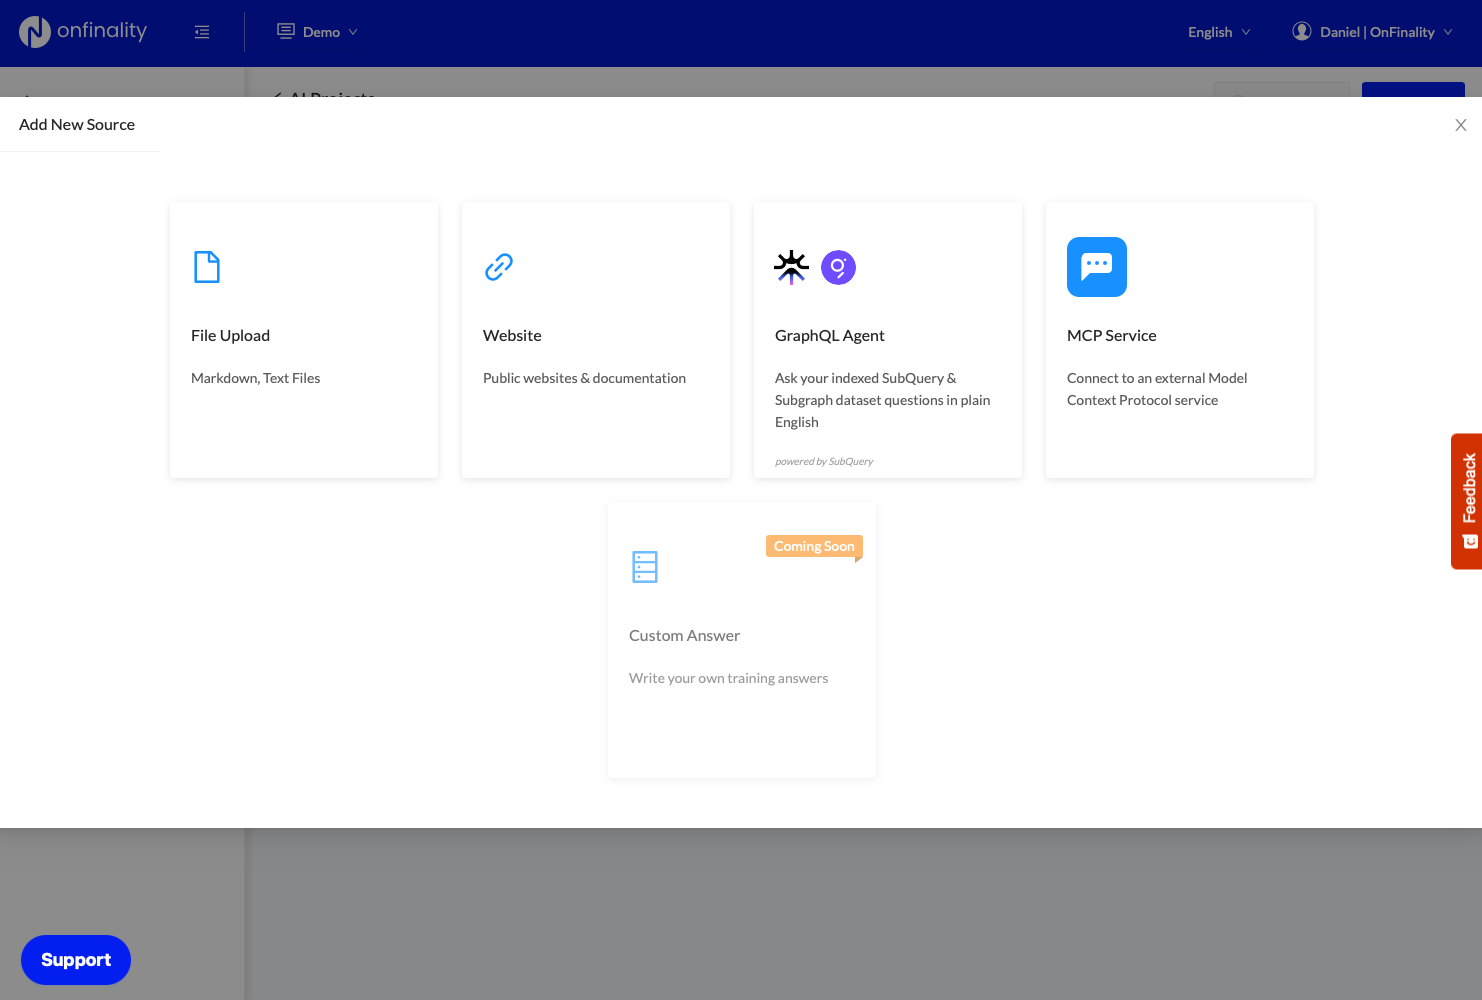
Paste your website and press Add Data Source
Repeat again for your documentation.
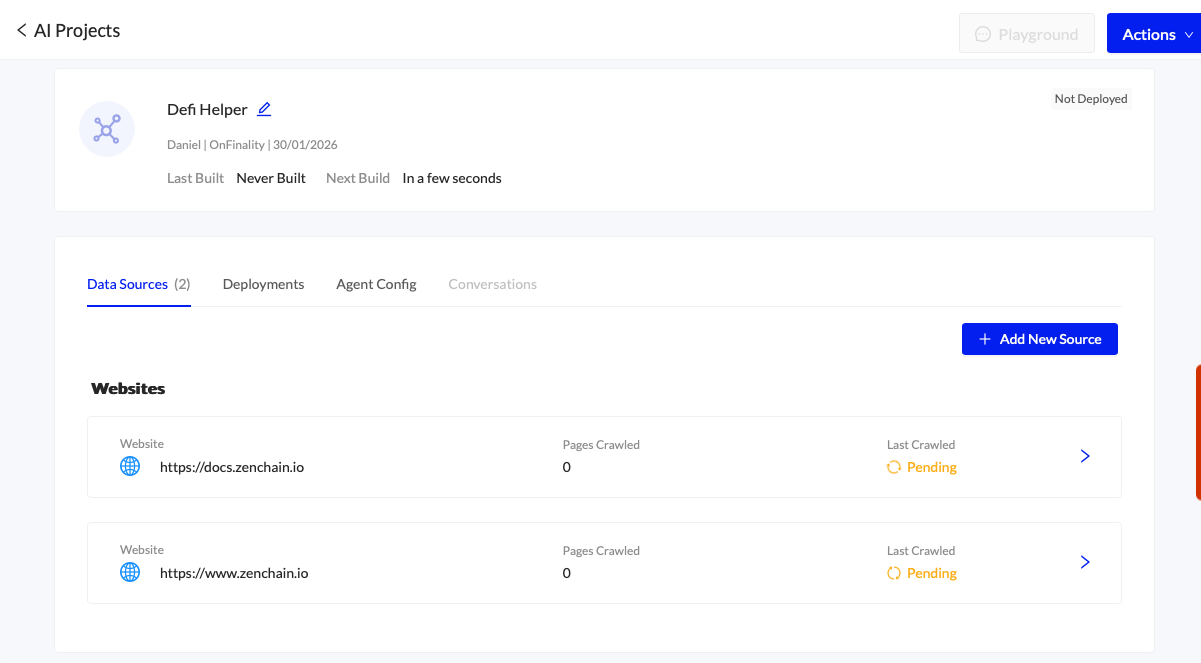
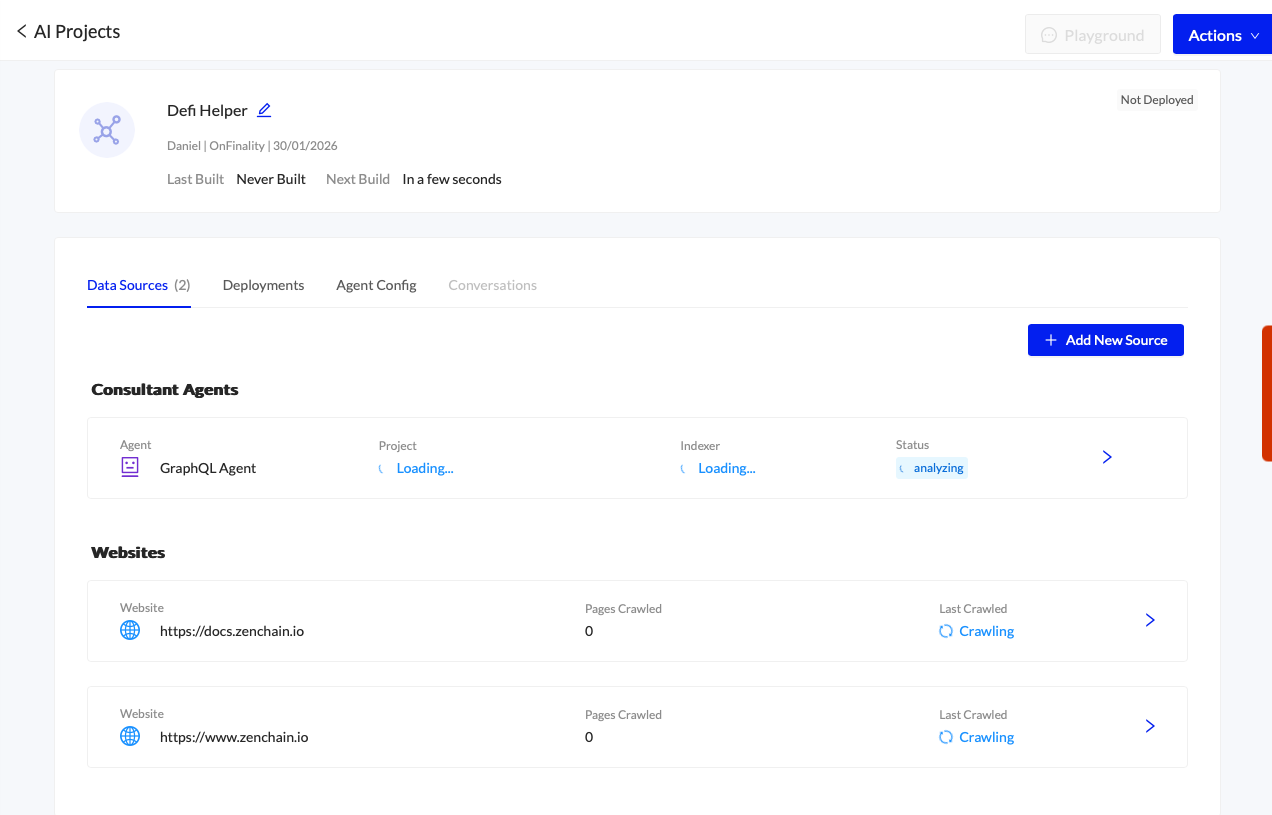
AVA will begin to crawl your websites. This will take up to 5 minutes
2.2 Live Blockchain Data (Dynamic Data Source)
Next, we want to hook AI Agent AVA up to a Subgraph for access to live blockchain data. This can be achieved using the GraphQL Data Source.
Before connecting your SubQuery or The Graph project make sure the schema is easily understandable.
Follow our guide to Writing Helpful GraphQL Schema
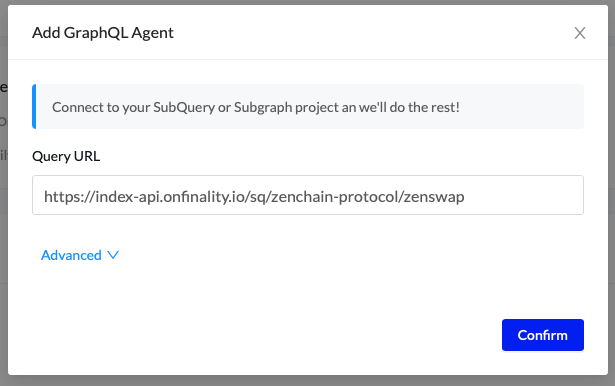
Press Add New Data Source and select GraphQL Agent
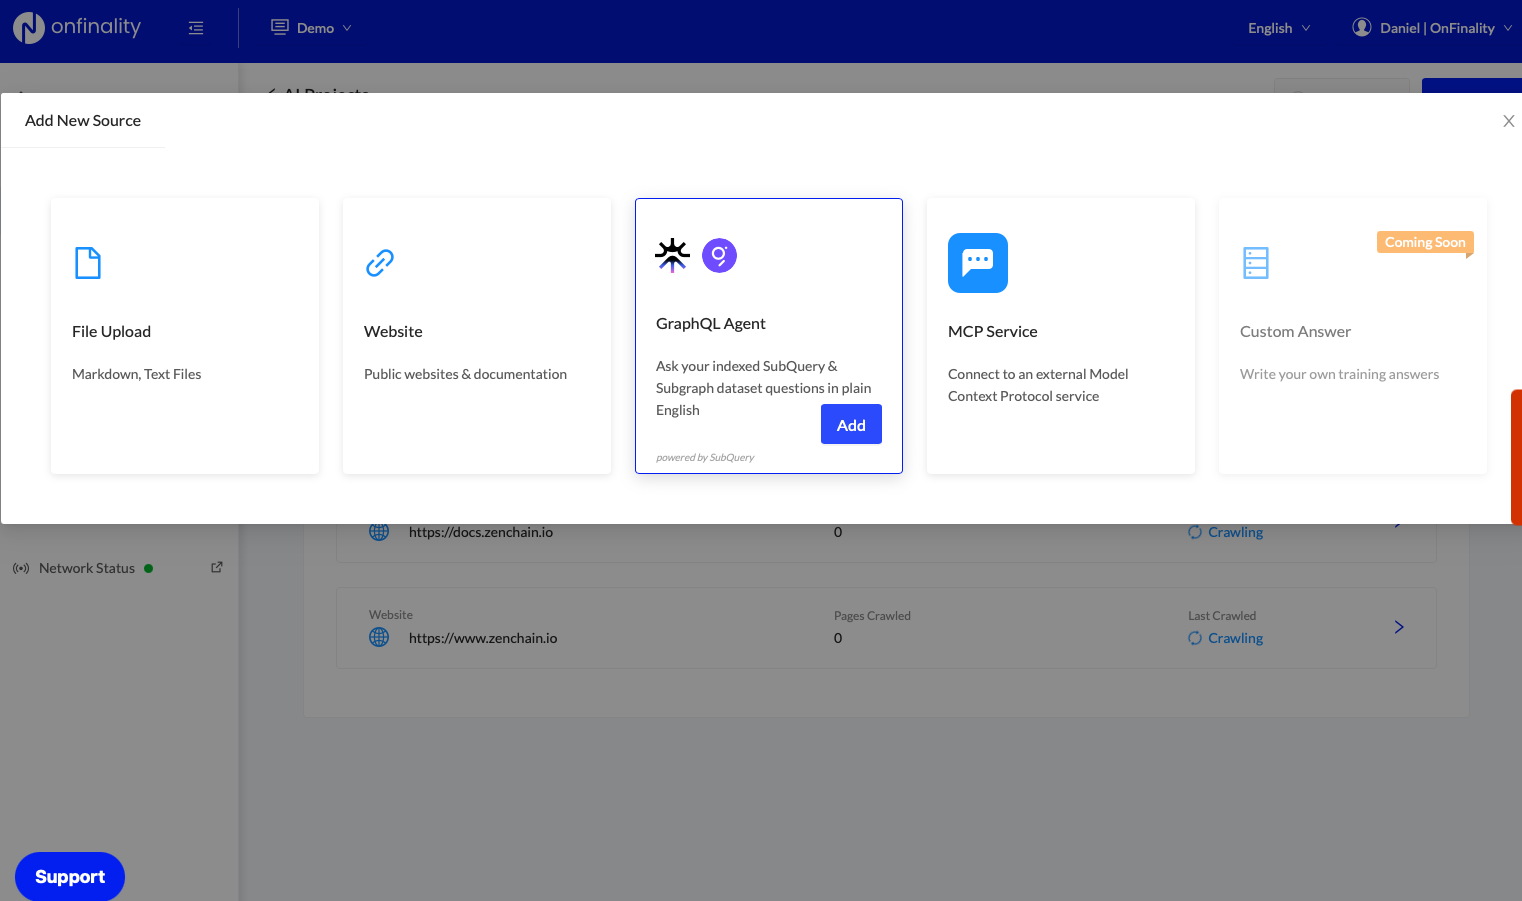
Enter your Subgraph Query URL. If your SubQuery or Subgraph is hosted externally (not with OnFinality) you may need to enter an authorisation token under Advanced
AI Agent AVA will begin analysing the GraphQL schema - this will take a few minutes.
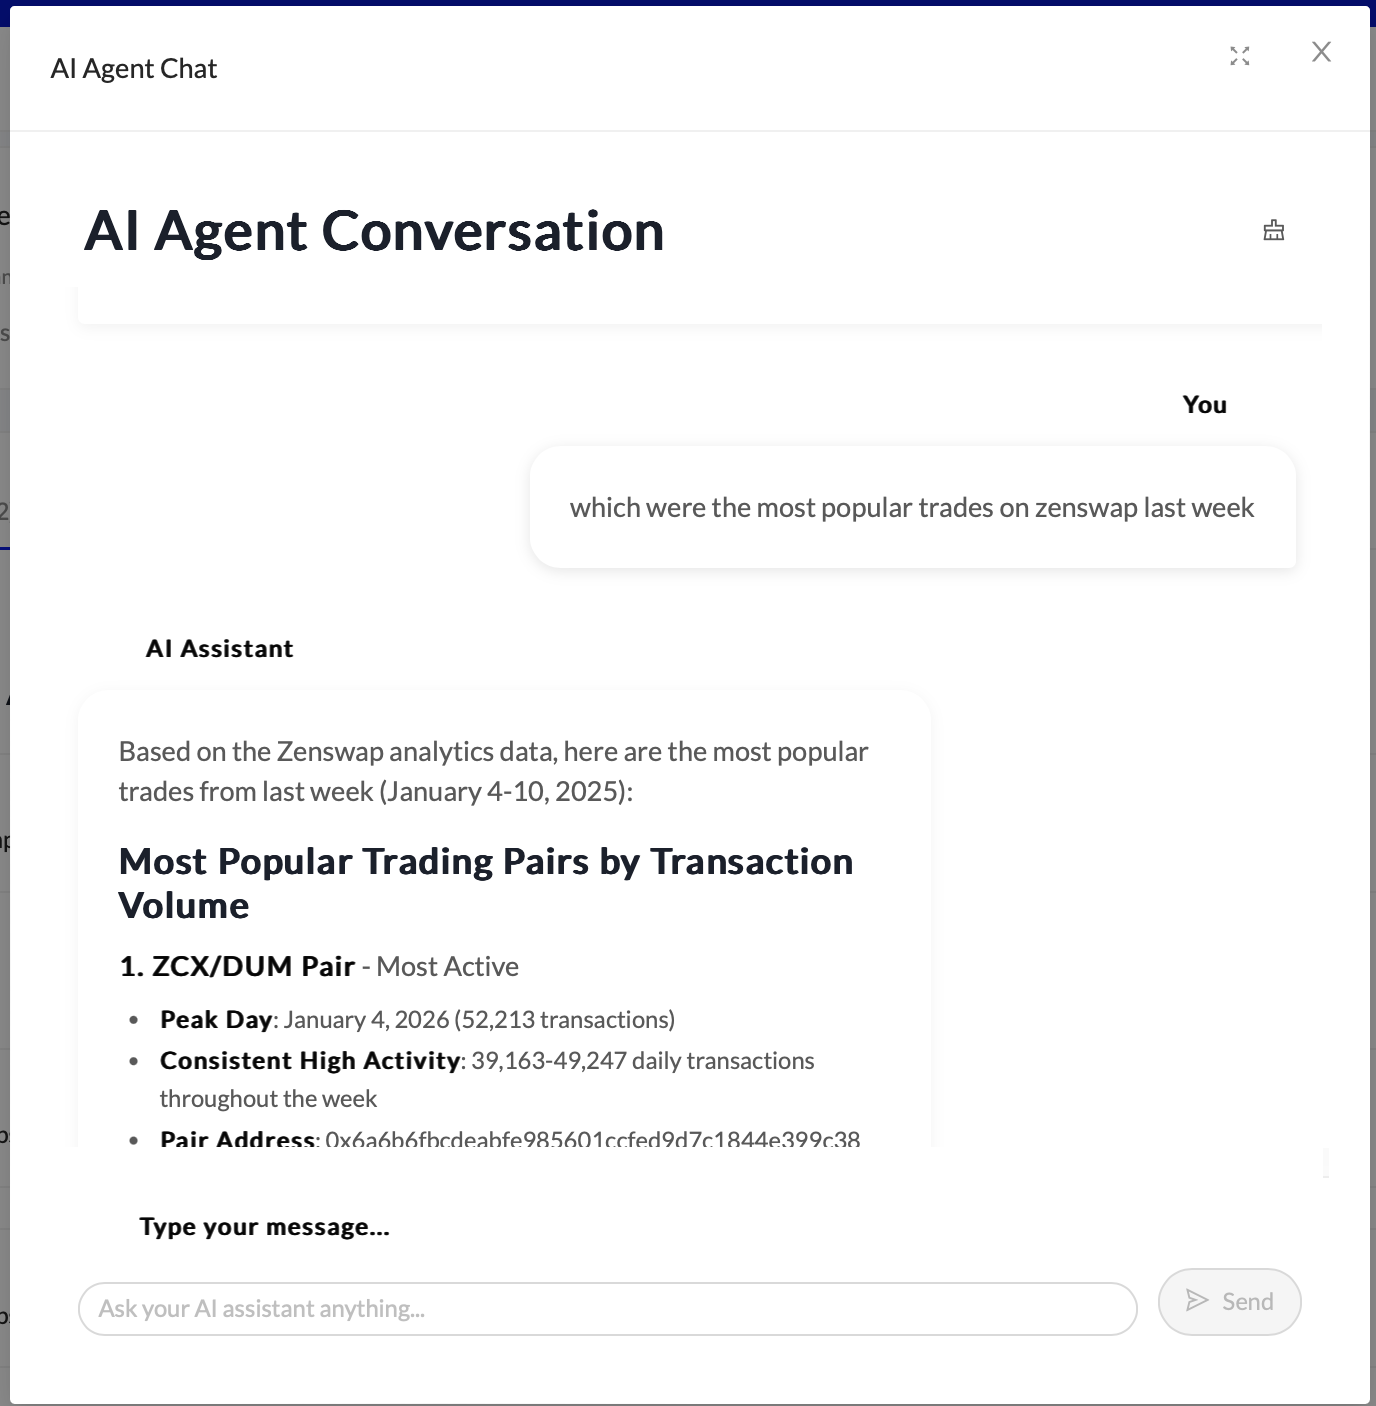
3. Playground Testing
Once your data sources are ready AVA you can try it out in the Playground.
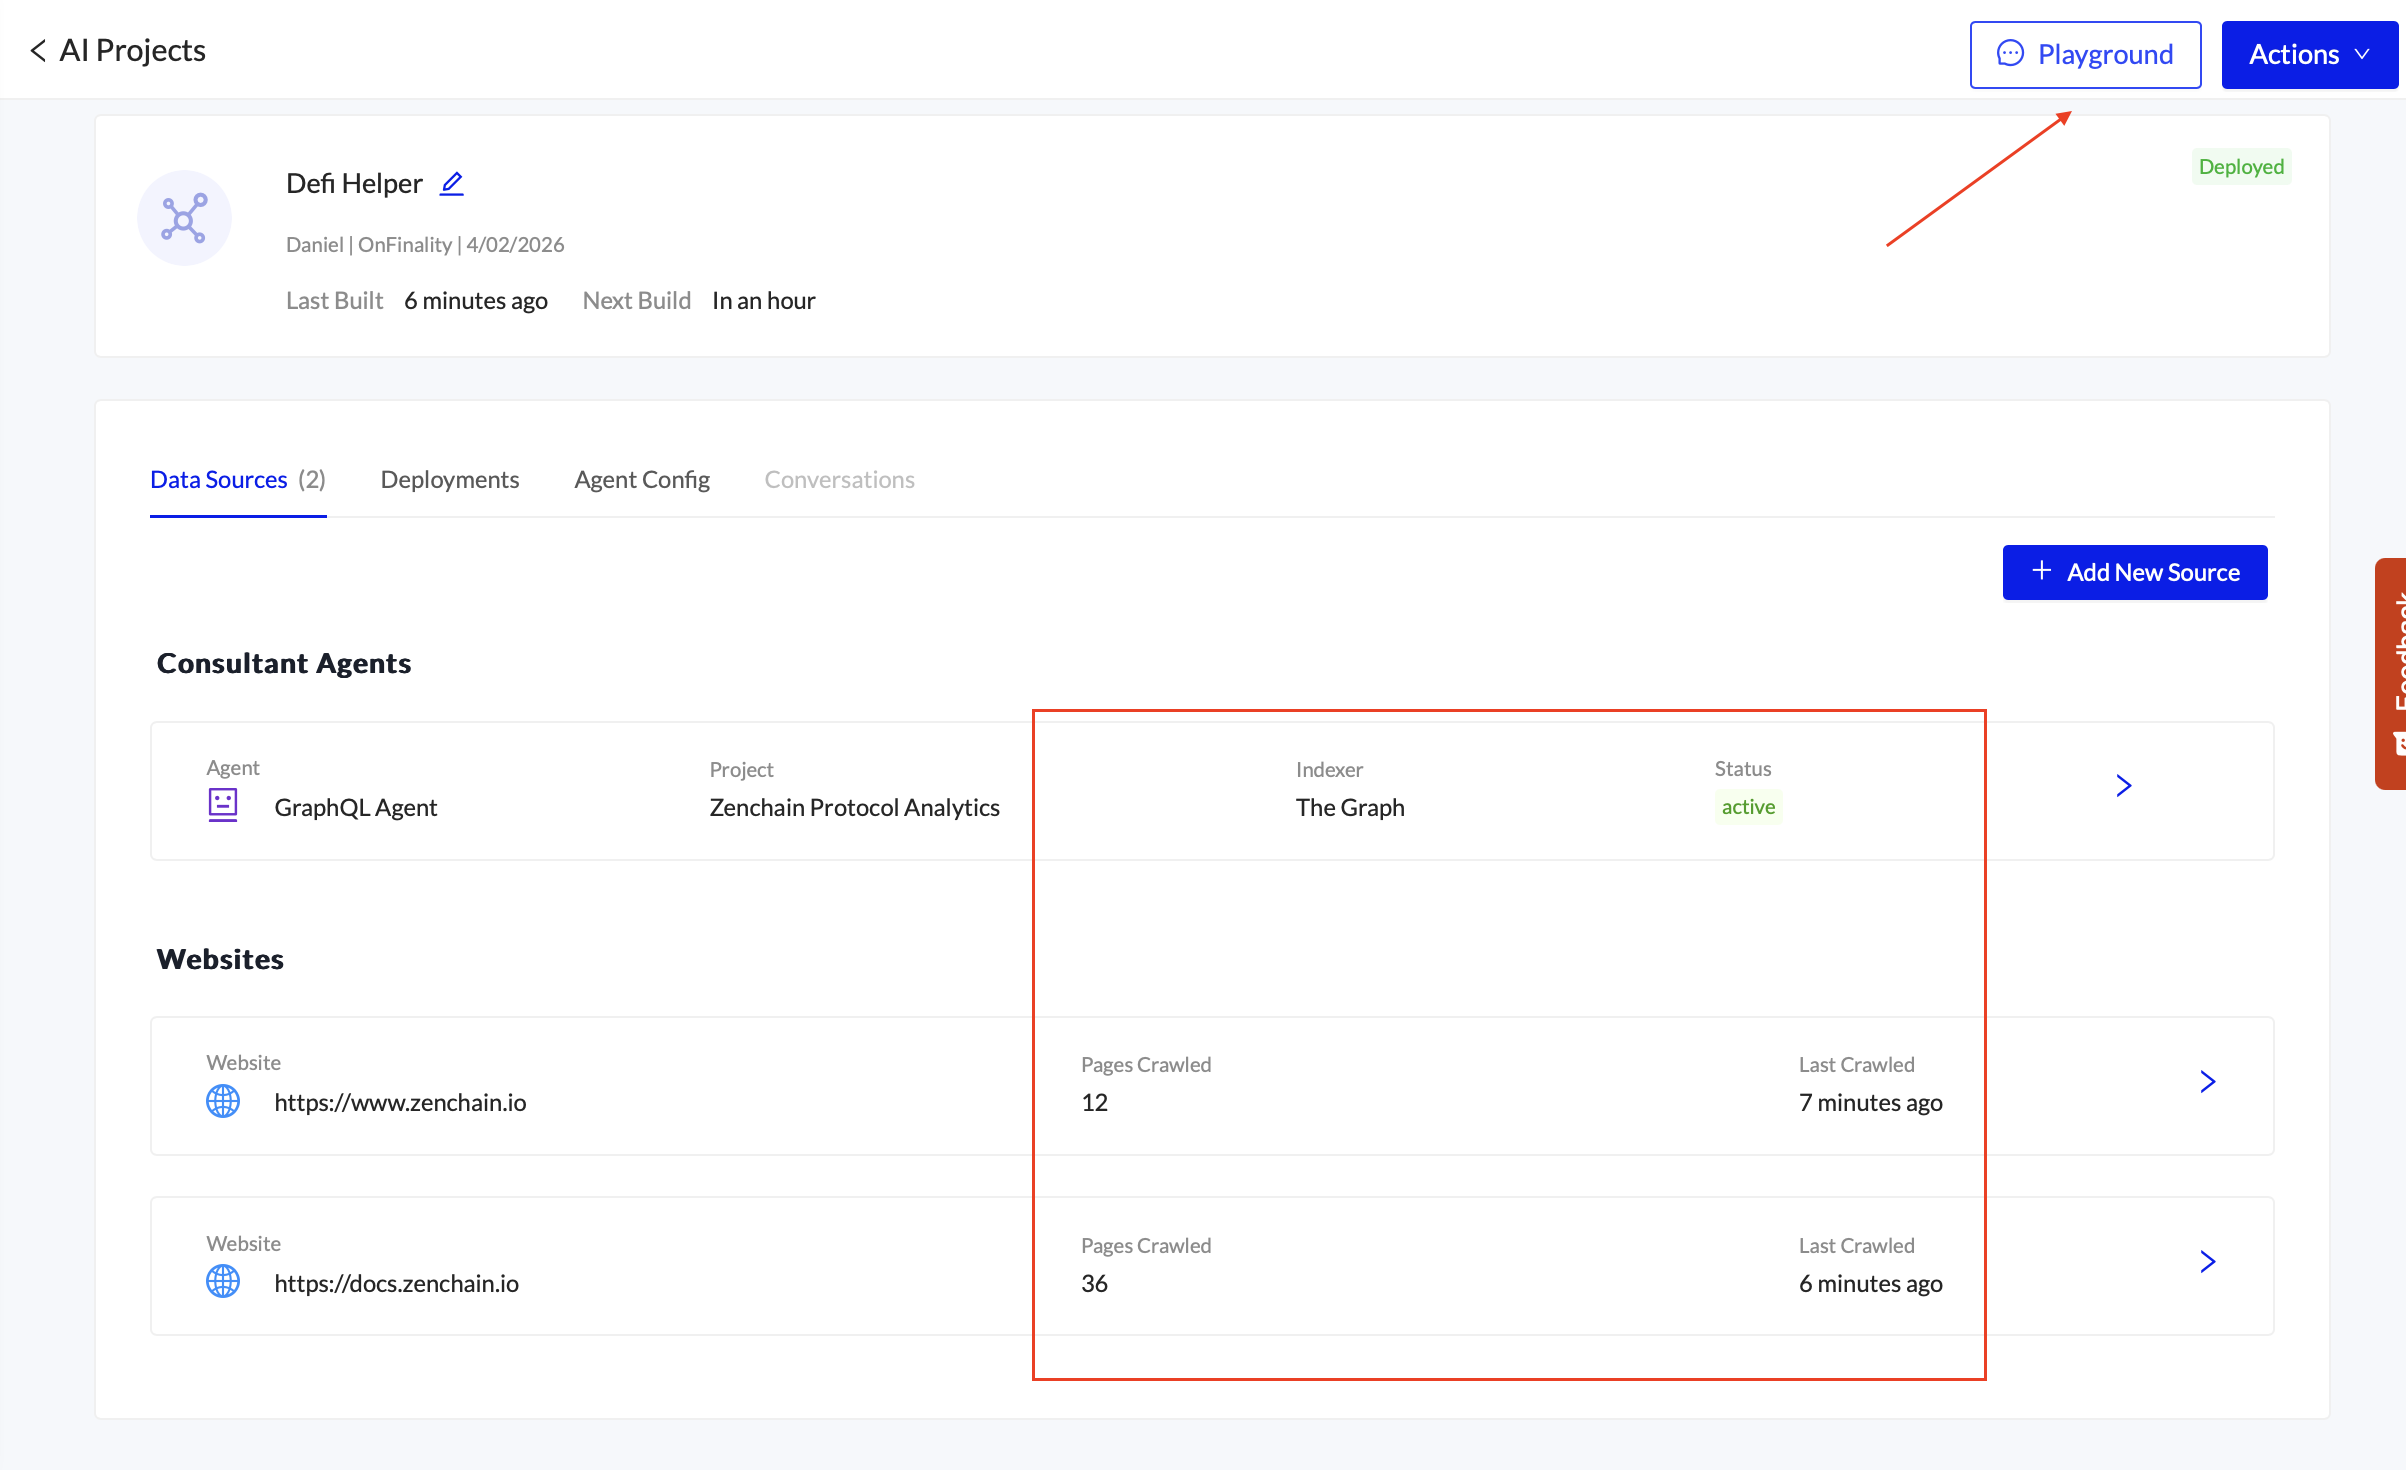
Image: Data Sources have finished building & Playground is now available
Answer from static data sources (Website & docs):
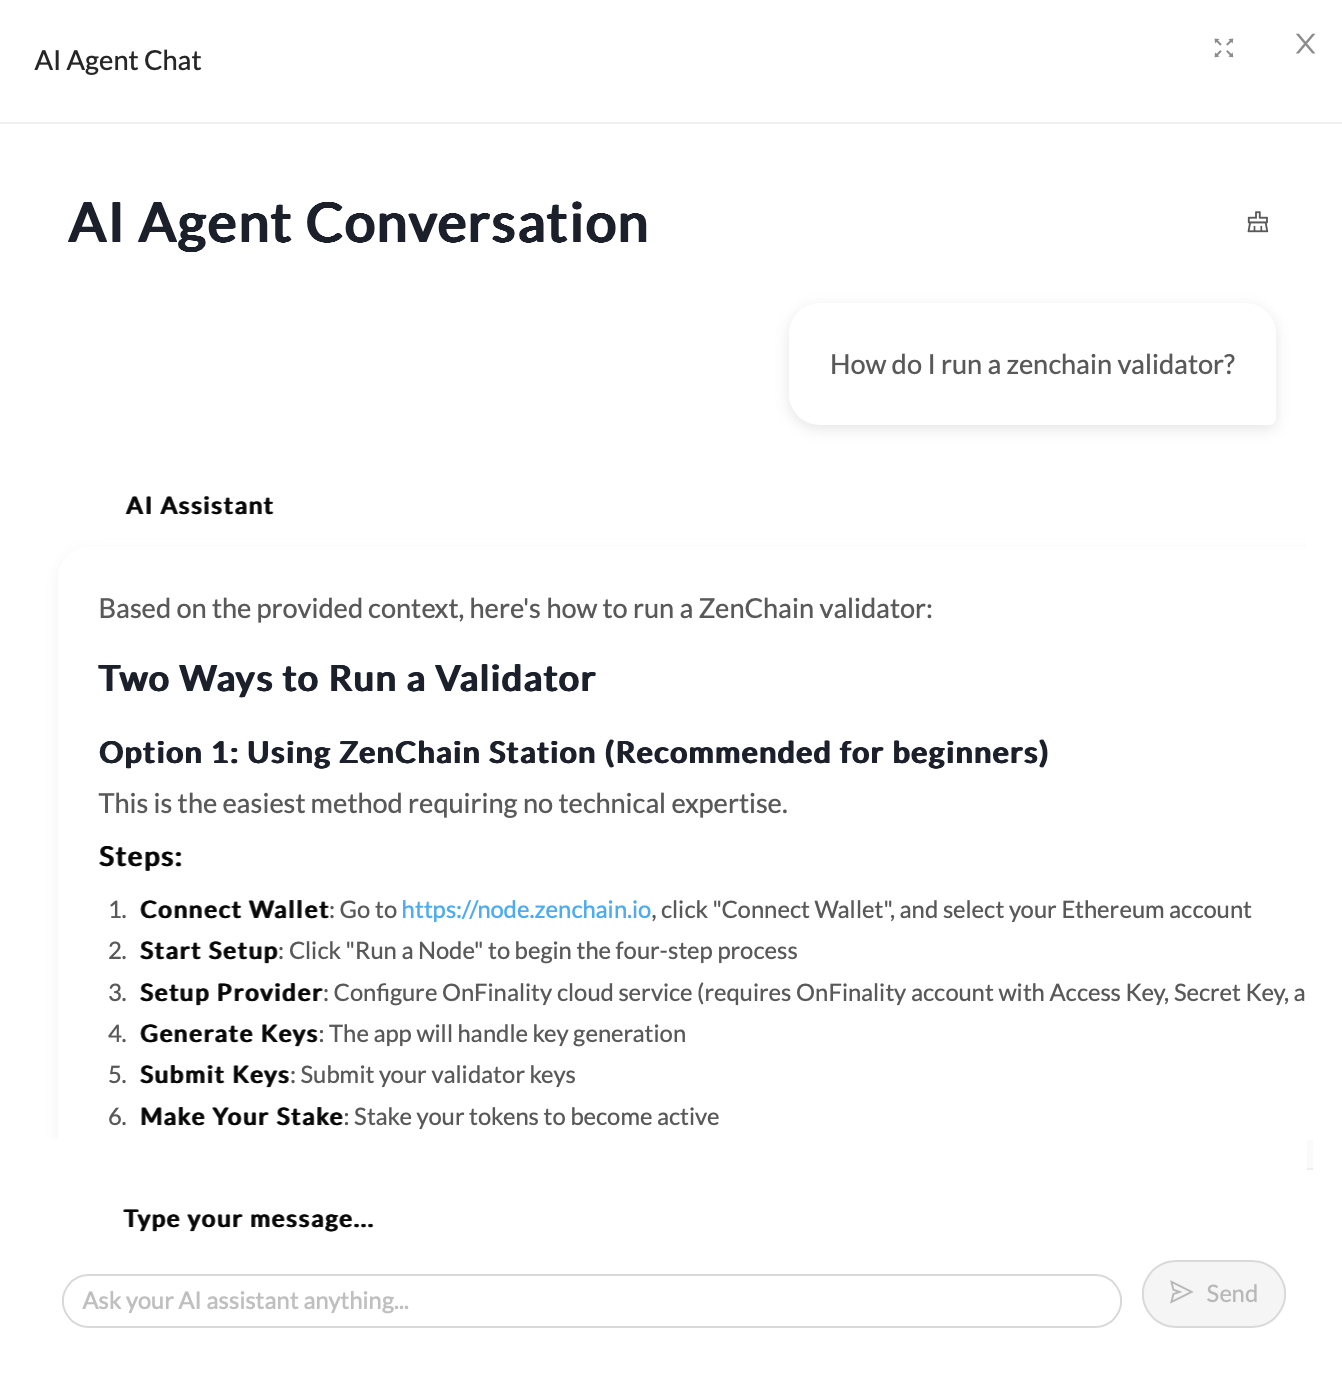
Answer from dynamic data source (Subgraph project):
4. Fine Tuning
After testing AVA you may need to make improvements
4.1 Data Sources
Now that the Data Sources are ready, you can click on each one to view the results, such as pages crawled.
Review Crawled Websites
View the crawled websites. AVA has a limit of how many pages deep it will crawl.
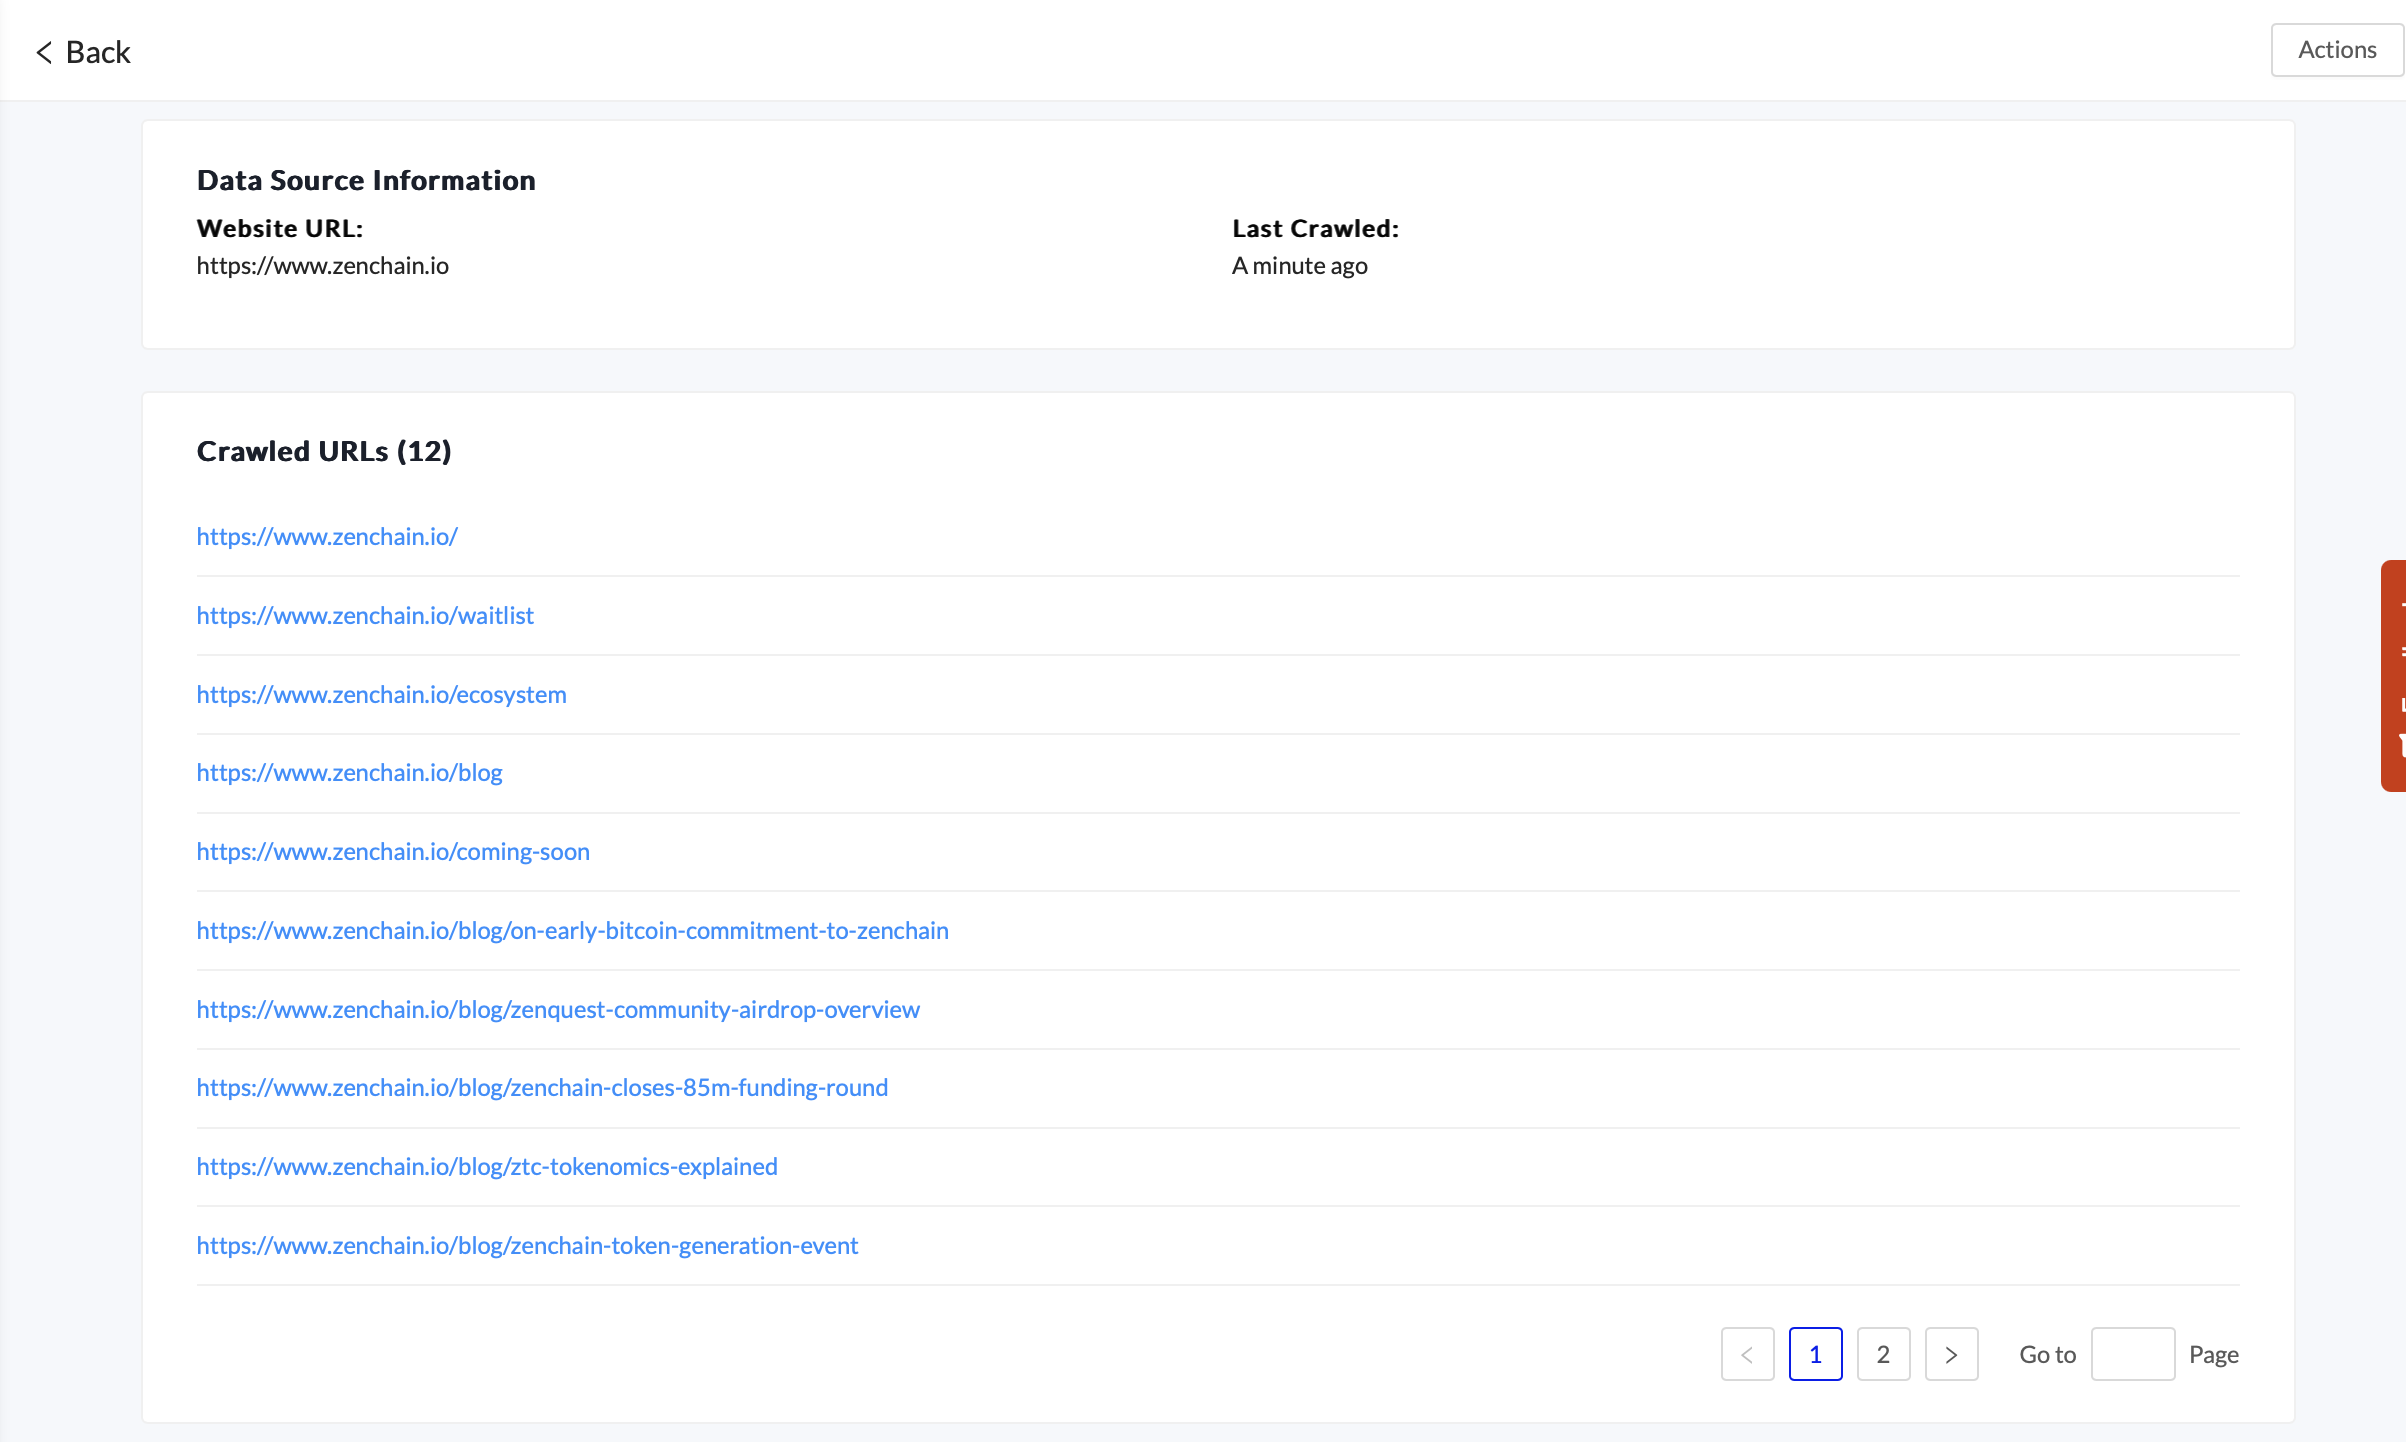
Add any missing pages directly as a new Website Data Source.
GraphQL Agent - Update Domain Capabilities
Domain Capabilities help AI Agent AVA to:
- Know when it should use this Data Source
- Understand what data is available on the Data Source
- Prepare GraphQL queries to read blockchain data
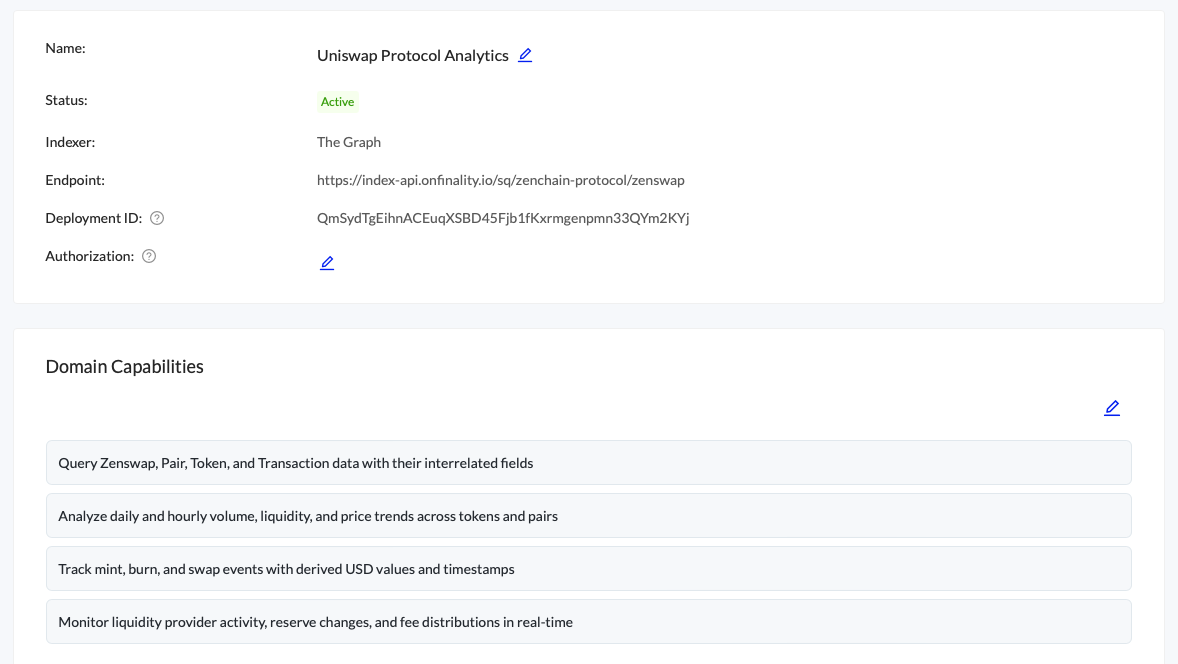
It’s important to review and edit the capabilities to get the most out of your indexed data.
If, after verifying the Domain Capabilities, AI Agent AVA is not answering questions using your Indexed Data consider improving your GraphQL schema and upgrading your AI Agent plan.
File Data Source
The File Data Source can be used to fill in any knowledge gaps that weren’t on your website or documentation.
We suggest keeping a backup of the text file in a platform with version history, such as Github or Google Docs
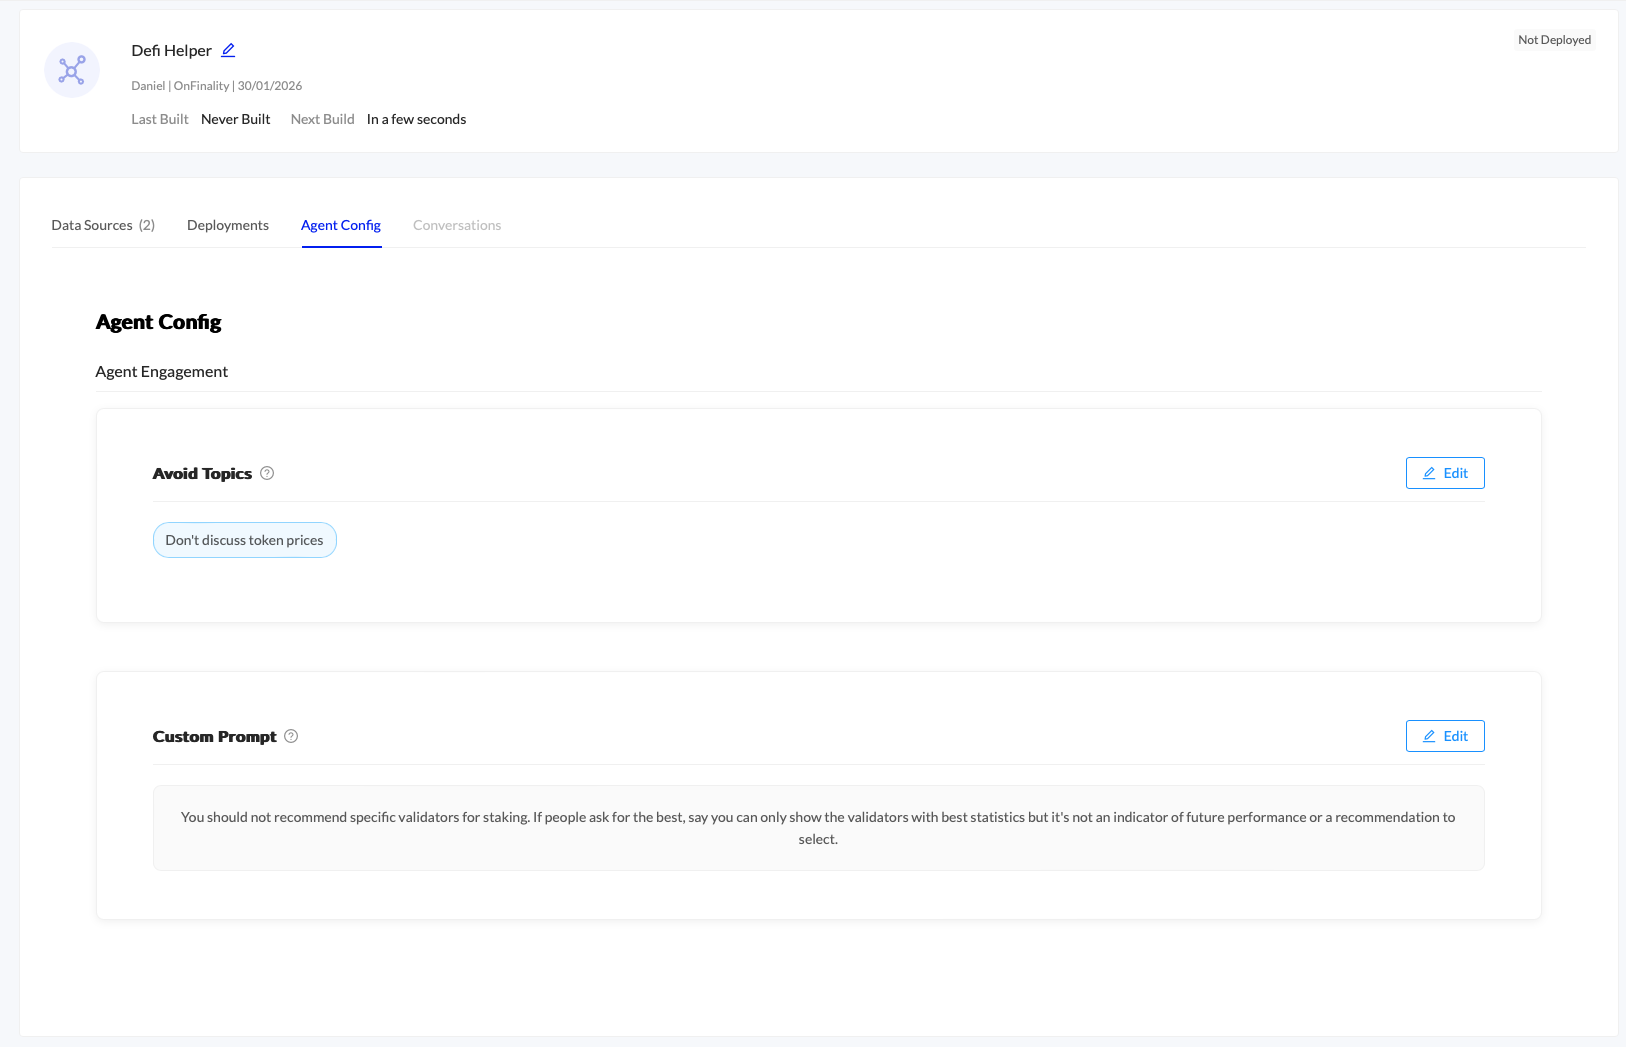
4.2 Agent Engagement Rules
To fine tune how AI Agent AVA engages you can use Avoided Topics and Custom Prompts under the Agent Config tab.
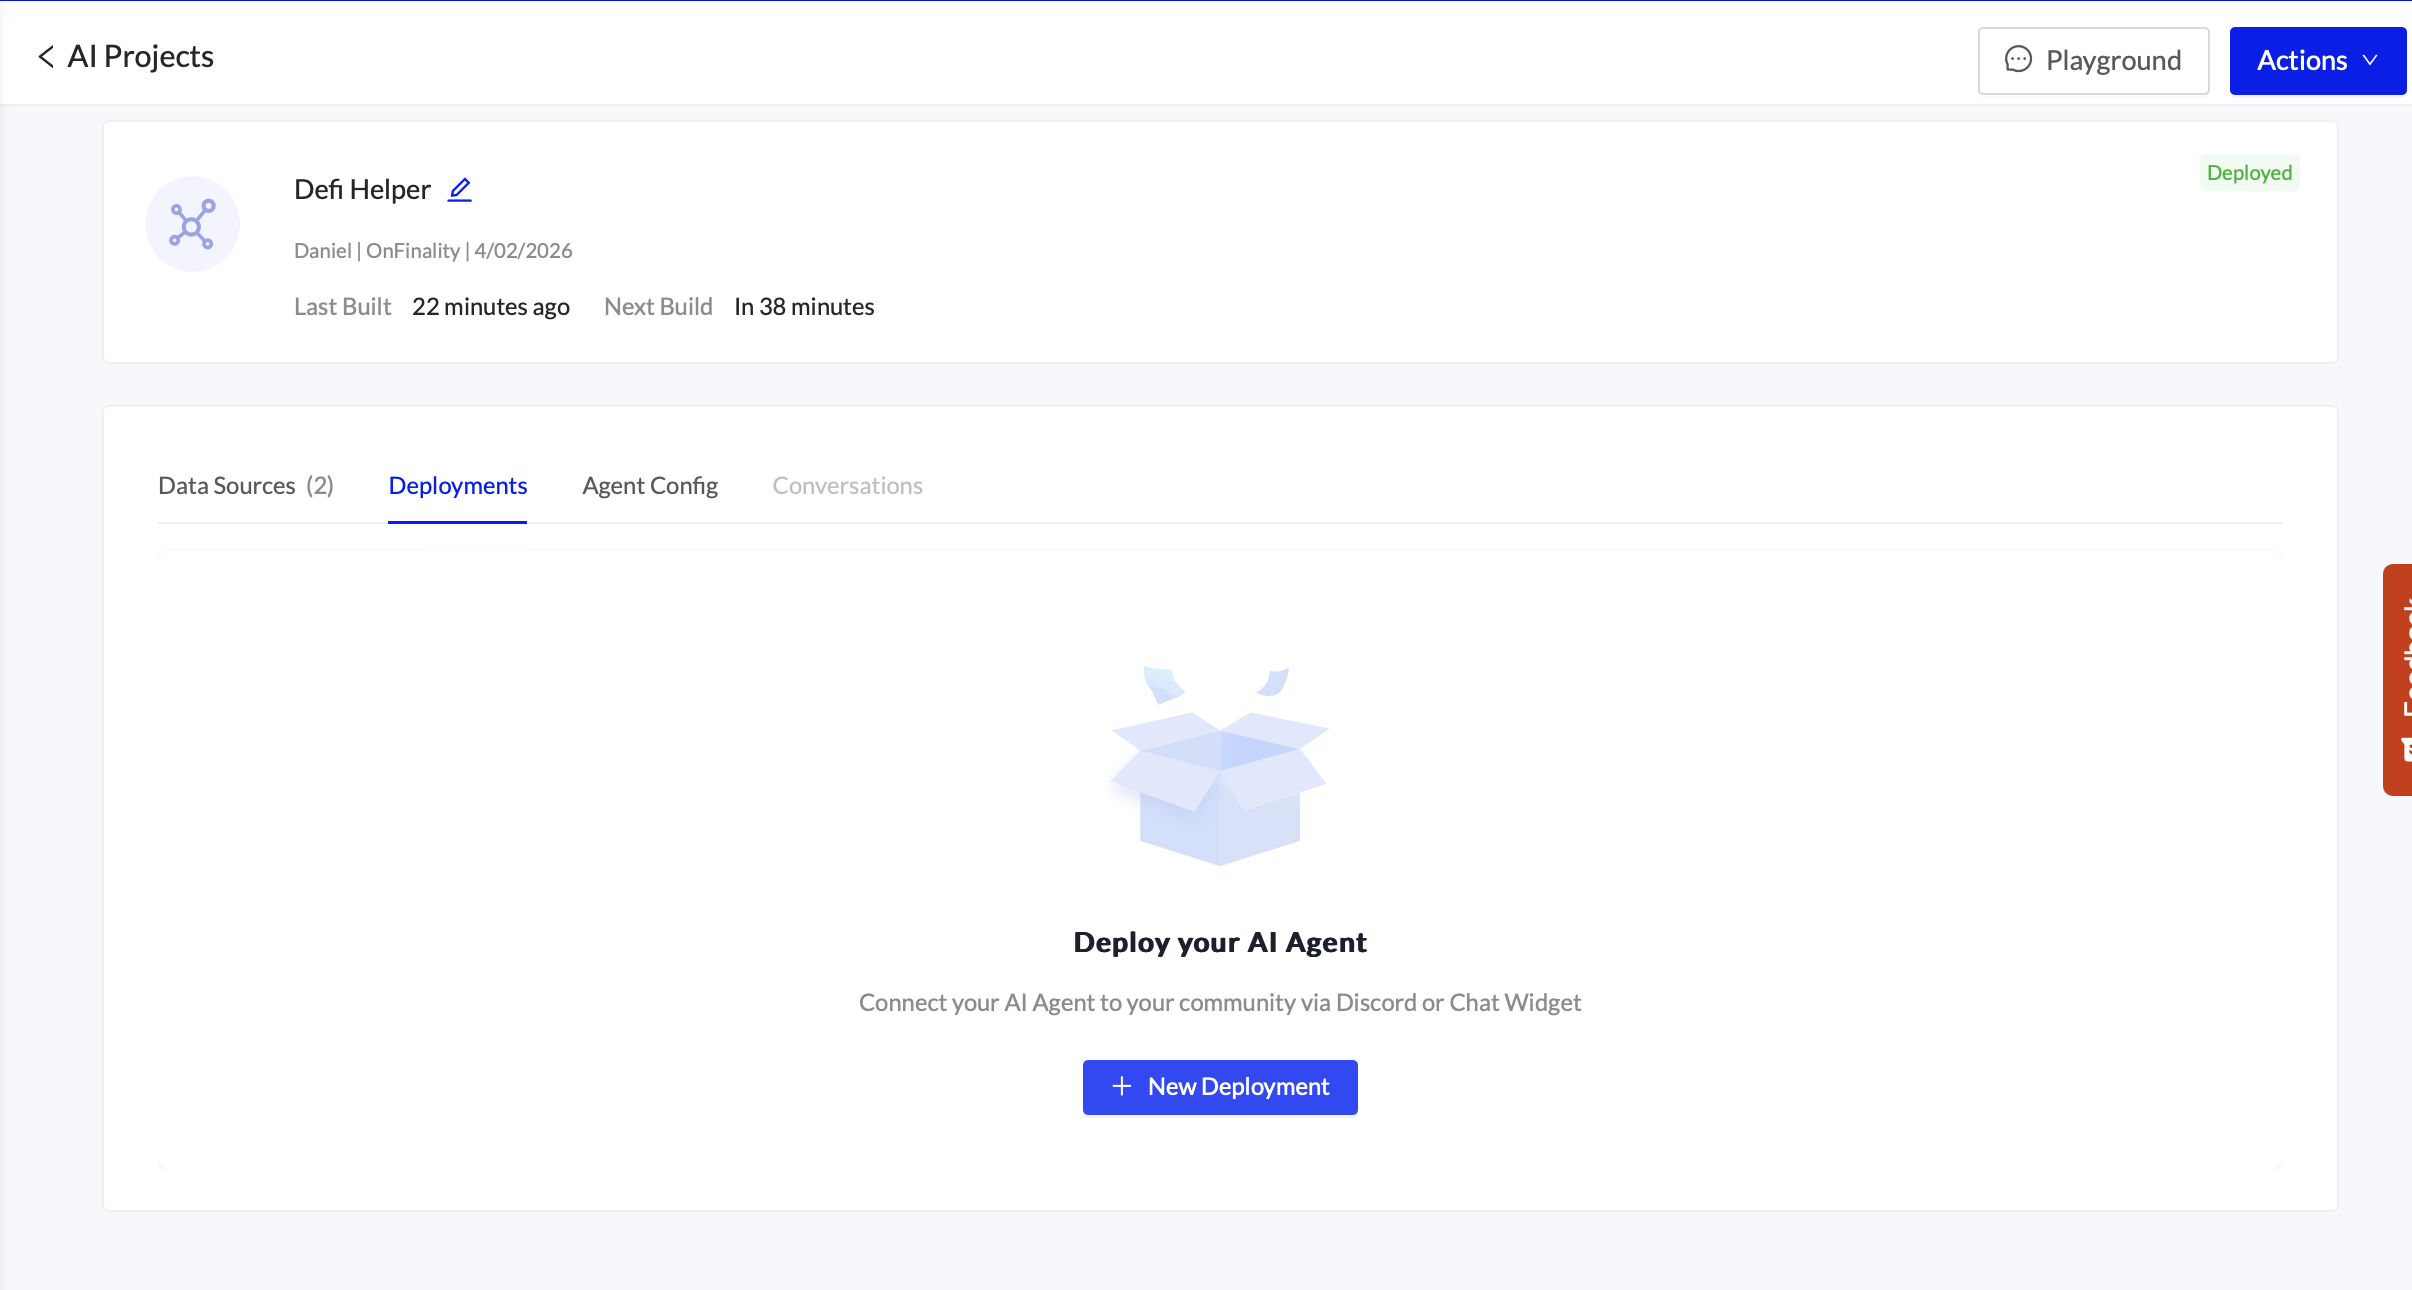
5. Deploy to Your Community
When you’re happy with how AVA is responding you’re ready to deploy to your community.
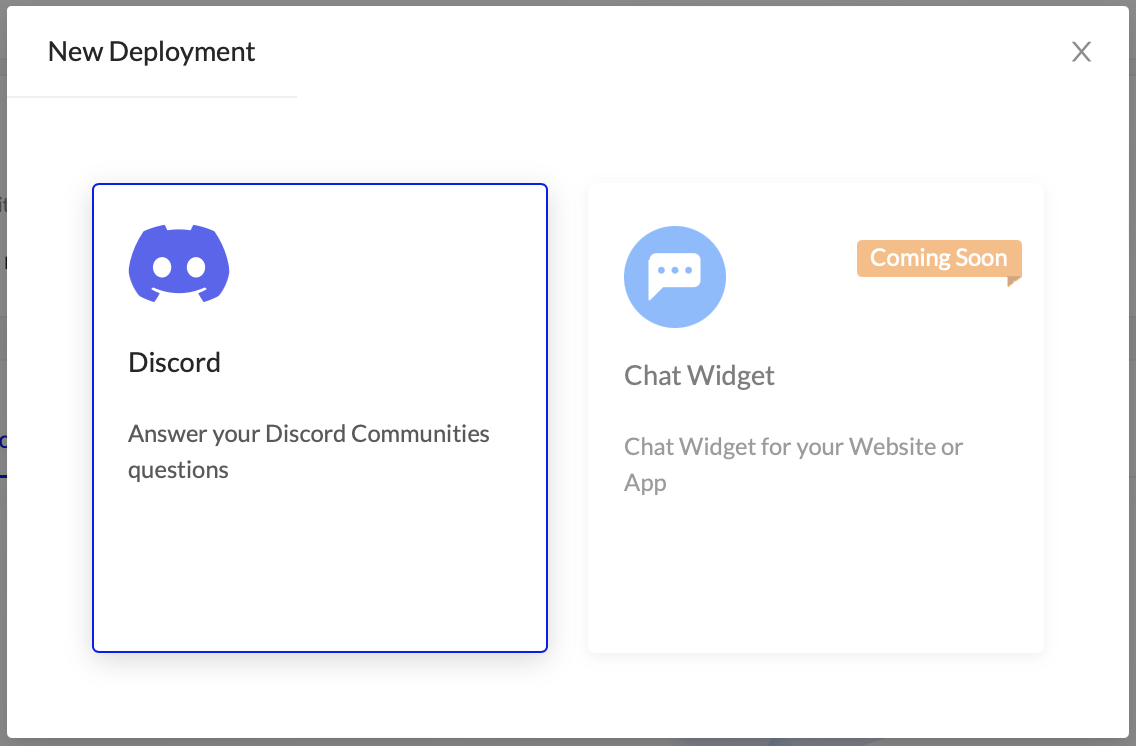
Open the Deployments menu and press New Deployment
Select Discord
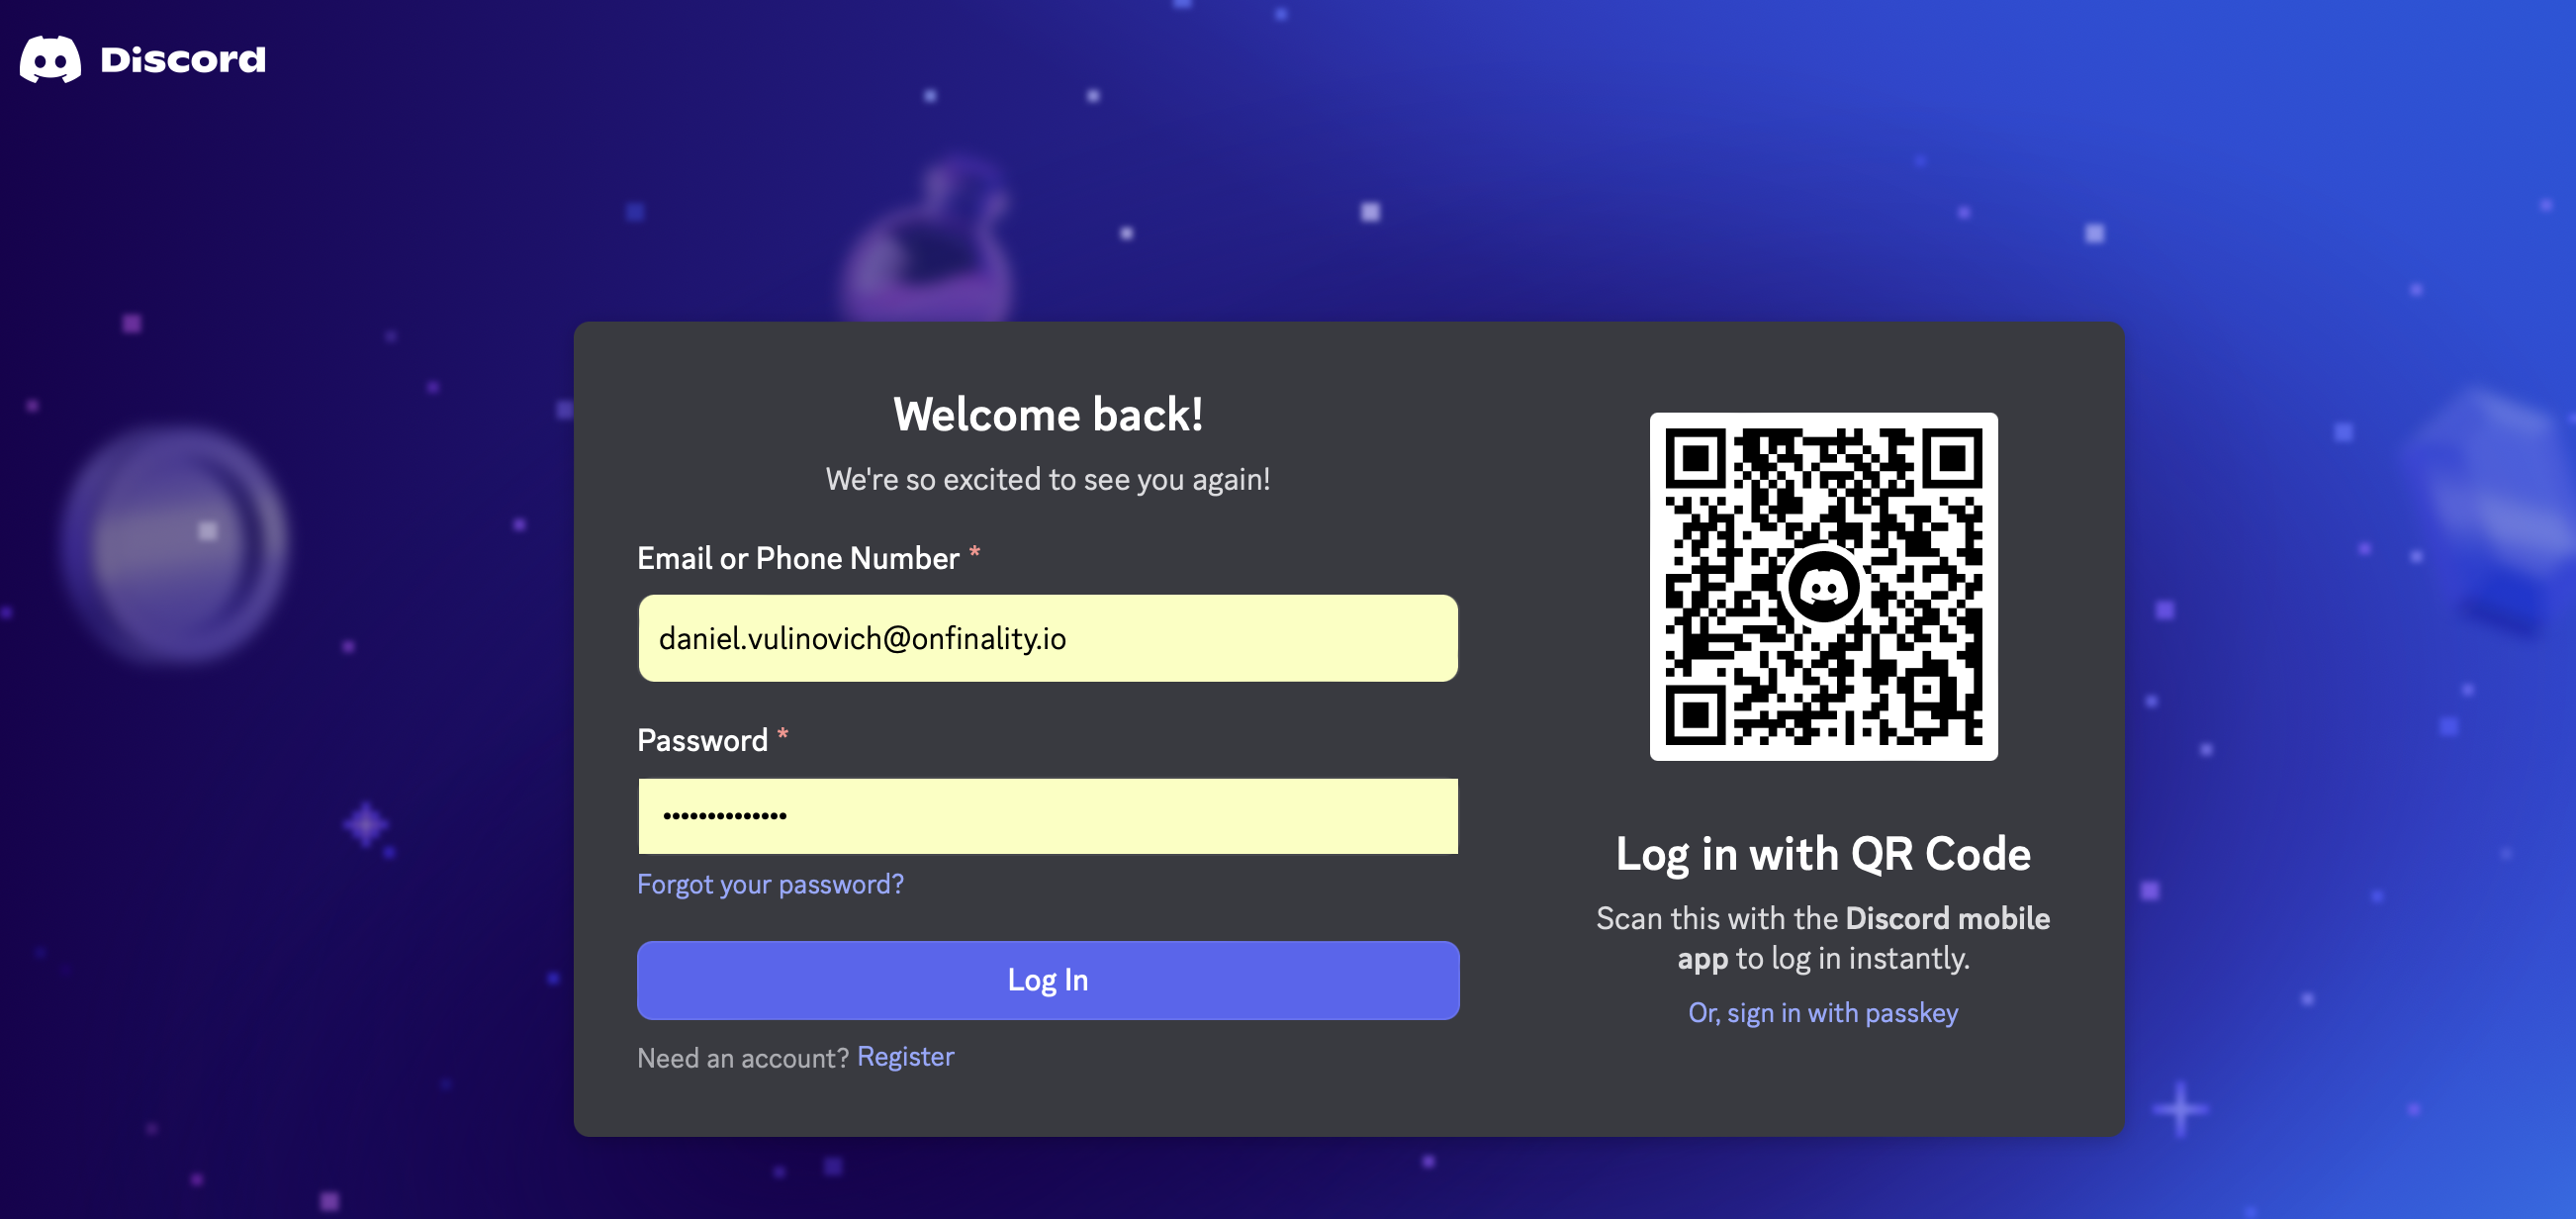
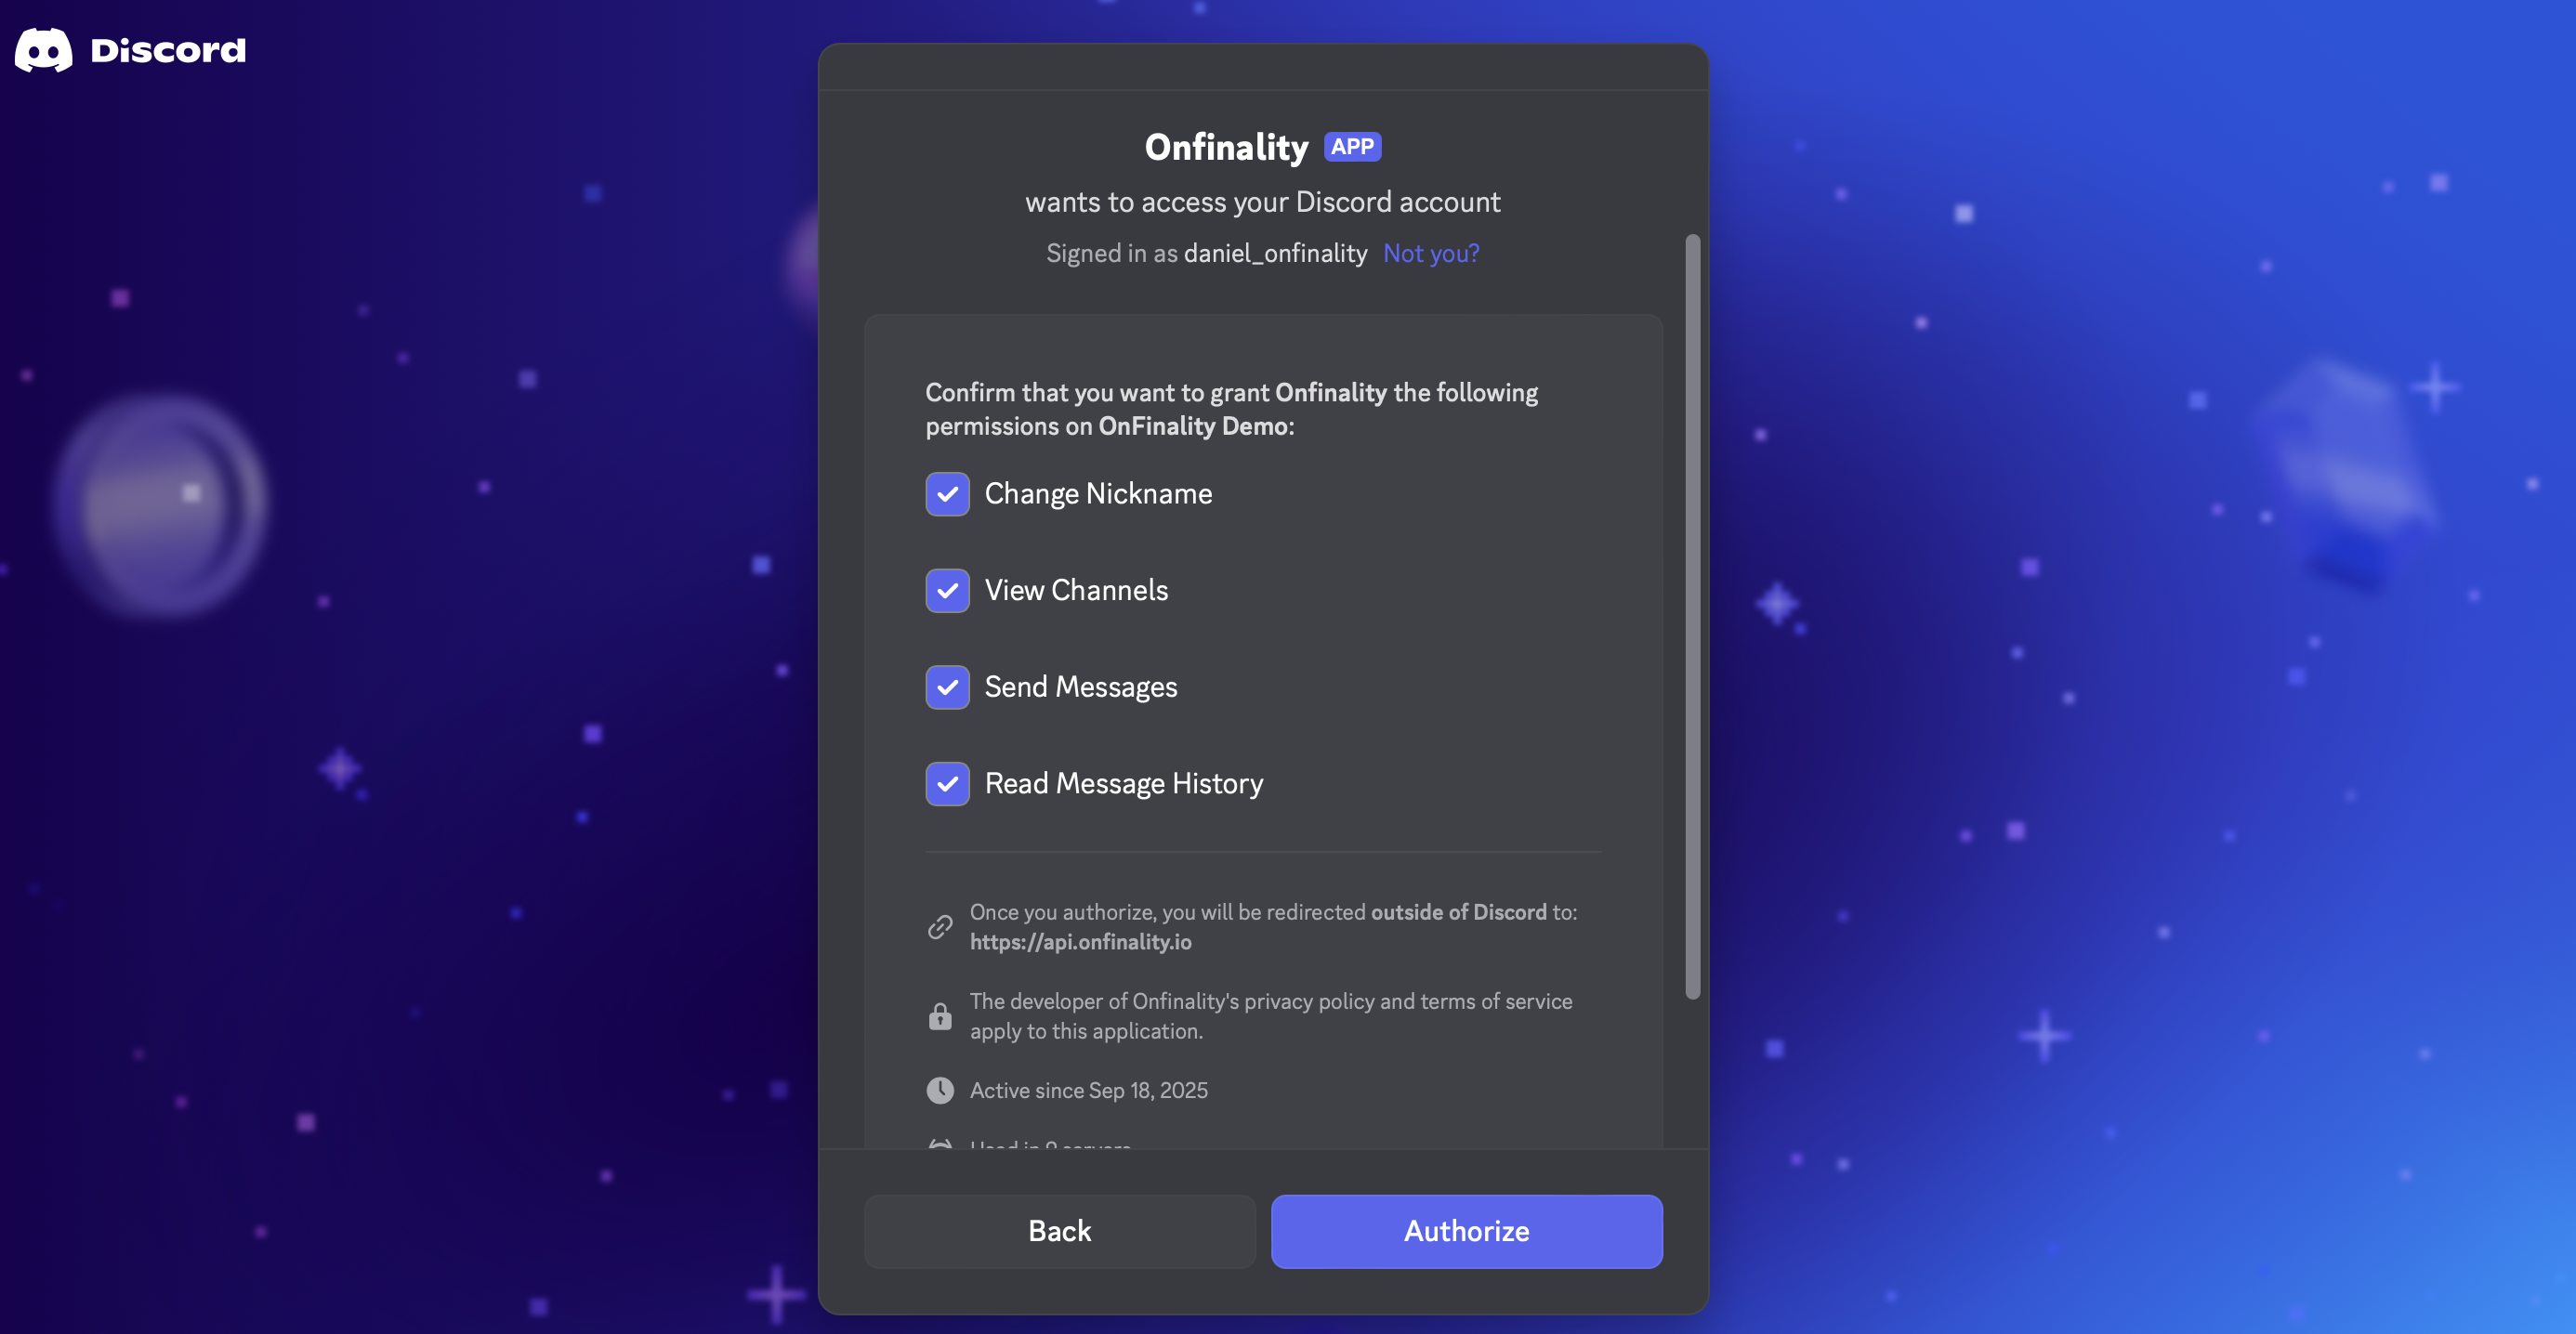
You will be asked to sign in to Discord
Select the channel which you are adding the AI Agent to.
You will be able to change the nickname in future steps
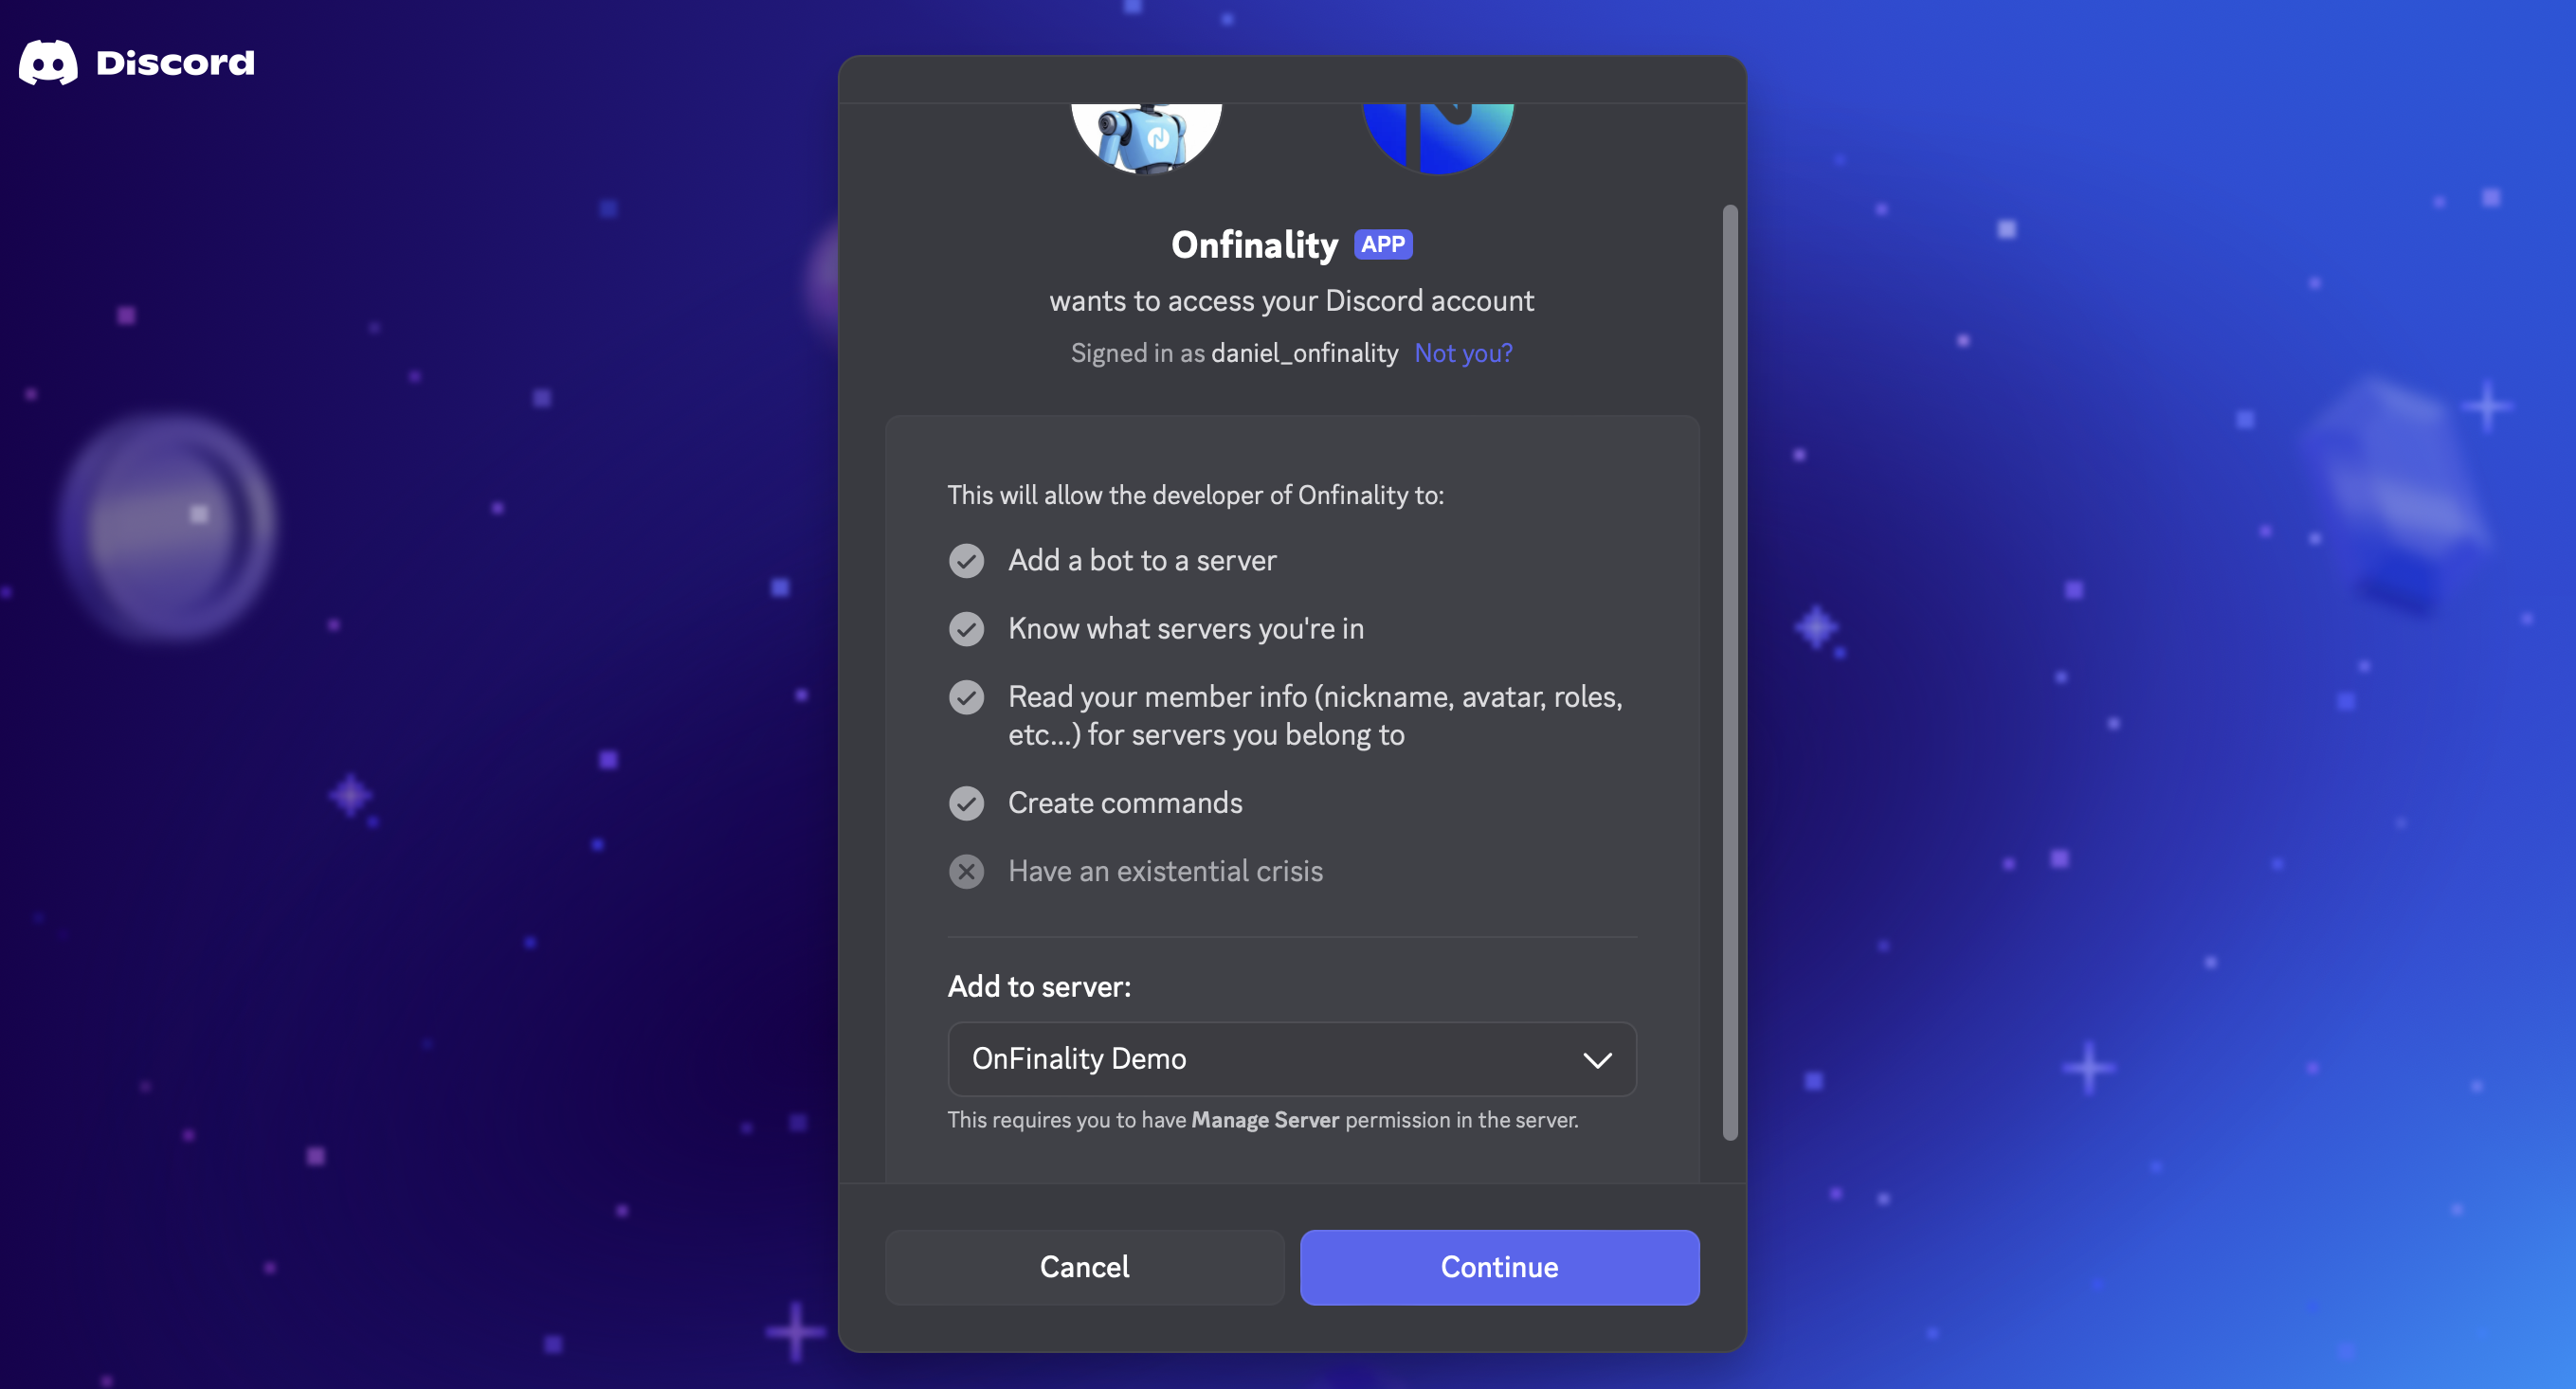
Approve the required permissions
Returning to OnFinality, you will be able to configure:
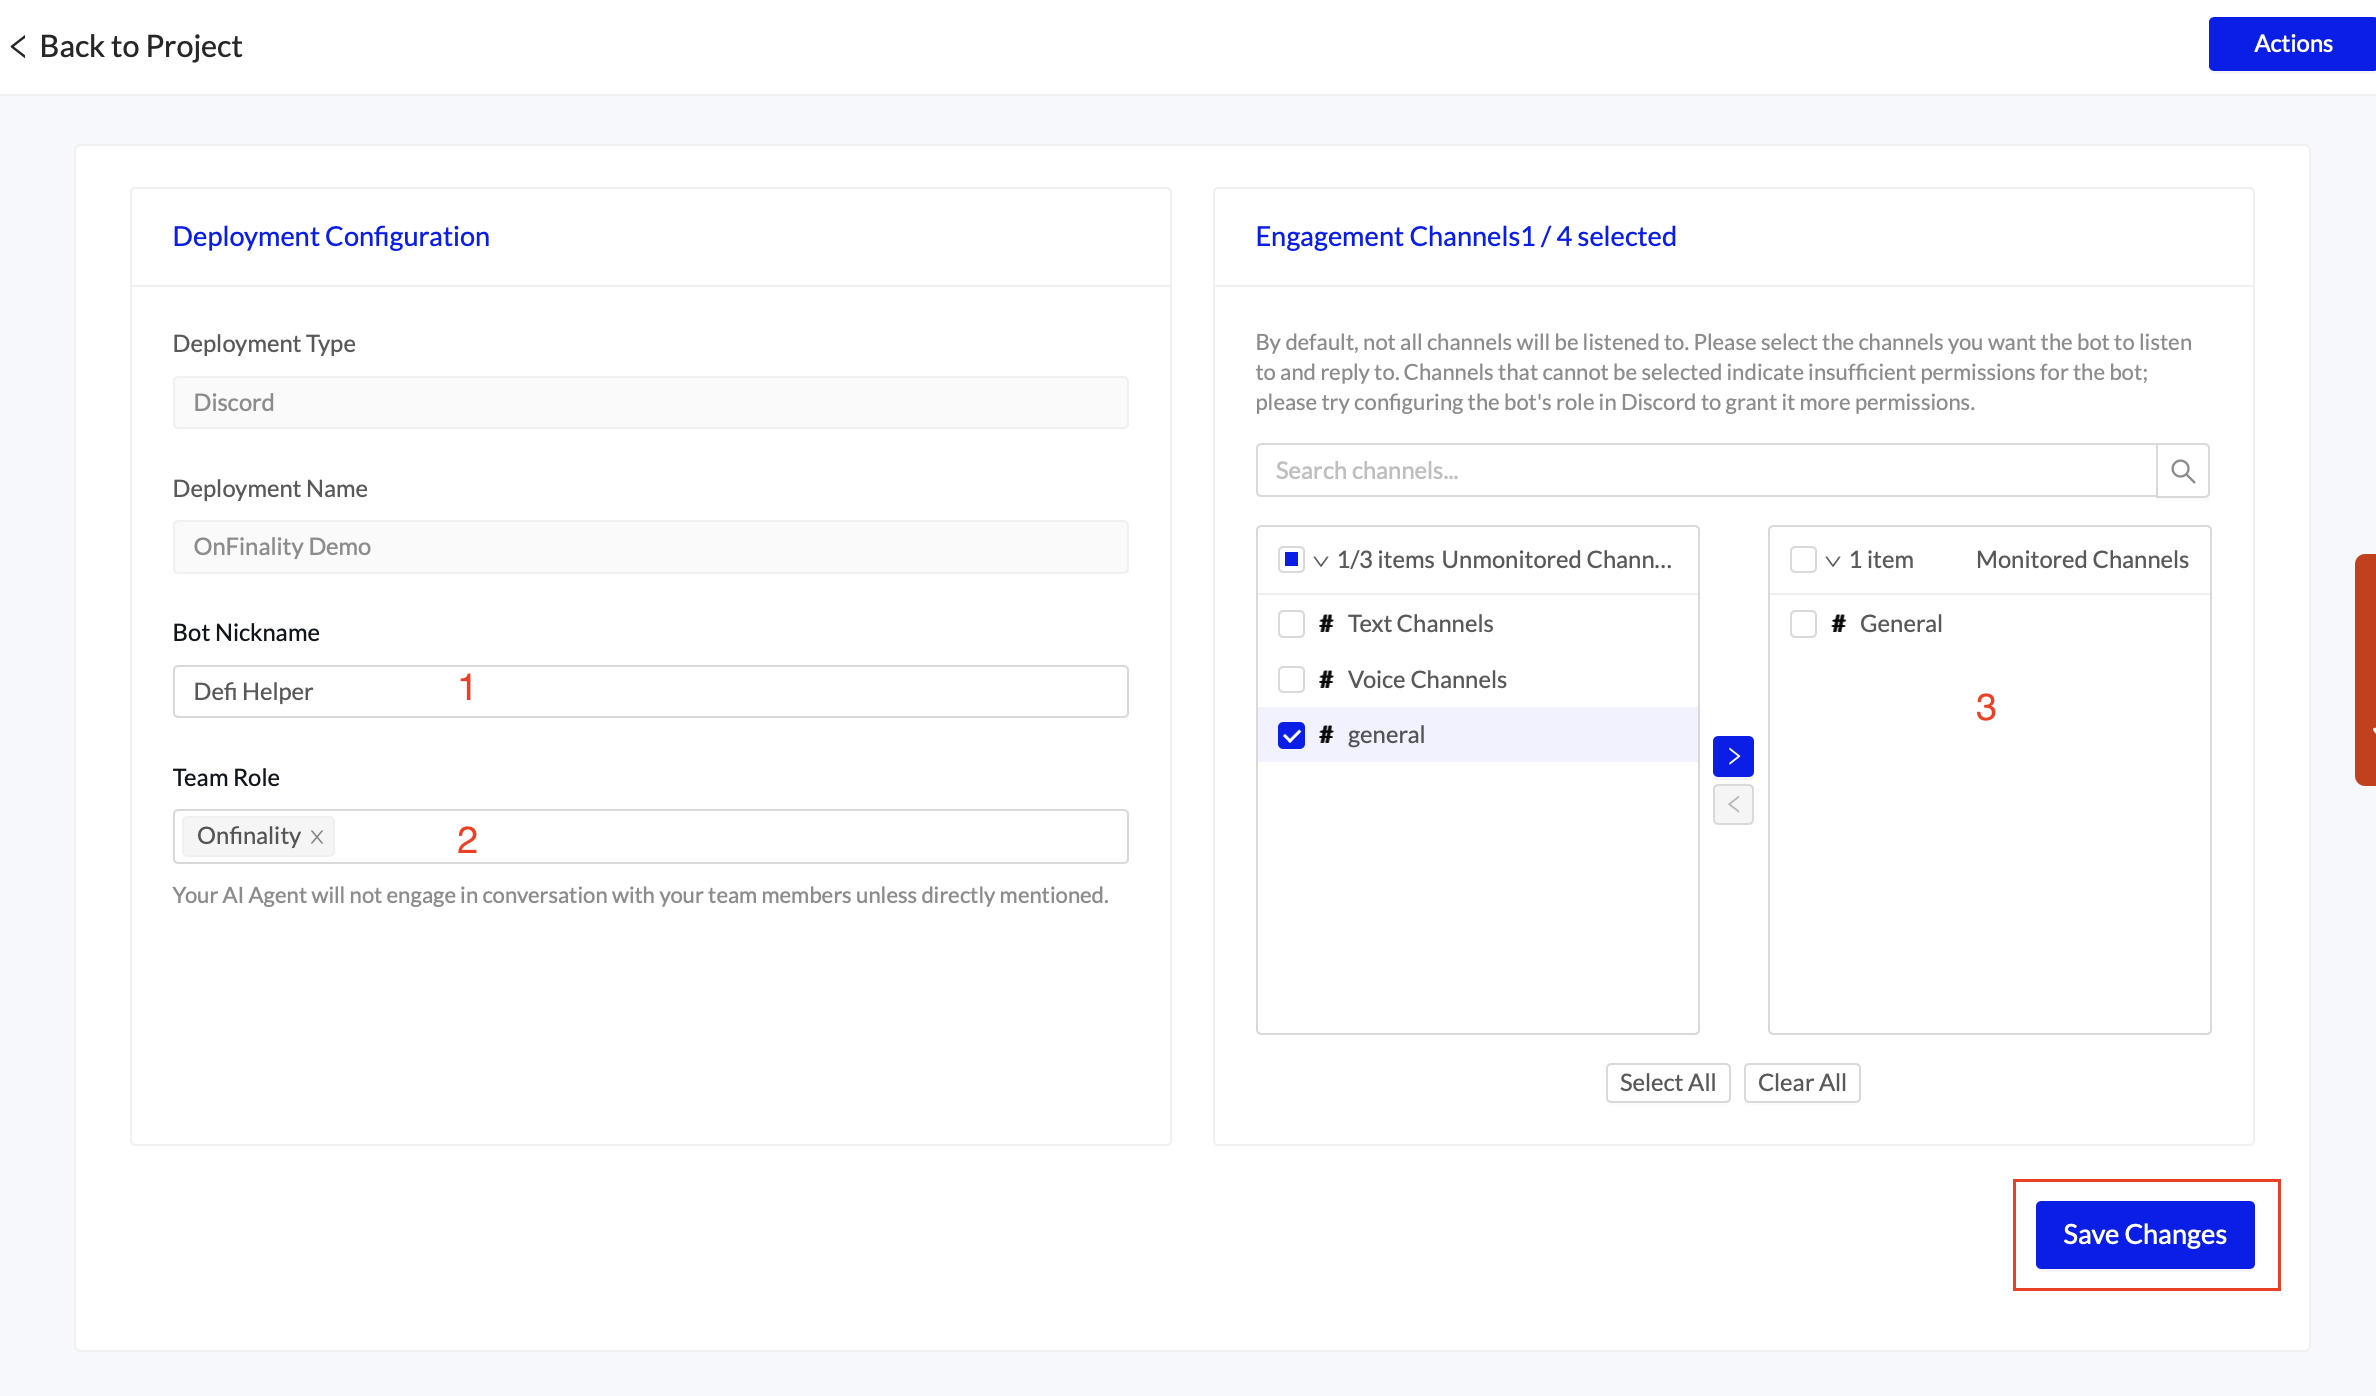
Bot Nickname. The name which your community will see in Discord
Team Role. This is the role of your team members - making sure that AI Agent AVA does not interact with your own team members unless directly requested.
Engagement Channels. By default, AVA will not have access to any channels.
Save the changes
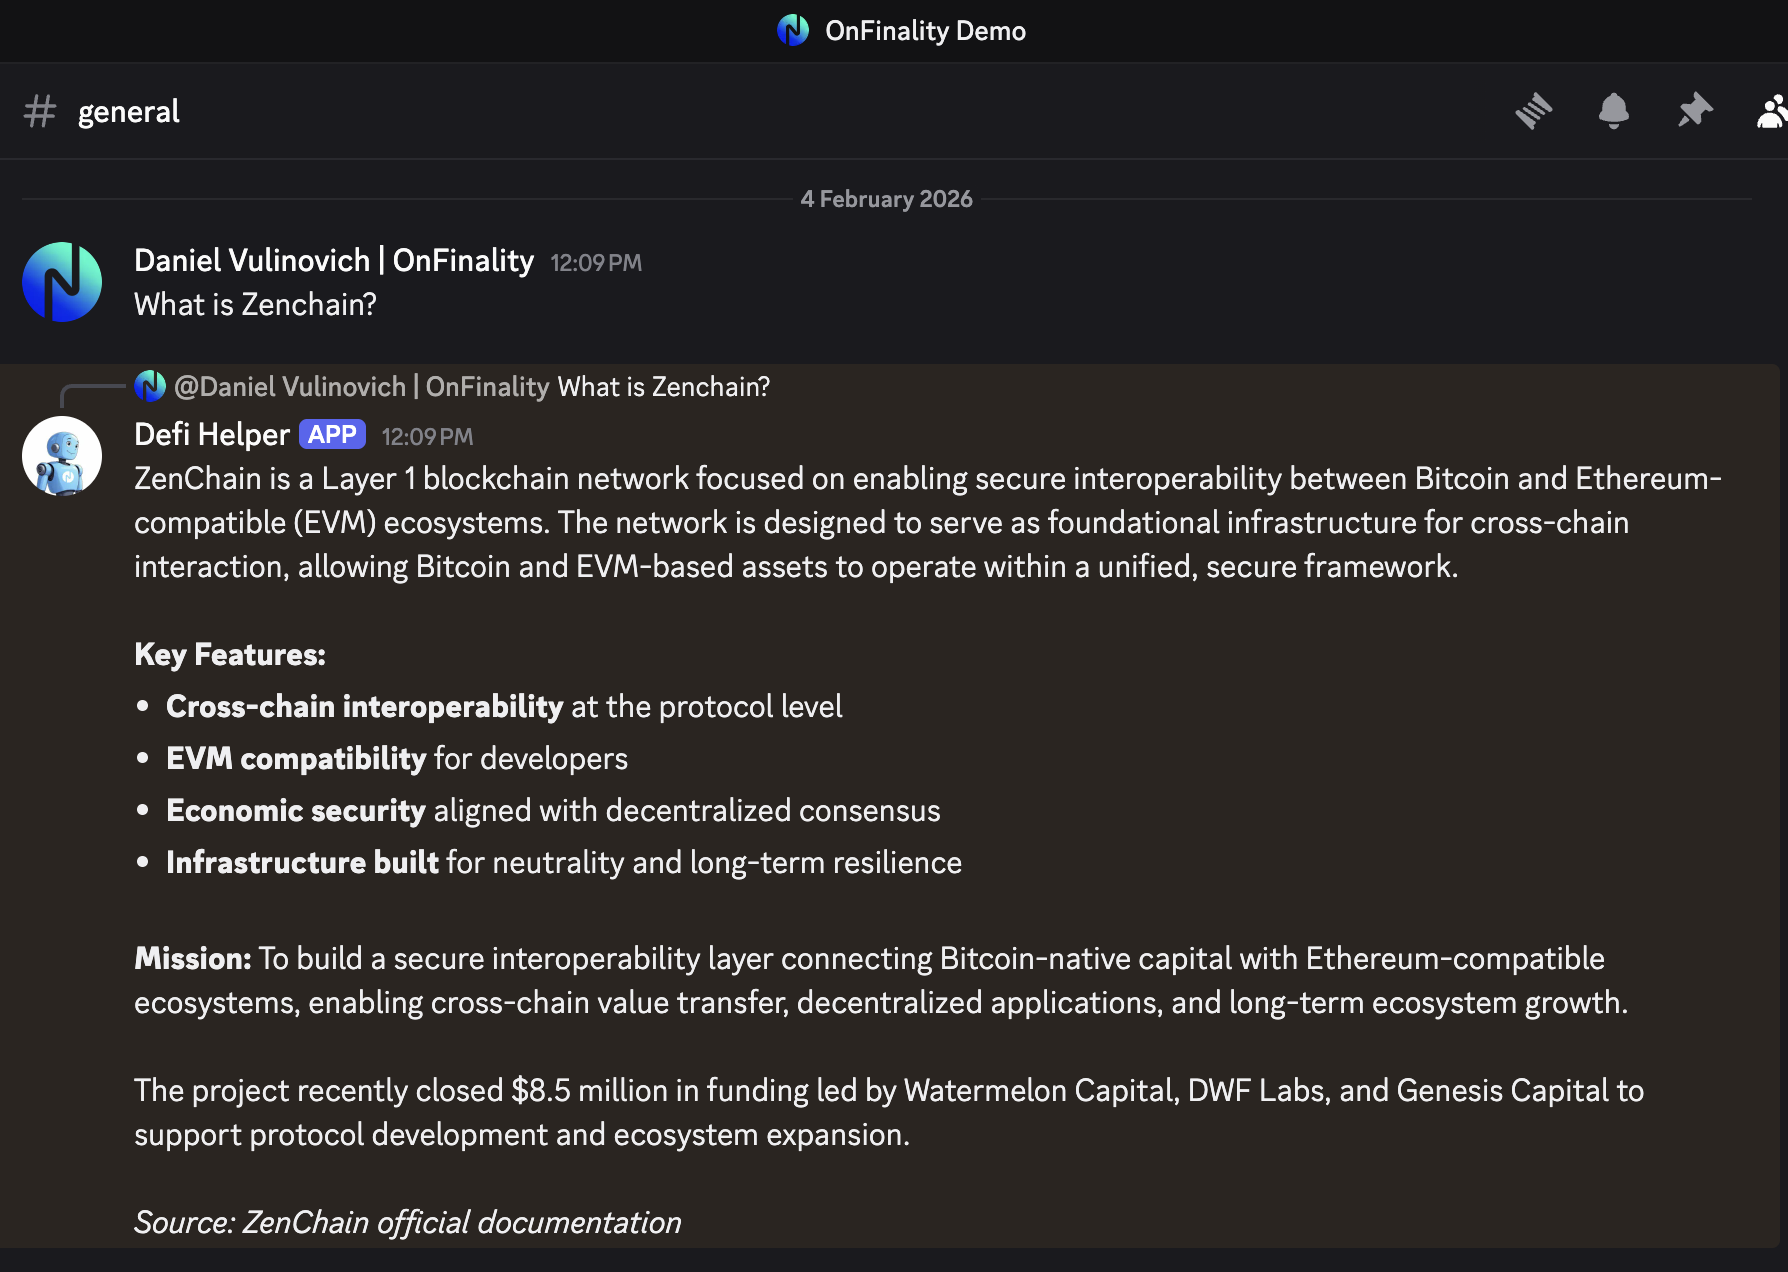
Congratulations!
AI Agent AVA is now active in your discord community!
We suggest reviewing the answers regularly and fine tuning (Step 4)
Contact support@onfinality.io for a free trial or for help